How to finish setting up a target
Last updated: November 3, 2026
Setup gives Astra the details it needs to scan a target: its address, scope and login. Targets waiting for setup appear in Pending Setup on the Targets page.
Complete the setup checklist
For web app targets, the setup page is a single checklist.
- On the Targets page, click Setup on the target's row.
- Work through the checklist:
- Target identity (Required): Target URL, Target Name, Business Name and the environment, Staging or Production.
- Select scan scope: which pages are in scope, starting from the Starting URI.
- Run authenticated scans (Recommended): add a login so that Astra can test pages behind it.
- Increase coverage: API specification files, extra hosts, custom headers and details about the application.
- When to scan: scan once now, or schedule recurring scans.
- Click Activate Target.
The Setup progress panel on the right shows what's done. After activation, the target moves to Active Targets and can be scanned.
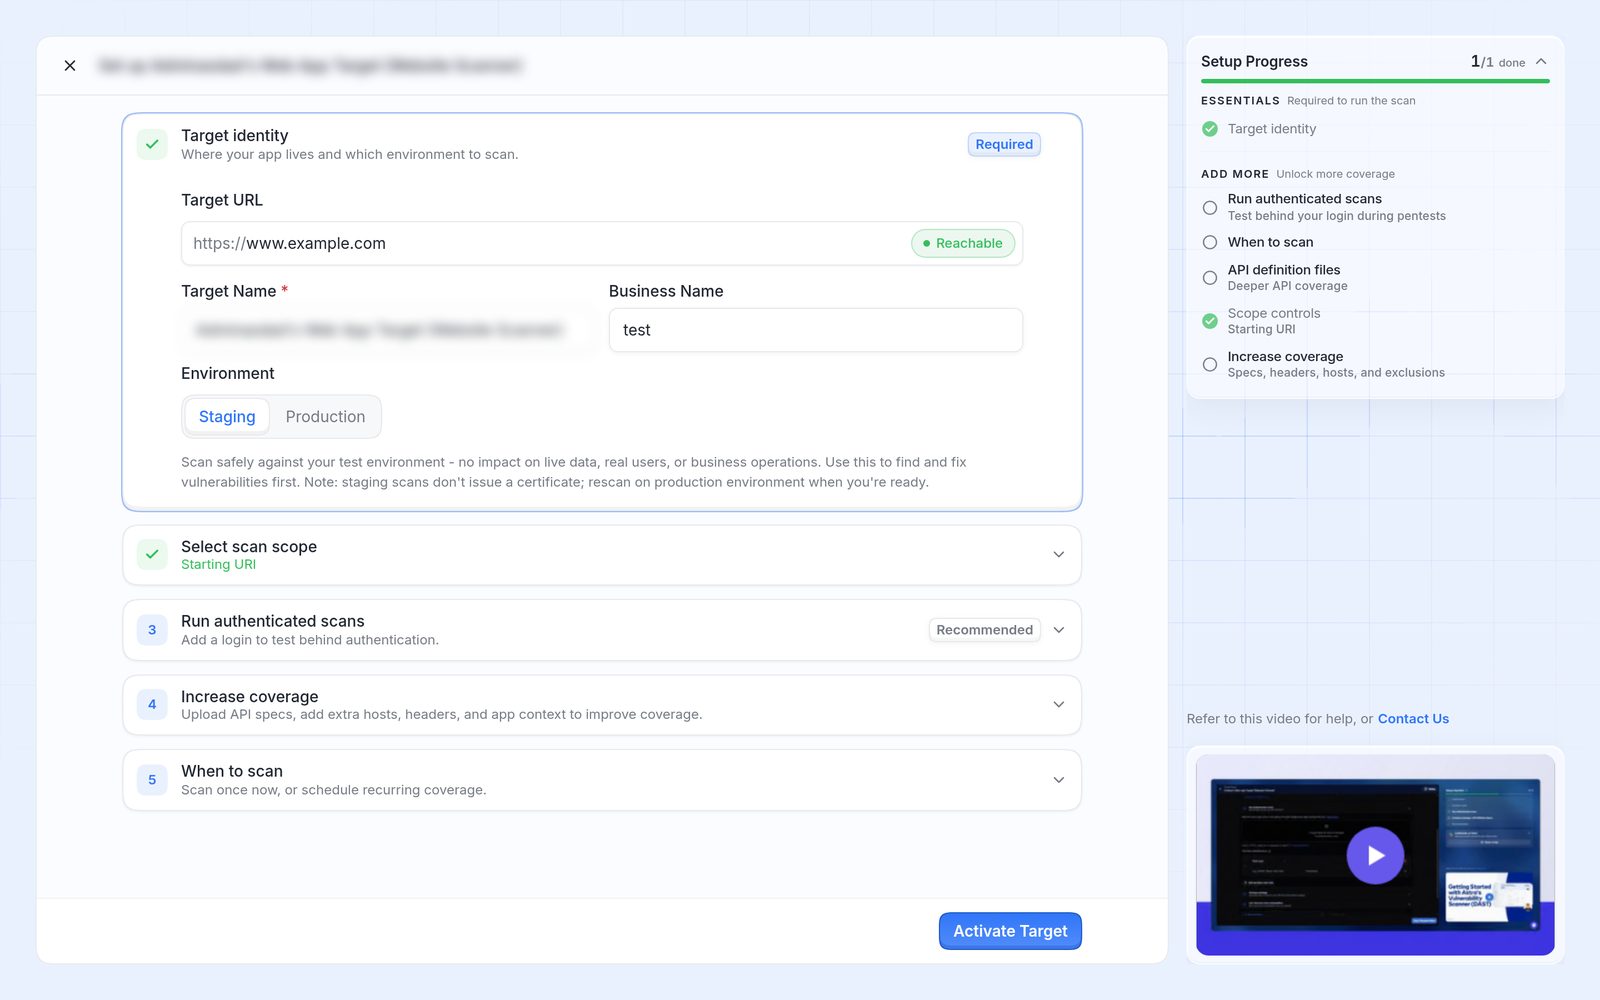
The setup page for a web app target, with Target identity open and the Setup progress panel on the right.
Important
Check the Target URL carefully before saving it. Once it's saved, it can't be edited. Read more in How to change a target's URL or replace a target.
Note
Scans of a staging environment don't issue a certificate. Scan the production environment when a certificate is needed.
Next steps
- Start the first scan. Read more in How to start an automated scan.
- If setup shows the target as Unreachable, let Astra's scanner through the firewall. Read more in How to make sure Astra's scanner can reach your application.