How to make sure Astra's scanner can reach your application
Last updated: November 3, 2026
Astra's automated scanner connects to the application over the internet, so firewalls, web application firewalls (WAFs), bot protection, IP restrictions and password prompts can block it. This article explains how to spot a blocked target and how to let the scanner in.
Signs that the scanner can't reach a target
Astra shows a connection problem in three places.
- During setup: the Target URL shows Unreachable, with the reason in its tooltip. Automated scans won't run until the target is reachable. A pentest can still go ahead.
- When starting a scan: the target is skipped with "Target is unreachable, ensure Astra's scanner IPs are whitelisted."
- On a scan: the scan stops at the first step, its Progress card shows Connectivity Check Failure with See Details, and the scan is marked Failed.
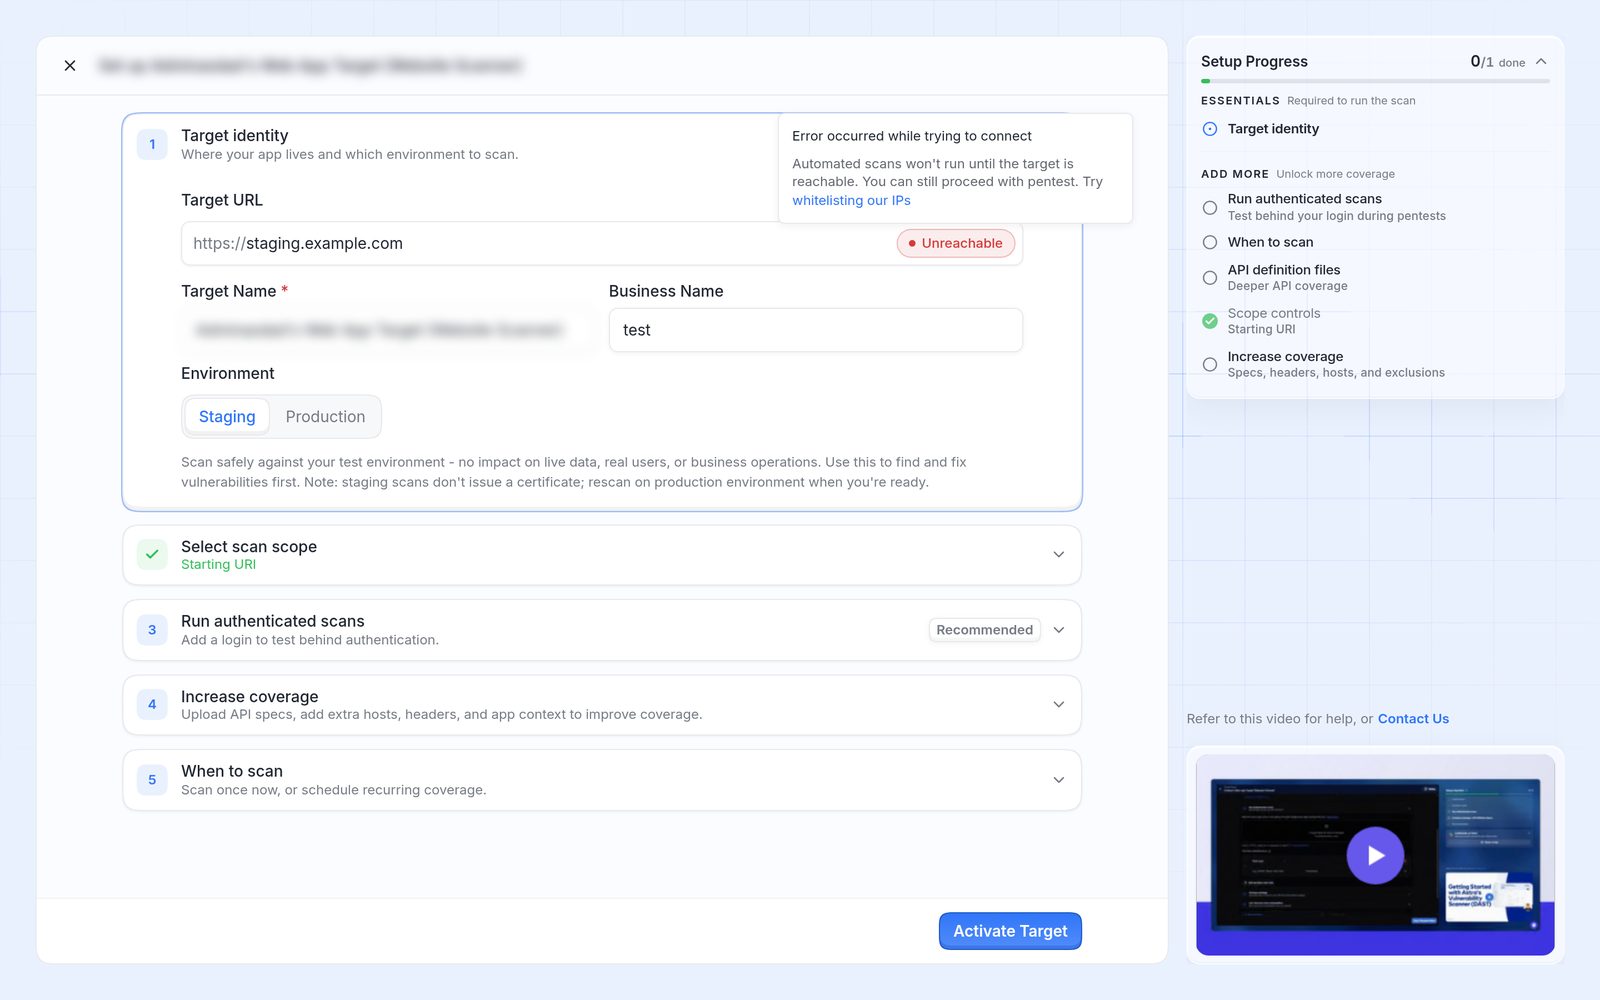
The setup page with an unreachable Target URL and the reason in the tooltip.
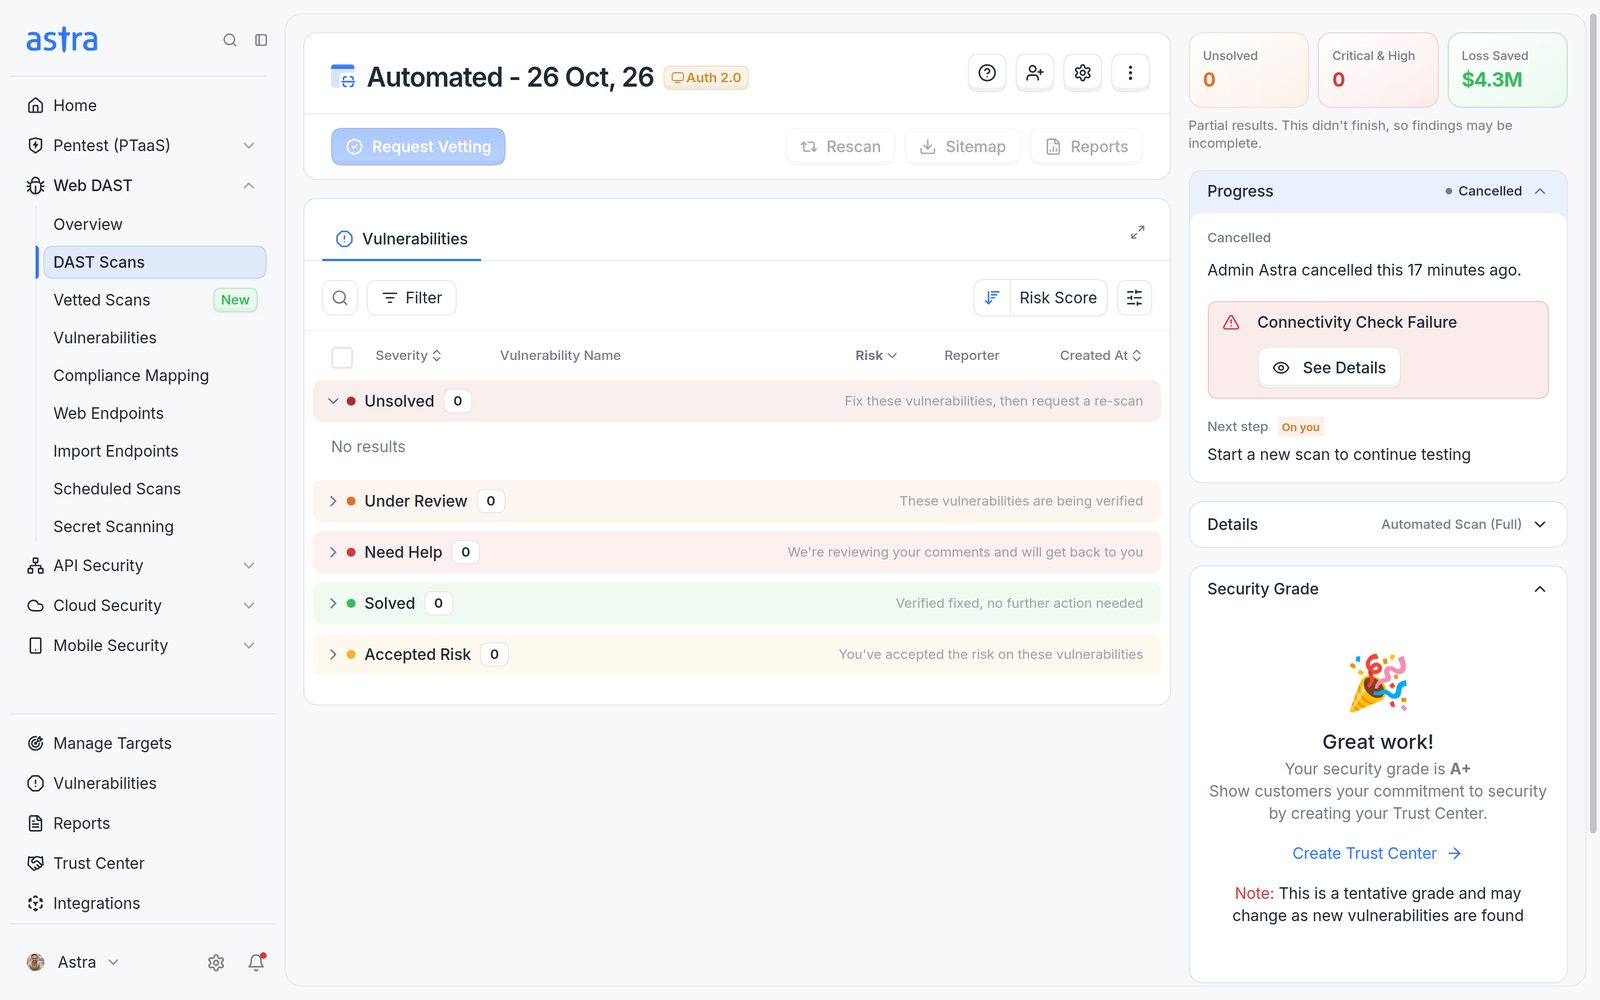
A scan's Progress card showing Connectivity Check Failure, with See Details.
Let the scanner reach the target
Work through these steps in order.
Step 1: Allow Astra's scanner IP addresses. All automated scan traffic comes from a fixed set of IP addresses. Add every address to the allowlist in each layer that can block traffic: the firewall, the WAF or CDN (such as Cloudflare, AWS CloudFront or Imperva), bot protection, and any login, CAPTCHA or MFA protection.
Current Astra scanner IP addresses:
168.144.85.193 168.144.87.223 34.69.226.239 35.193.102.27 12.202.180.108 34.136.217.65 35.222.104.14 104.154.201.208 34.27.197.32 34.135.0.247 153.54.104.217 34.70.219.138 104.154.186.213 34.69.130.106 34.135.25.35 34.66.6.242 34.41.10.119
The current list is also linked from the setup page: Increase coverage → Show advanced settings → IP whitelist → View IP ranges.
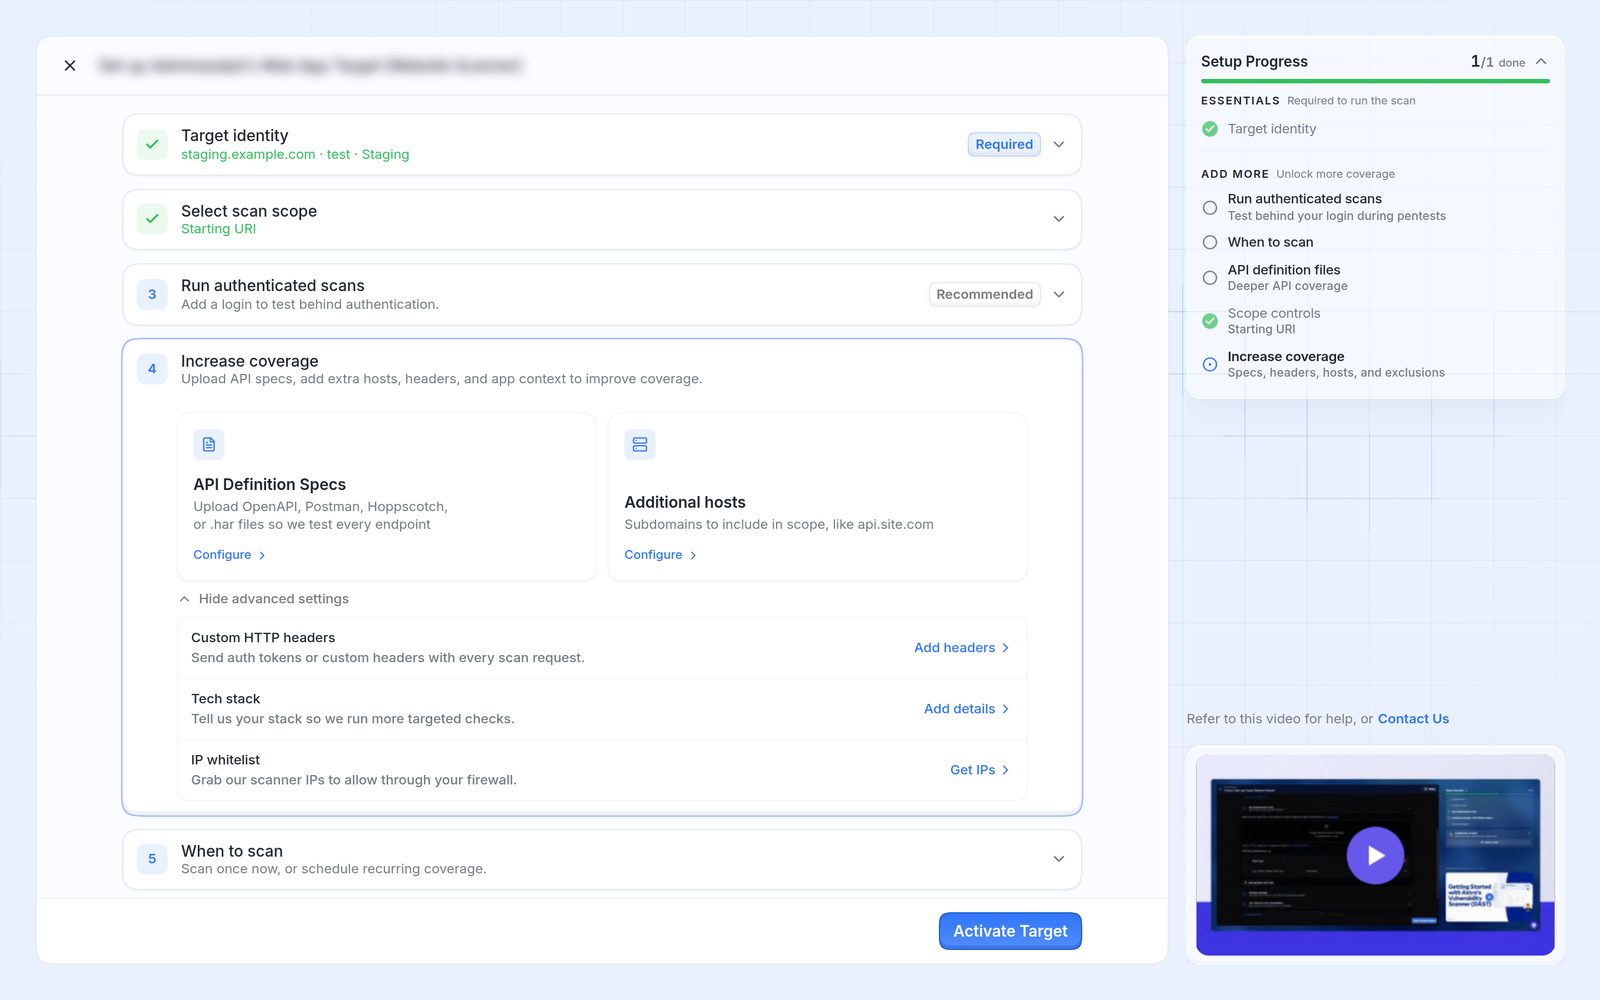
Increase coverage on the setup page, with advanced settings open.
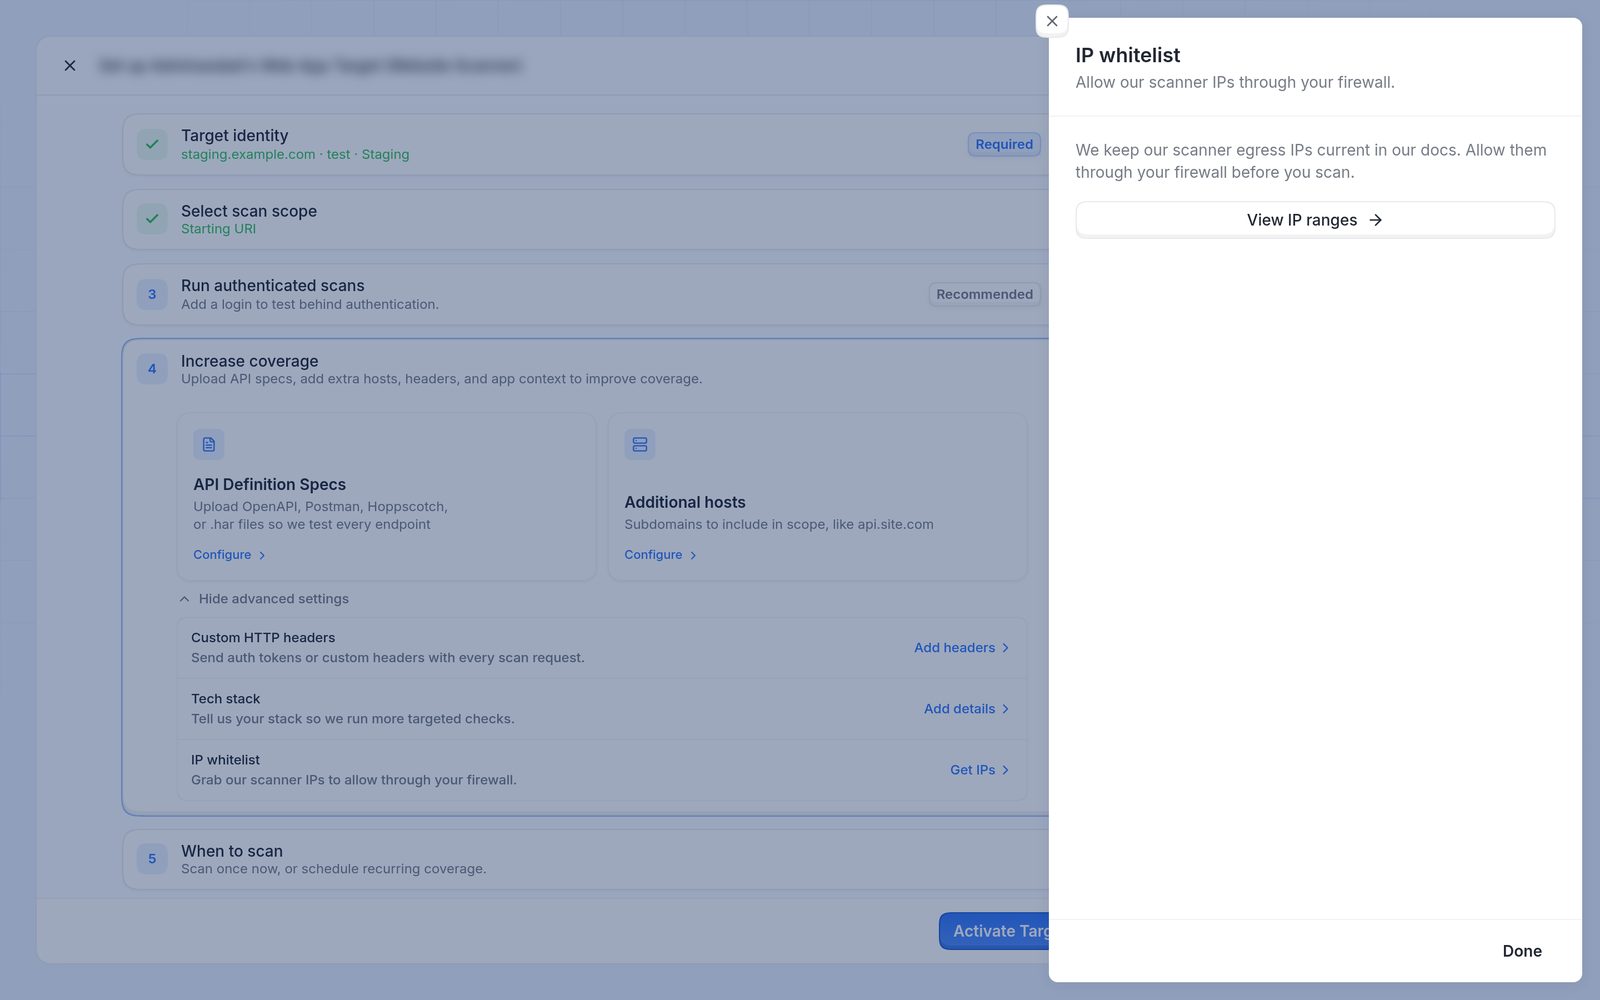
The IP whitelist panel on the setup page, with View IP ranges.
Important
Allowlist every address. Scans can come from any of them, so a partial list can cause some scans to fail.
Provider tips:
- Cloudflare: allow the IPs in a WAF custom rule or an IP Access rule, so that Bot Fight Mode doesn't challenge the scanner.
- Vercel: add the IPs as System Bypass Rules in the Vercel firewall.
- CAPTCHA and bot detection (such as Google reCAPTCHA or Auth0 Bot Detection): exempt the IPs so that the scanner isn't shown a challenge.
Step 2: Let the scanner past restricted access. Sites that only allow certain visitors, such as a staging site, need one of these options.
- IP restriction: allowlist the IPs above.
- HTTP Basic Authentication (the browser's username and password prompt): include the credentials in the Target URL, in the form
https://username:password@staging.example.com. - A secret header: have the scanner send a custom HTTP header with every request, and allow requests that carry it on the server or WAF.
To add a header to an existing target, open the target's settings, go to Target Setup → Advance Settings, and under What HTTP Headers should we send with the scanner requests? click Add HTTP Header, then Save Changes. During setup, use Custom HTTP headers → Add header → Save & add to setup. The header is sent from the next scan onwards.
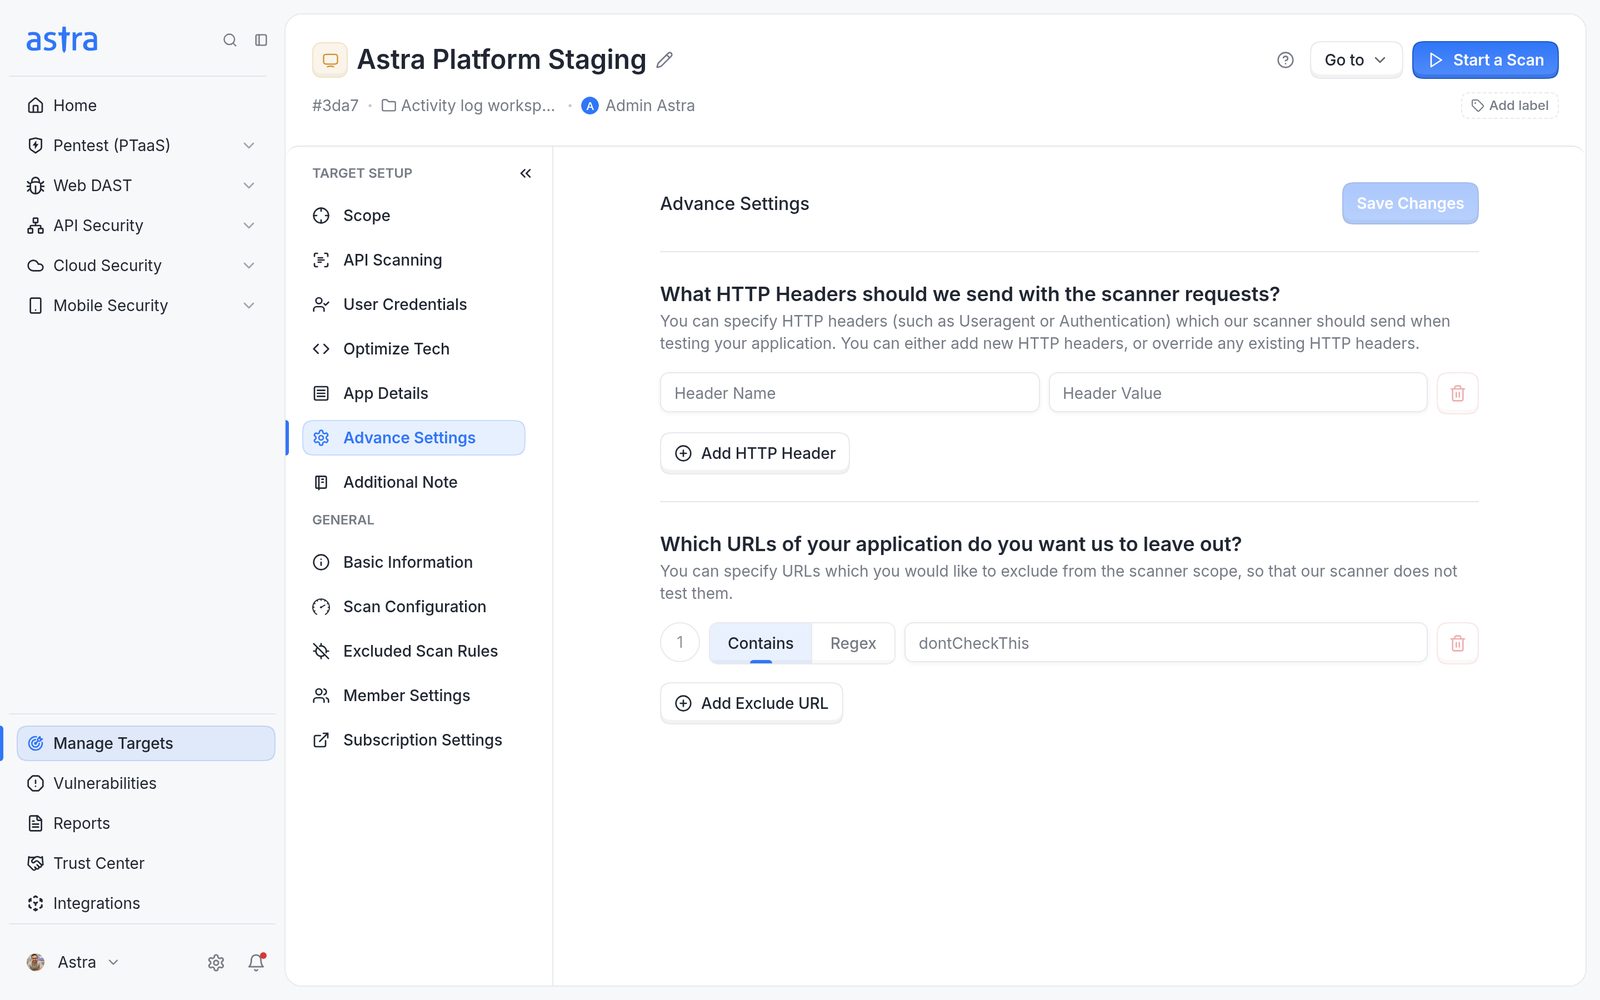
Target settings, Advance Settings, with the HTTP headers the scanner sends.
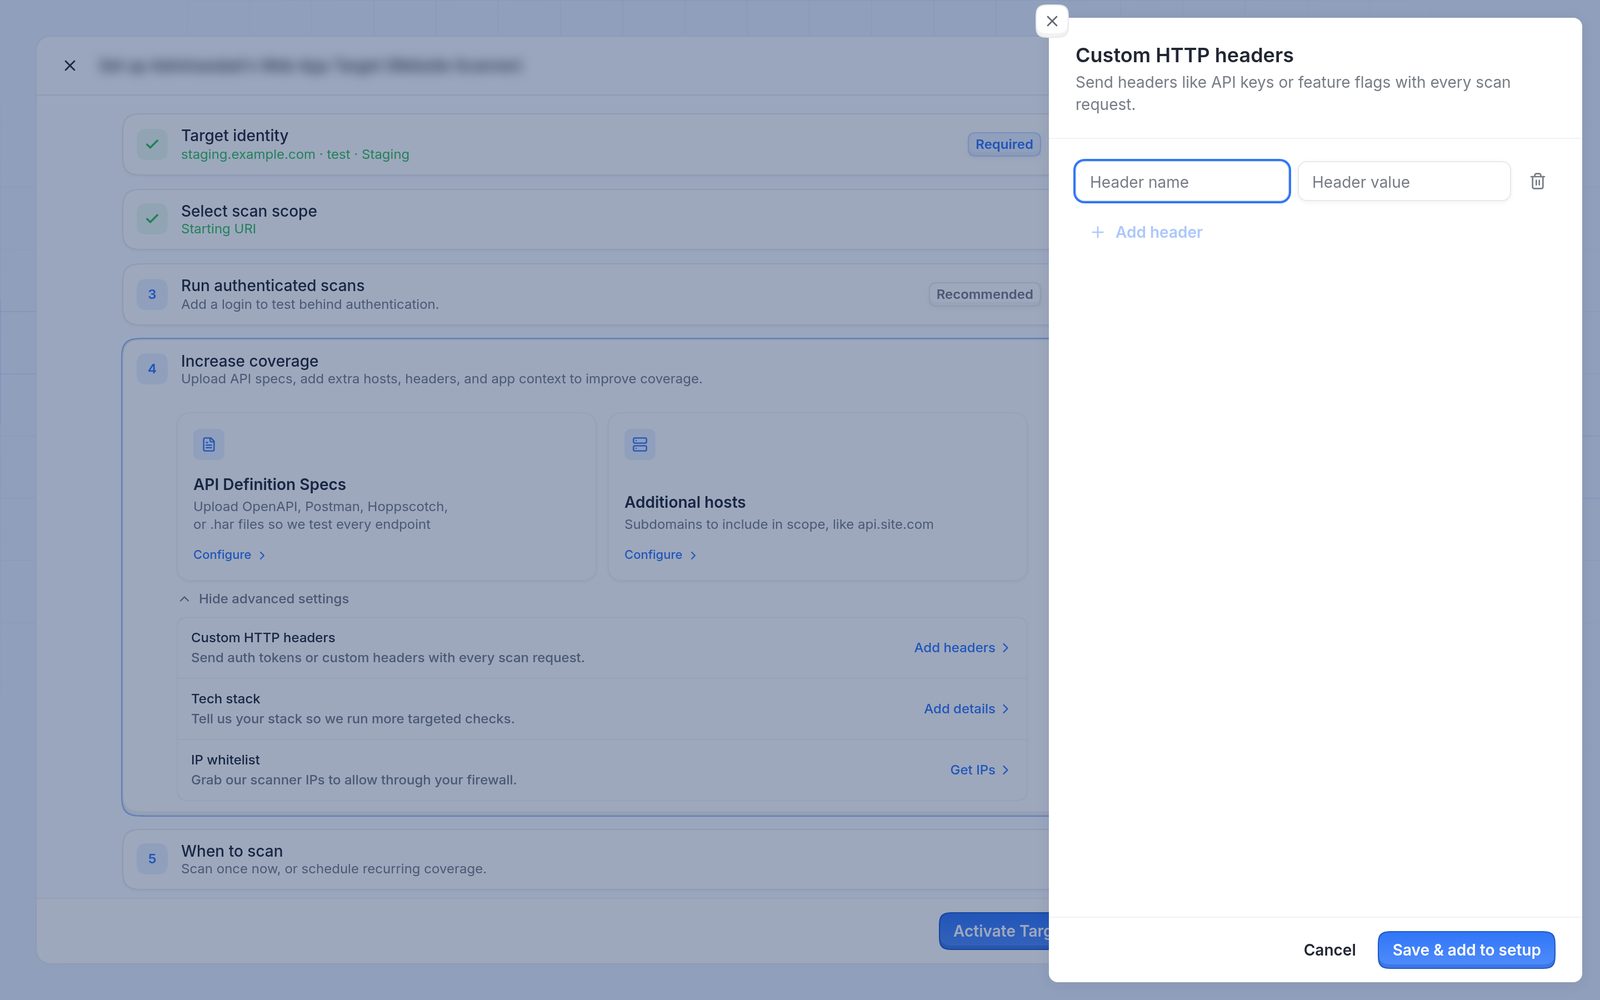
The Custom HTTP headers panel on the setup page.
Note
A site that's only available on a private network, such as a VPN or intranet, can't be reached from the internet. Contact support to discuss access options.
Step 3: Check the URL. Allowlisting helps only when the address itself loads. Check that the target URL:
- opens in a browser from outside the company network
- doesn't return
403 Forbidden,404 Not Foundor5xxerrors - shows the application, not a default server page or a Cloudflare challenge page
Step 4: Test the connection. Open the target's settings, go to Target Setup → Scope and click Test Connectivity. The message Connectivity check passed means the scanner can reach the site. Otherwise the reason is shown. Fix it and test again.
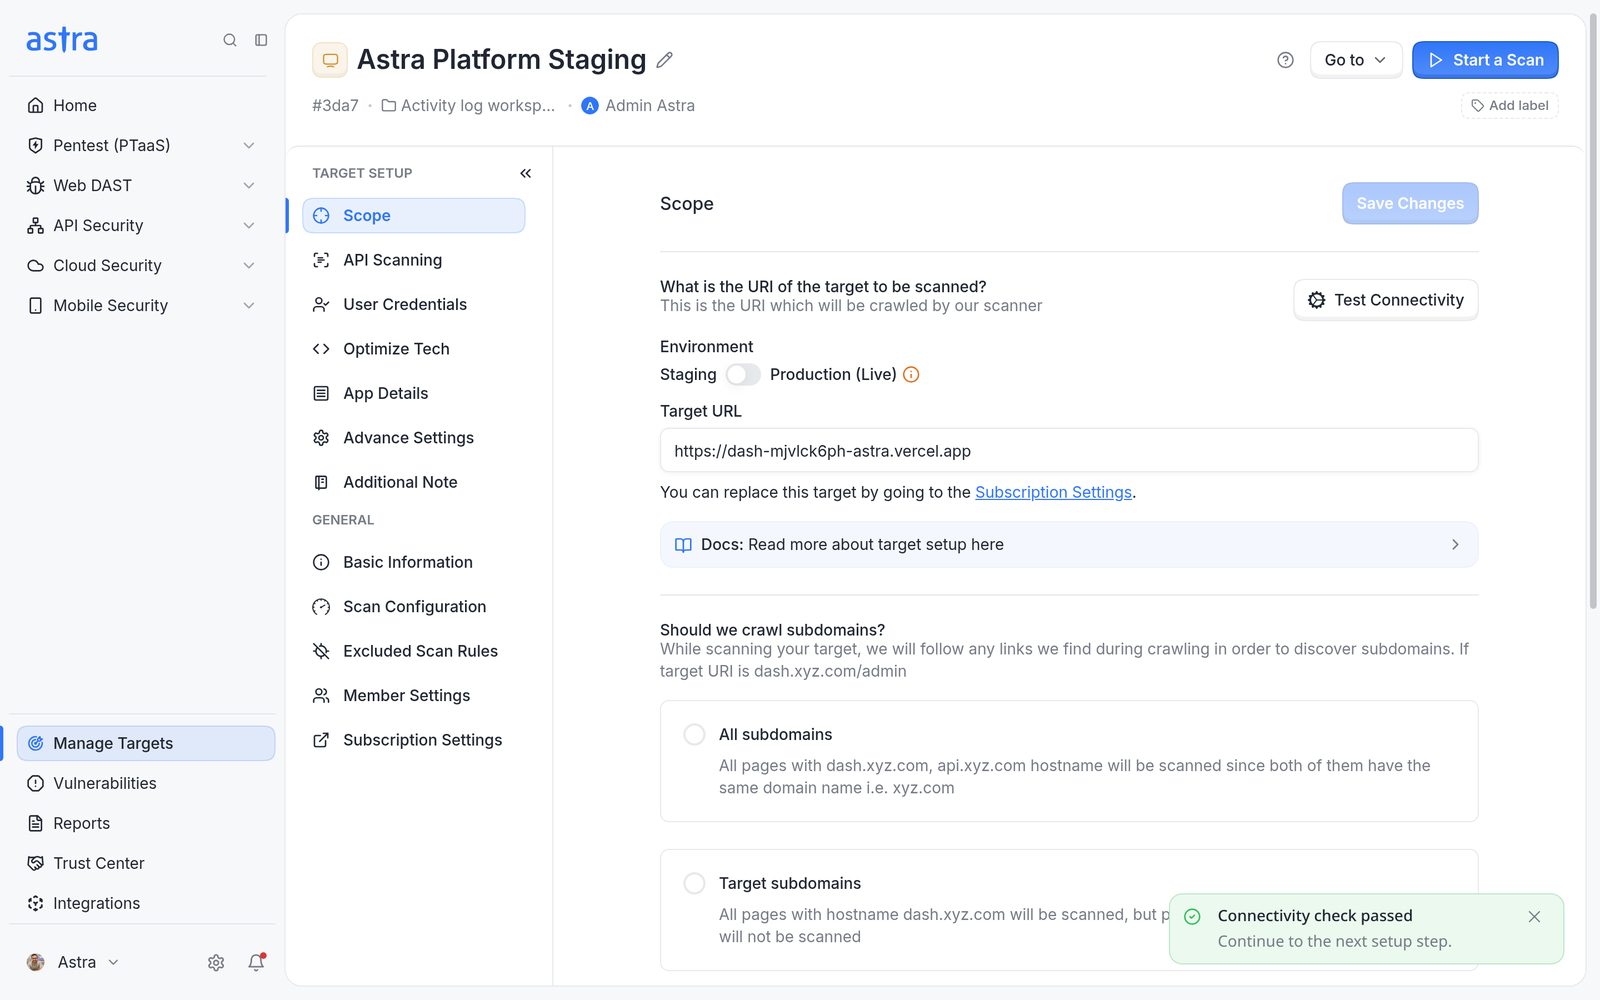
Target settings, Scope page, after a successful Test Connectivity.
If a scan has already failed, click See Details under Connectivity Check Failure to open Connectivity Check Error Details. It shows whether the site was reachable, whether access was denied, and whether a Cloudflare or default server page came back. If the URL was wrong, correct Target URL, click Update Target URL, then click Restart Scan.
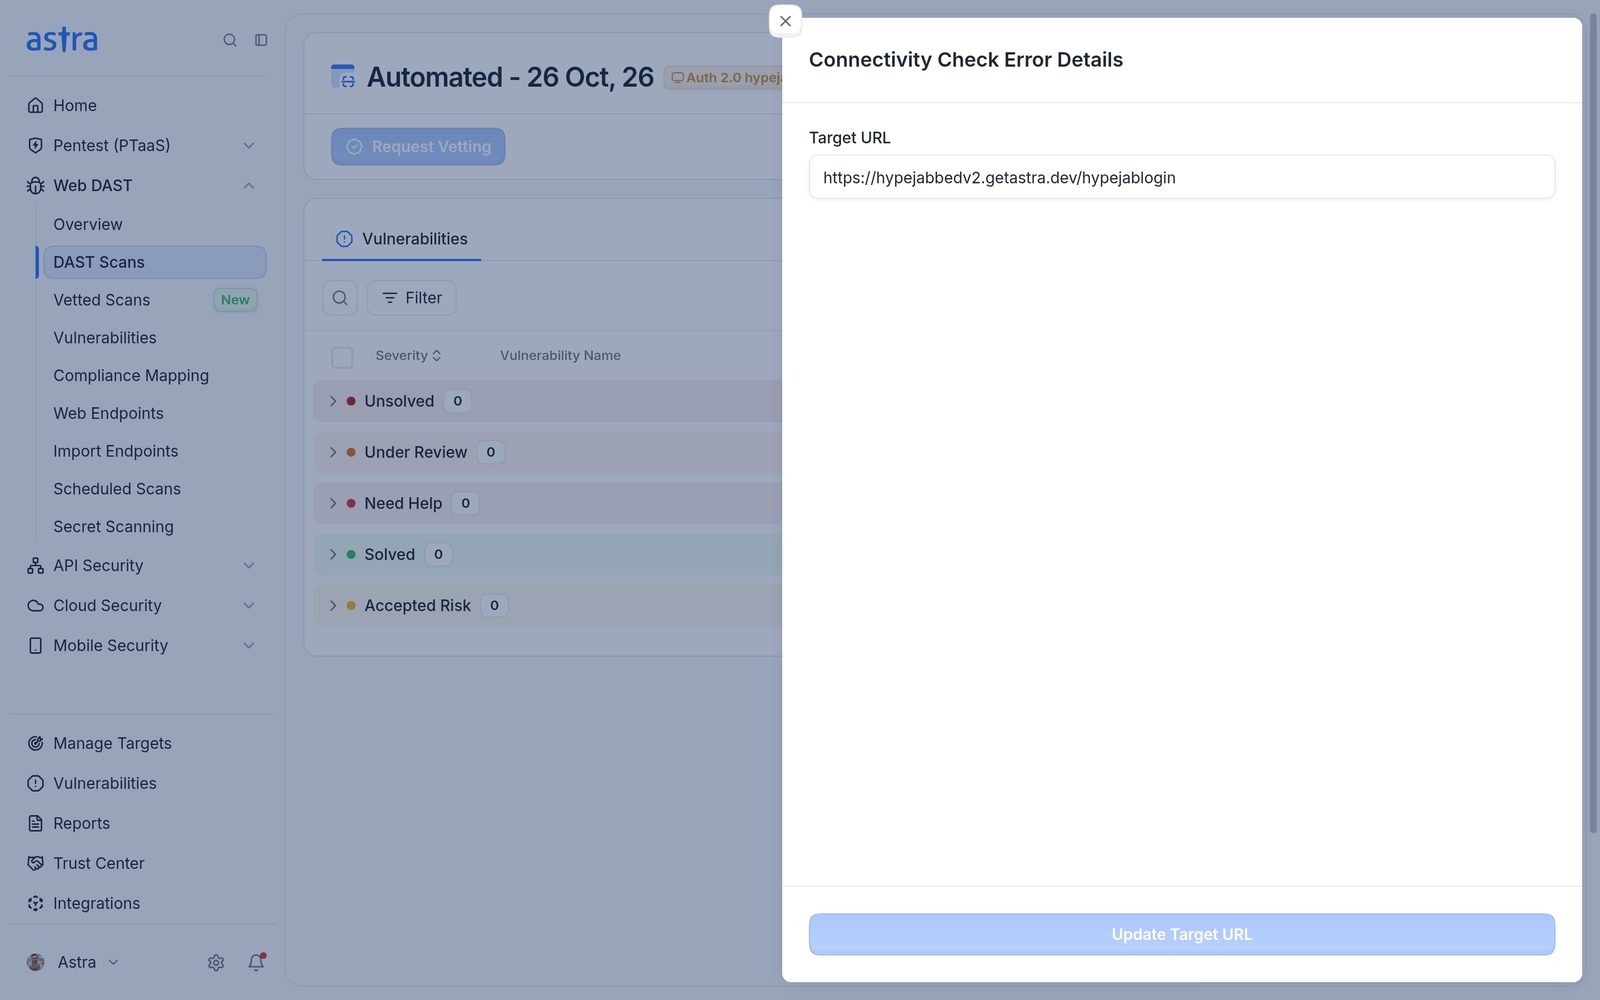
Connectivity Check Error Details, with Target URL and Update Target URL.
Avoid rate limits and account lockouts
Scans send many requests, which can trigger rate limits or lock the test account. Read more in How to prevent scans from triggering rate limits and account lockouts.
FAQ
Setup says my target is unreachable, but the site opens fine in my browser. Why?
The browser is on the team's own network, while Astra connects from the internet using the IPs above. The usual causes are a firewall, WAF or bot protection blocking those IPs, a VPN-only site, or a password prompt. Allow the IPs or add a header, then click Test Connectivity.
We allowlisted all of Astra's IPs and the target is still unreachable. What else should we check?
Check every layer in front of the application, not only the server firewall: CDN rules, WAF bot rules and hosting firewalls such as Vercel's. Then run Test Connectivity or open See Details on the failed scan to see which layer is still blocking.
How can we tell whether traffic hitting our site is from Astra?
Compare the source IP with the list above. When a custom HTTP header is set up for the target, Astra's requests also carry that header.
We got an email saying a scan failed because Astra couldn't connect. What happened?
The scan, often a scheduled one, couldn't reach the target and stopped at the connectivity check. Fix access using the steps above, then start a new scan. Read more in How to start an automated scan.