How to set up a cloud target
Last updated: November 12, 2026
A cloud target's setup tells Astra which cloud provider you use and how to access your cloud account. The steps depend on the provider. For AWS, Microsoft Azure and Google Cloud, the setup also asks for programmatic access and lets you limit the scan scope with resource tags.
Set up a cloud target
On the Targets page, click Setup on the target's row.
Get Started: enter the Target Name and the Business Name (For Pentest Certificate), and then click Save & Continue.
Cloud Provider: choose AWS, Digital Ocean, Google Cloud GCP, Microsoft Azure or Other.
User Credentials: enter the console sign-in details Astra uses to check your cloud configuration. For AWS, enter the Account ID, Email/Username and Password of an IAM user with the security analyst role, plus an optional MFA Setup Key. For Digital Ocean, invite pentests@getastra.com to your team instead. During setup, the Provide IAM console credentials switch lets you skip these fields: they are only needed for manual pentests and reviews, and automated scans can run with programmatic access credentials.
Programmatic Access (AWS, Azure and Google Cloud): import the credential file, or enter the keys by hand. For AWS, import a CSV file, or enter the Access Key ID and Secret Access Key. For the other providers, upload a JSON file.
Scan Scope (AWS, Azure and Google Cloud): optionally add tag rules to choose which resources Astra scans.
Optional: Additional Note: add anything else the testers should know.
Click Save & Continue on each step.
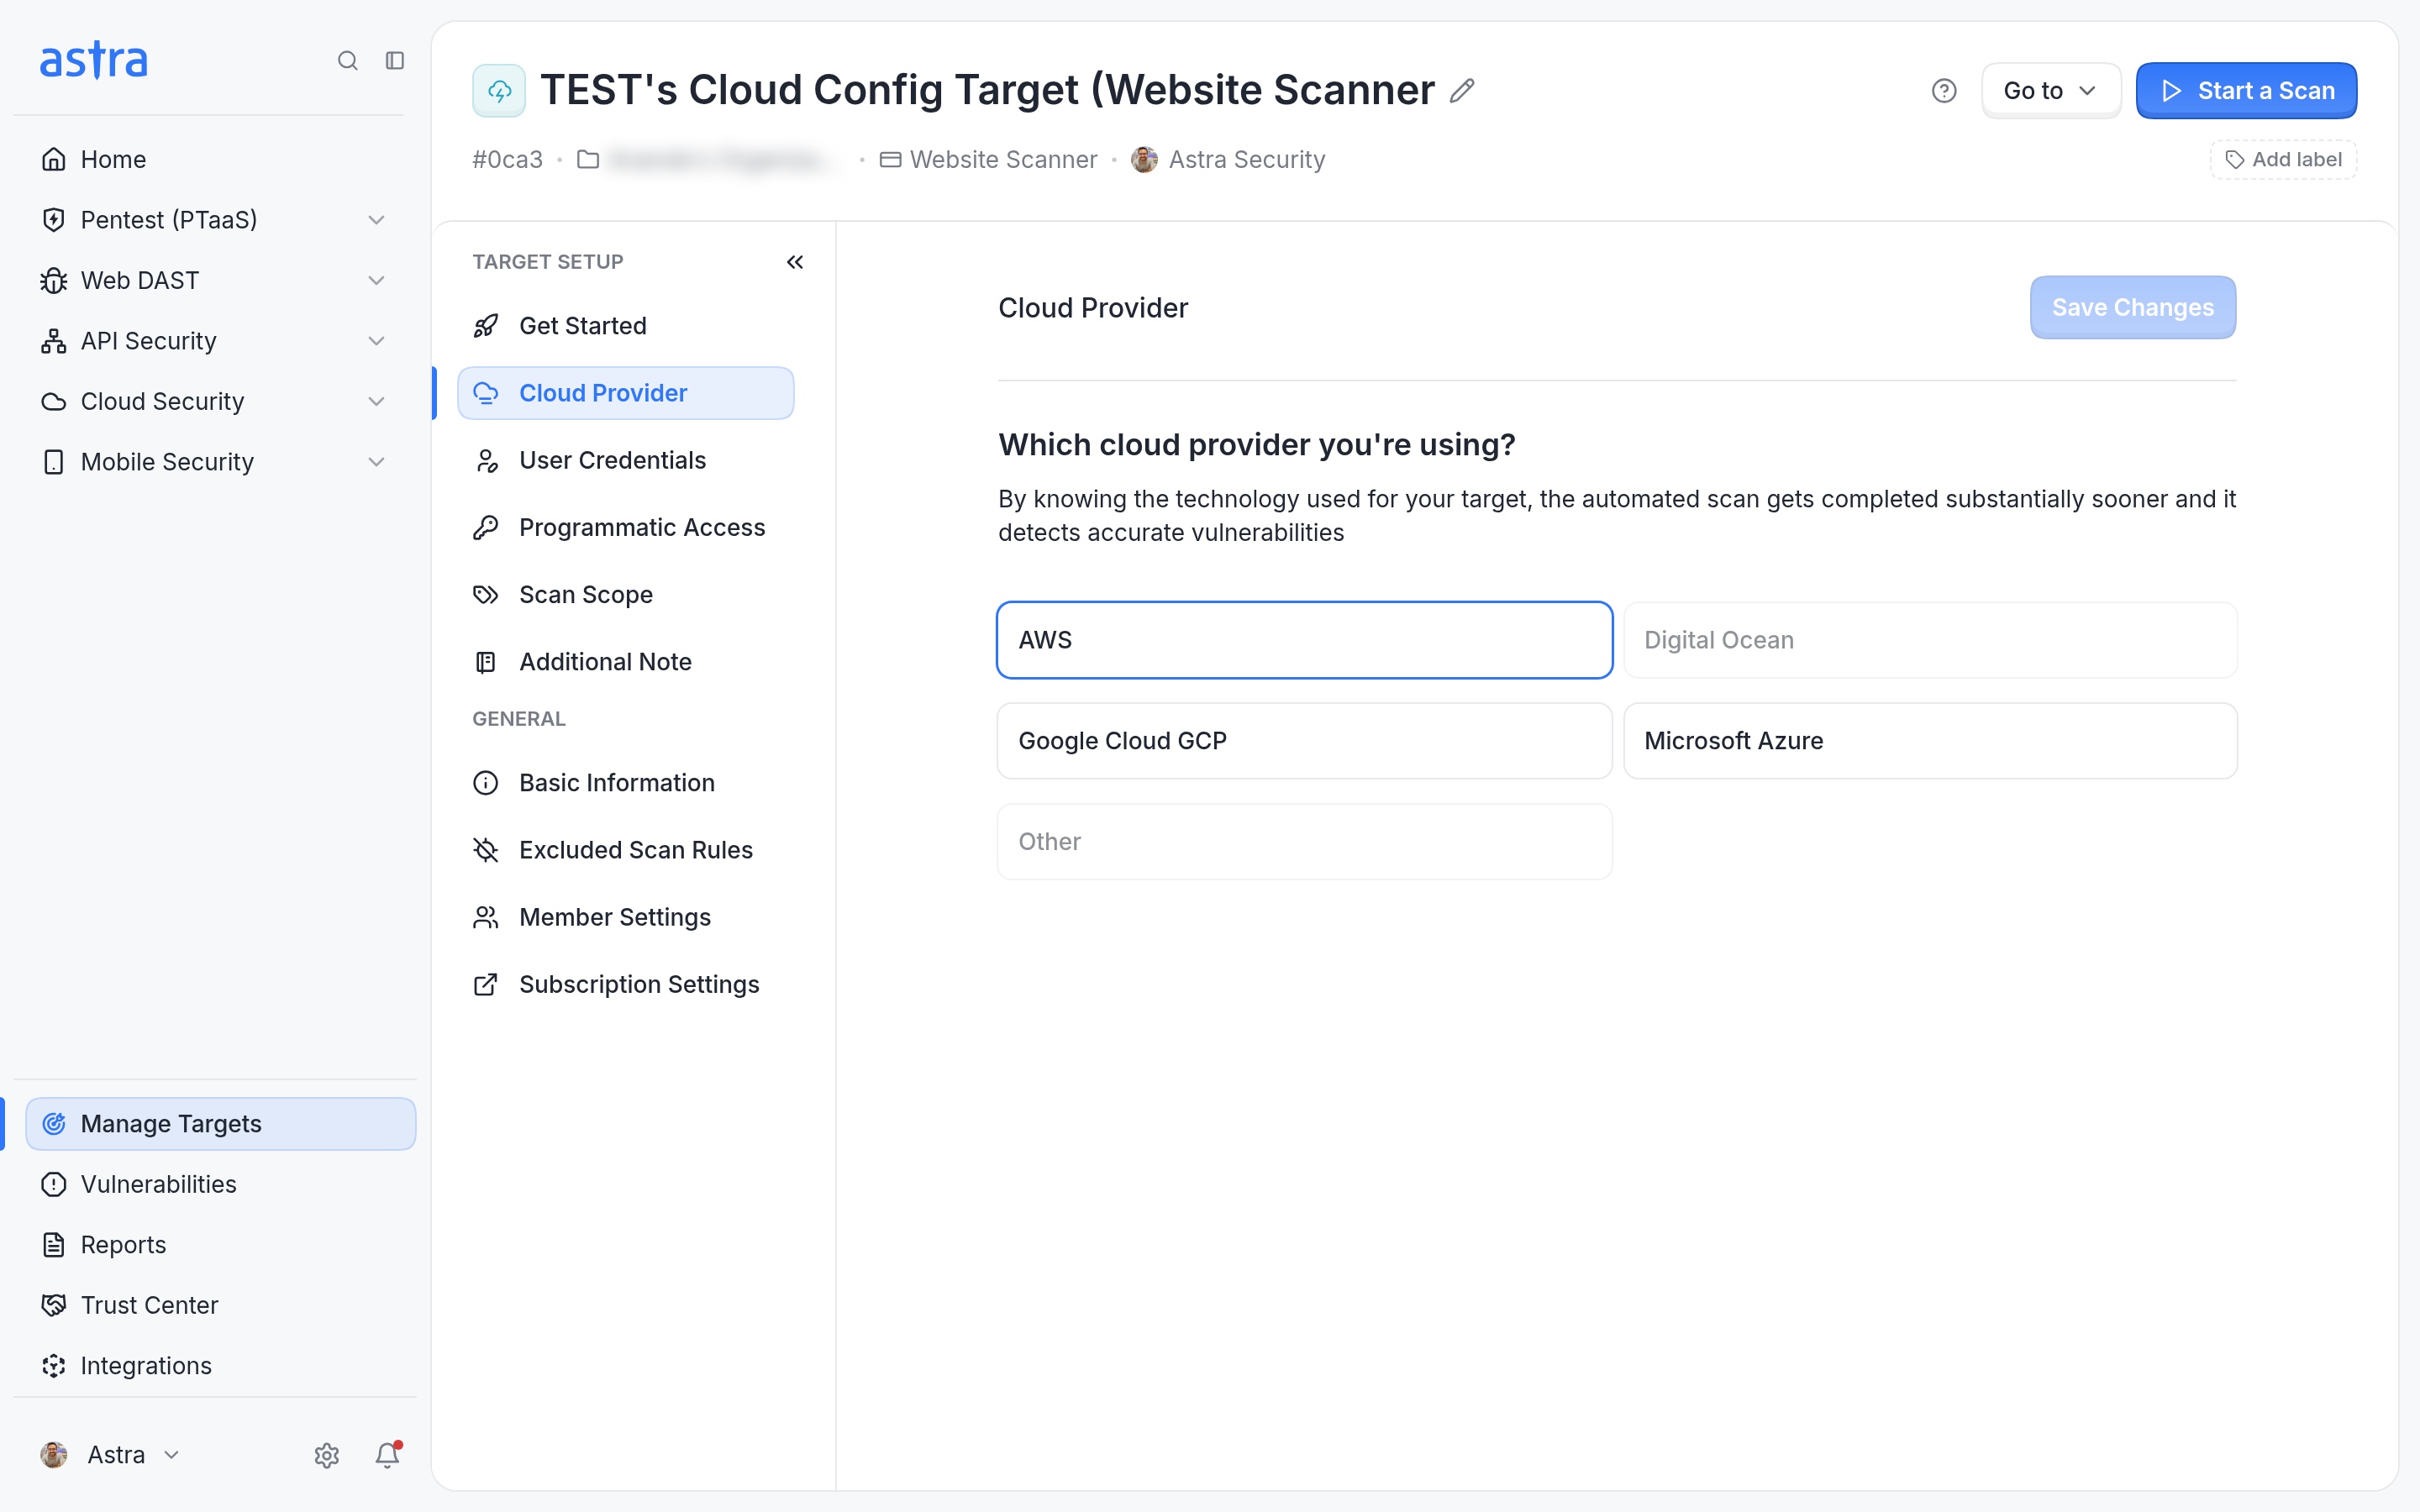
Choose the cloud provider in the Cloud Provider step.
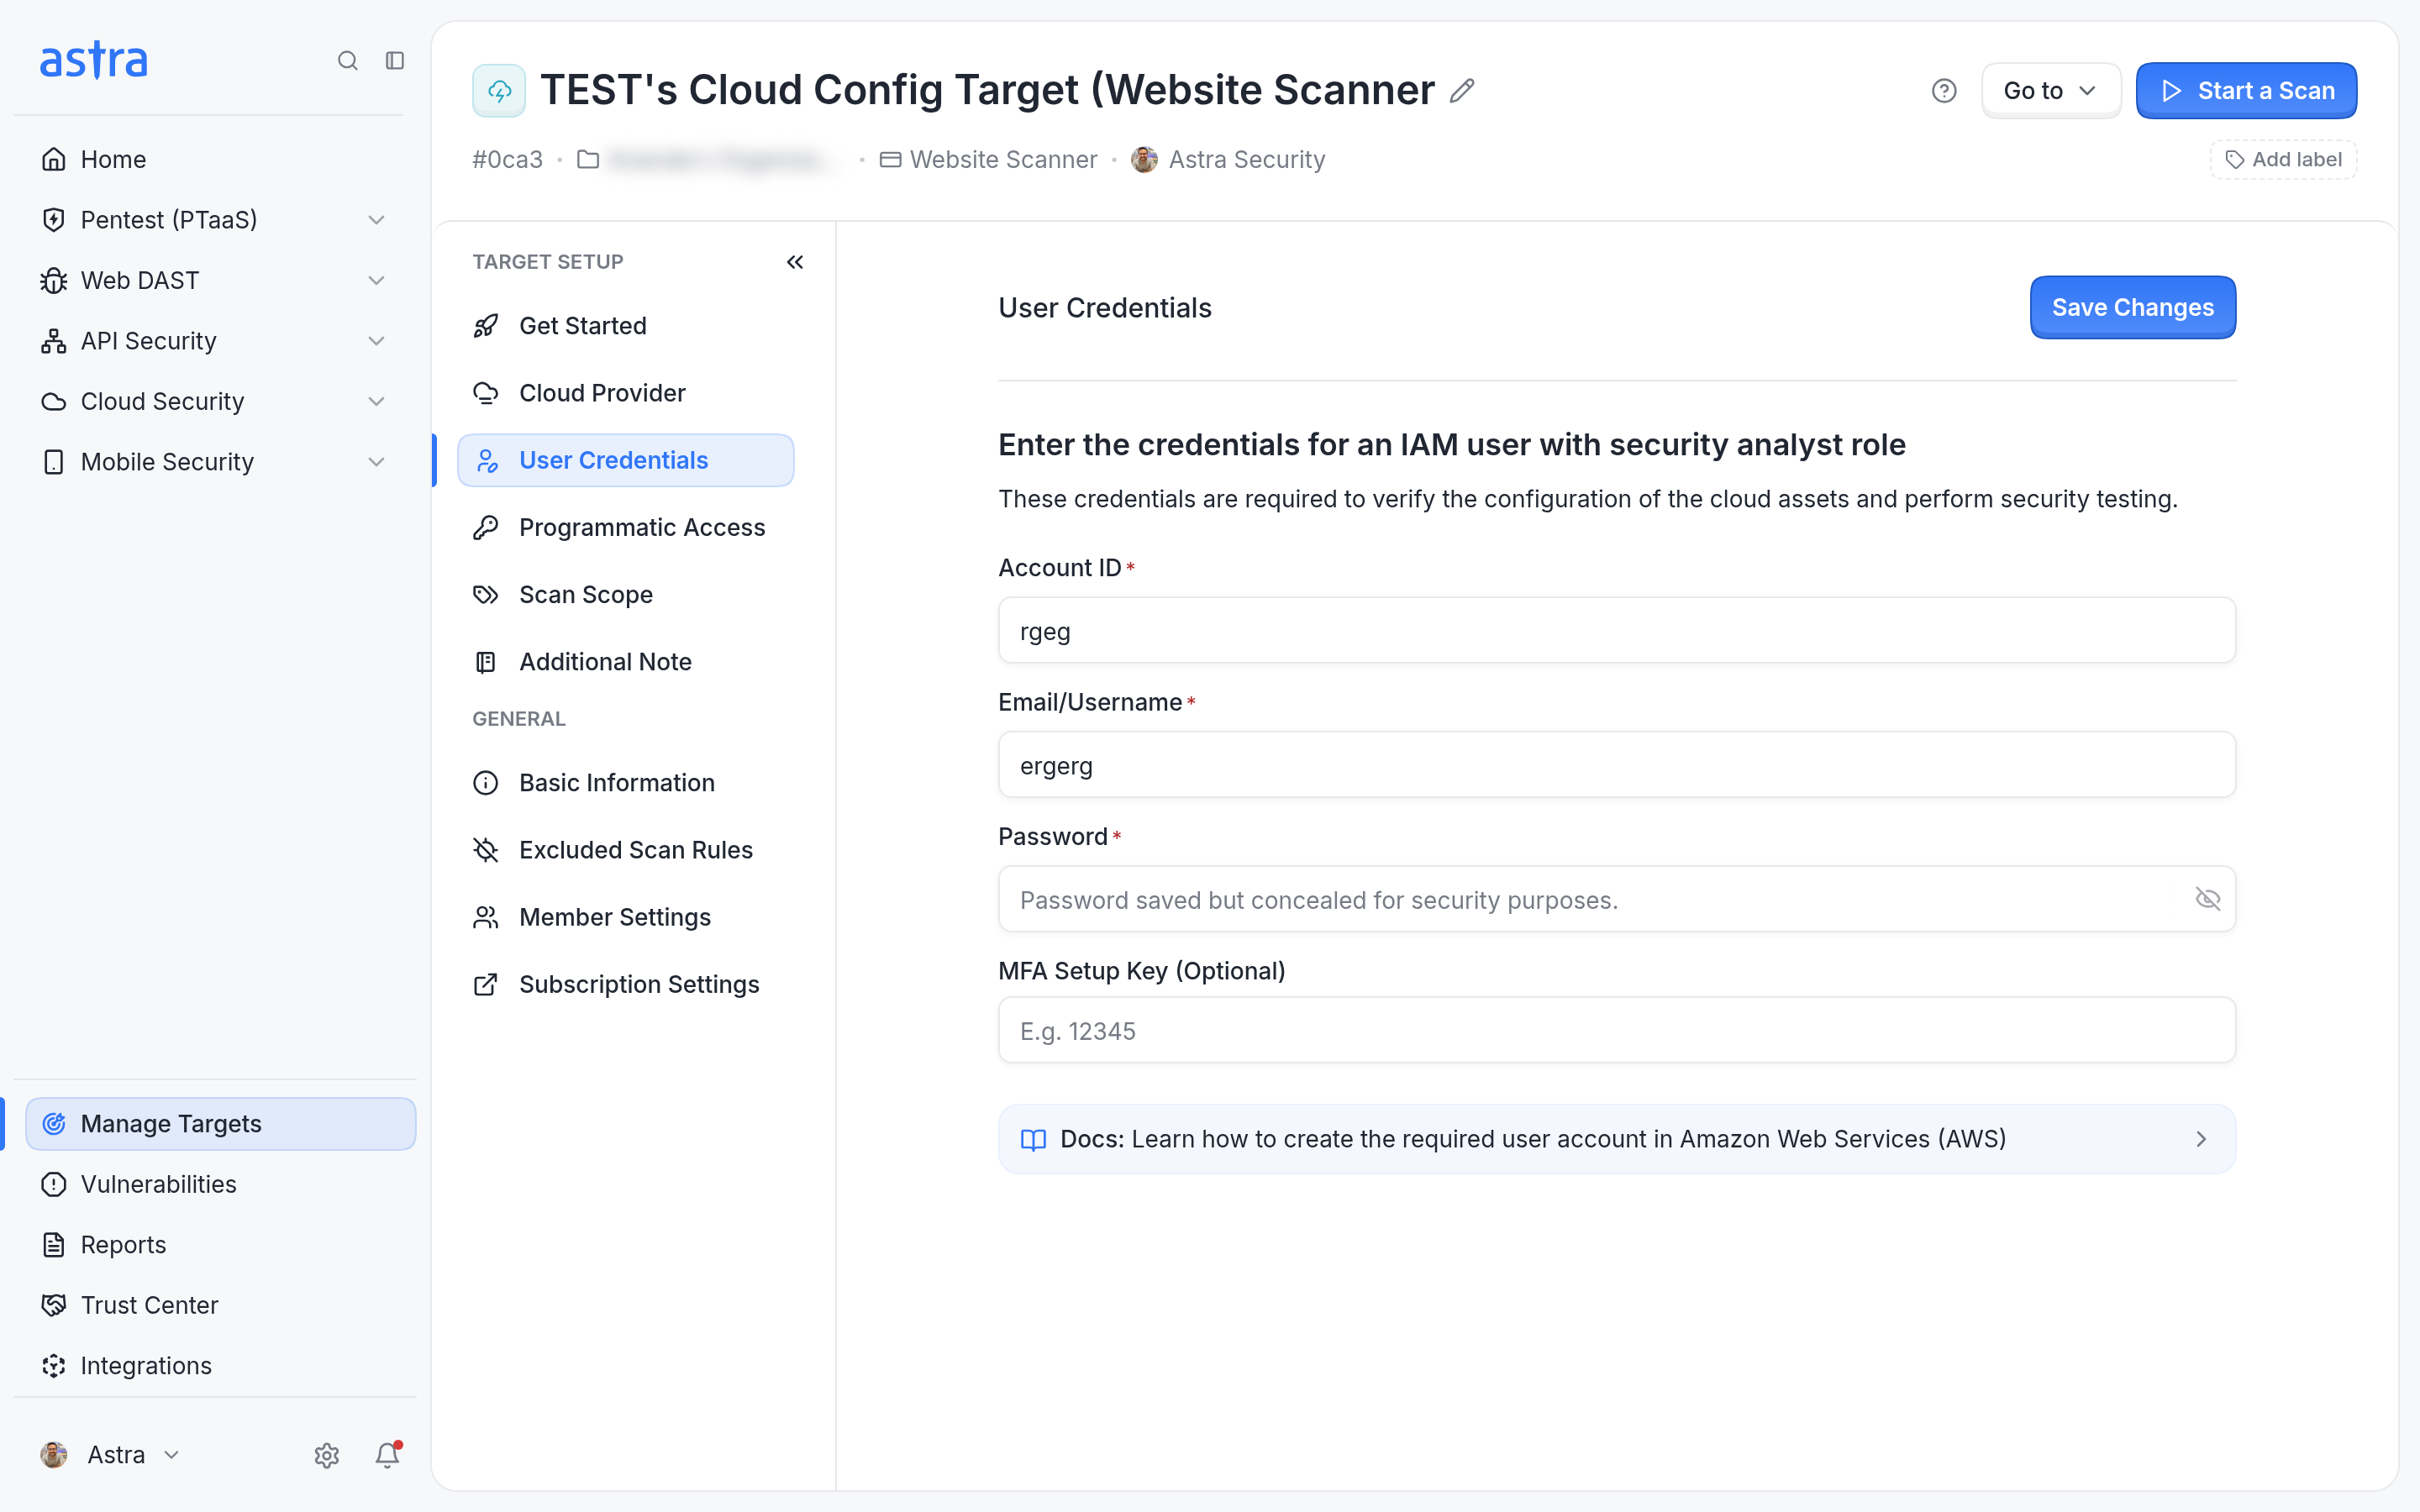
For AWS, User Credentials asks for the IAM user's account ID, email or username and password.
Note
In Programmatic Access, Astra checks the credentials. Continue when the Connection Status shows that the credentials are verified.
Limit the scan with resource tags
In Scan Scope, use the tags already on your cloud resources to decide what Astra scans:
Include resources with these tags: only resources that match at least one rule are scanned.
Exclude resources with these tags: resources that match any rule are skipped.
Leave both lists empty to scan everything the credentials can access. Click Add in bulk to add many tags at once.
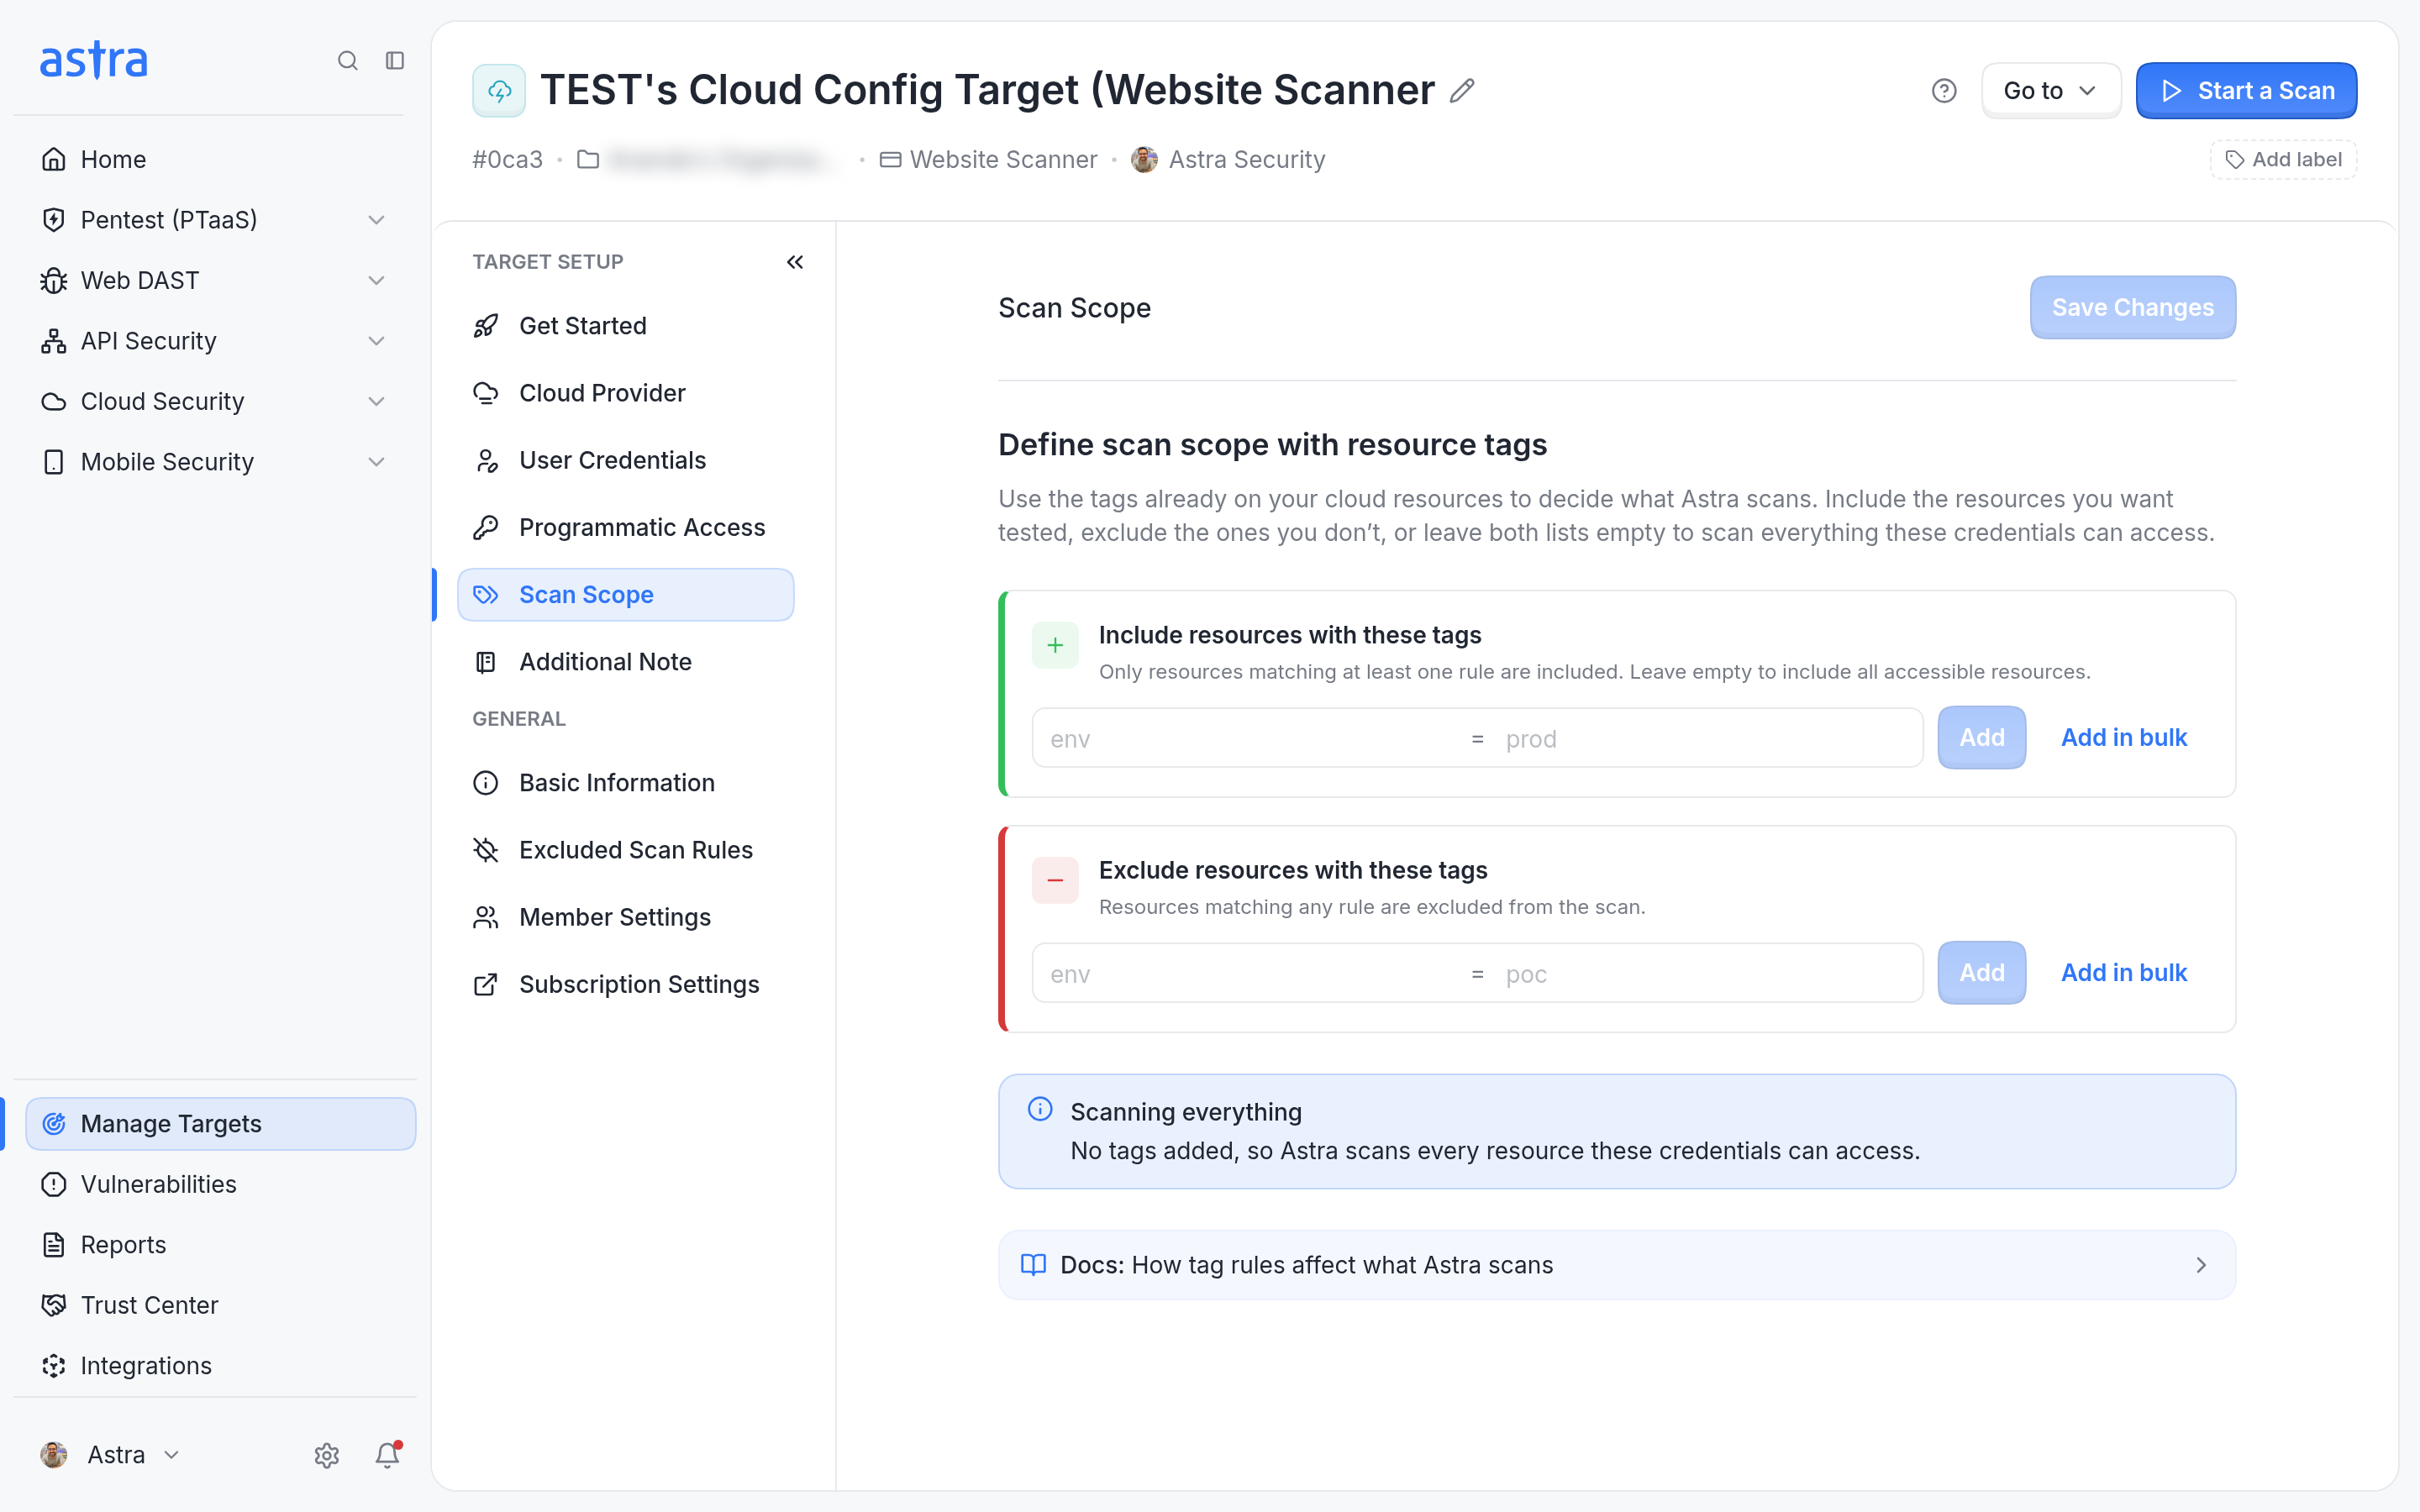
Scan Scope uses include and exclude tag rules.
Change the setup later
After setup, open the target's Settings. The setup steps are listed under Target Setup, and you can change them there. Click Save Changes after each change.
Next steps
Start a scan. Read more in How to start an automated scan or How to start a pentest.