How to verify target ownership
Last updated: November 3, 2026
Before scanning some targets, Astra asks for proof that the team owns them. This applies only to web app and API targets on a free trial. These targets appear in Pending Verification on the Targets page.
Start verification
Verification starts from the target's row.
- On the Targets page, click Verify on the target's row.
- In Tell us About your Application, fill in:
- Target Name: the name shown across the dashboard.
- Business Name (For Pentest Certificates): the company name printed on certificates.
- Target URL (To Be Scanned): the full address, for example
https://www.example.com. - Staging or Production (Live): the environment the URL points to.
- Click Continue. Get Started in 3 Simple Steps gives an overview. Click Continue again.
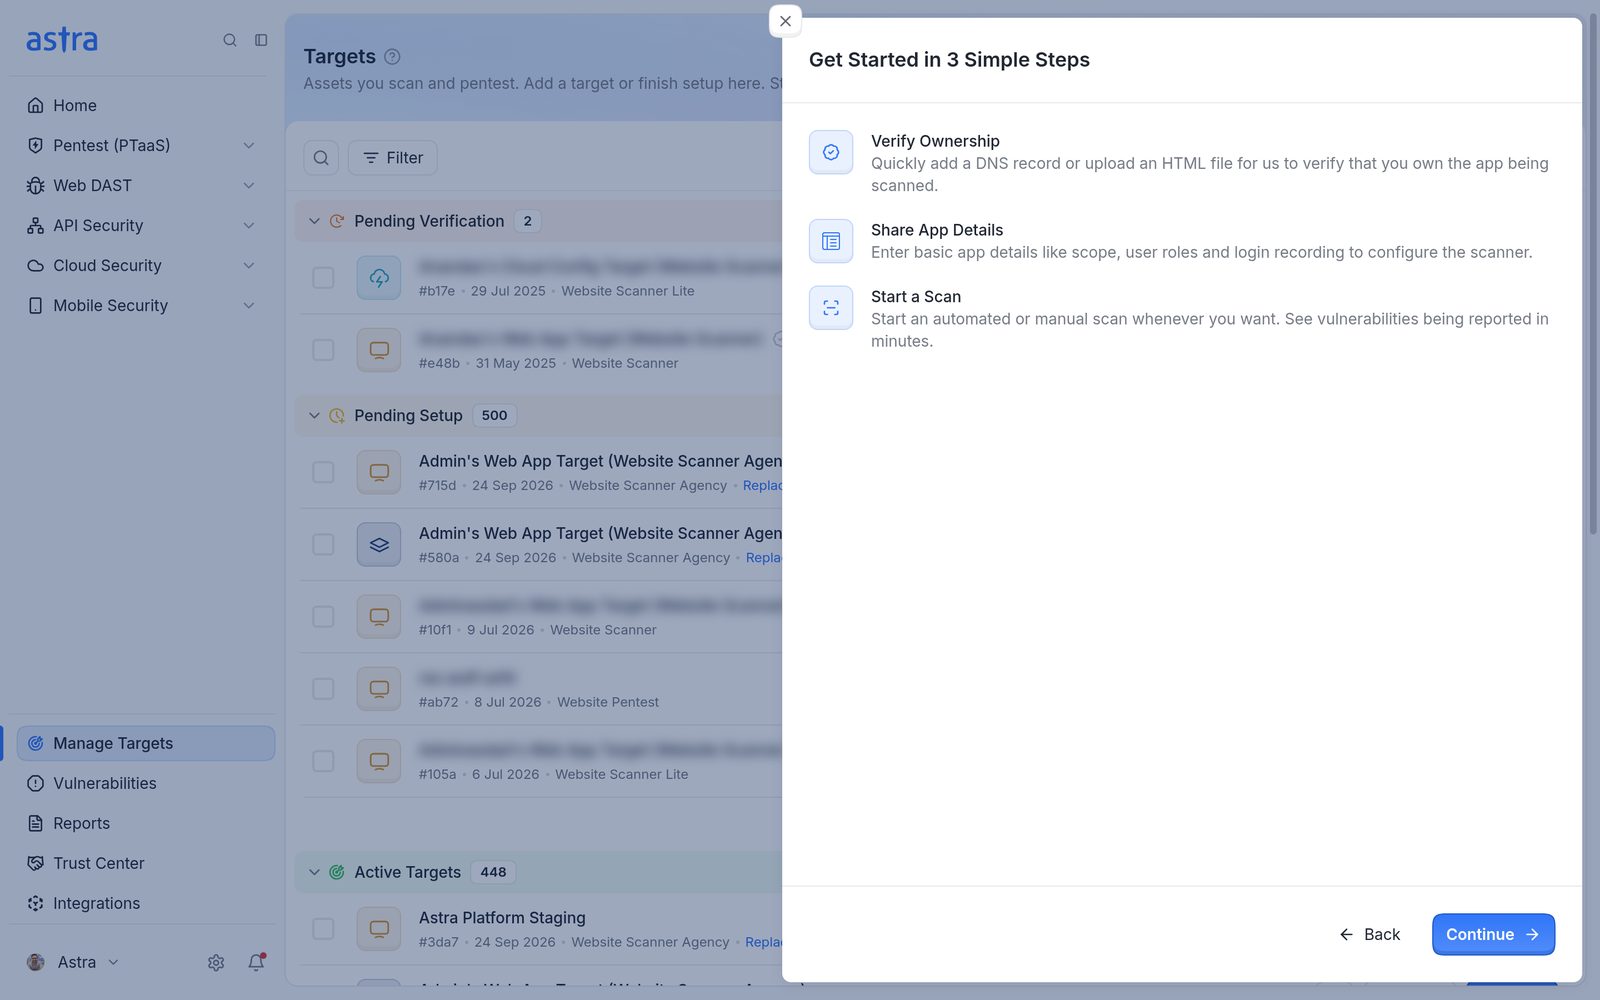
Get Started in 3 Simple Steps: Verify Ownership, Share App Details and Start a Scan.
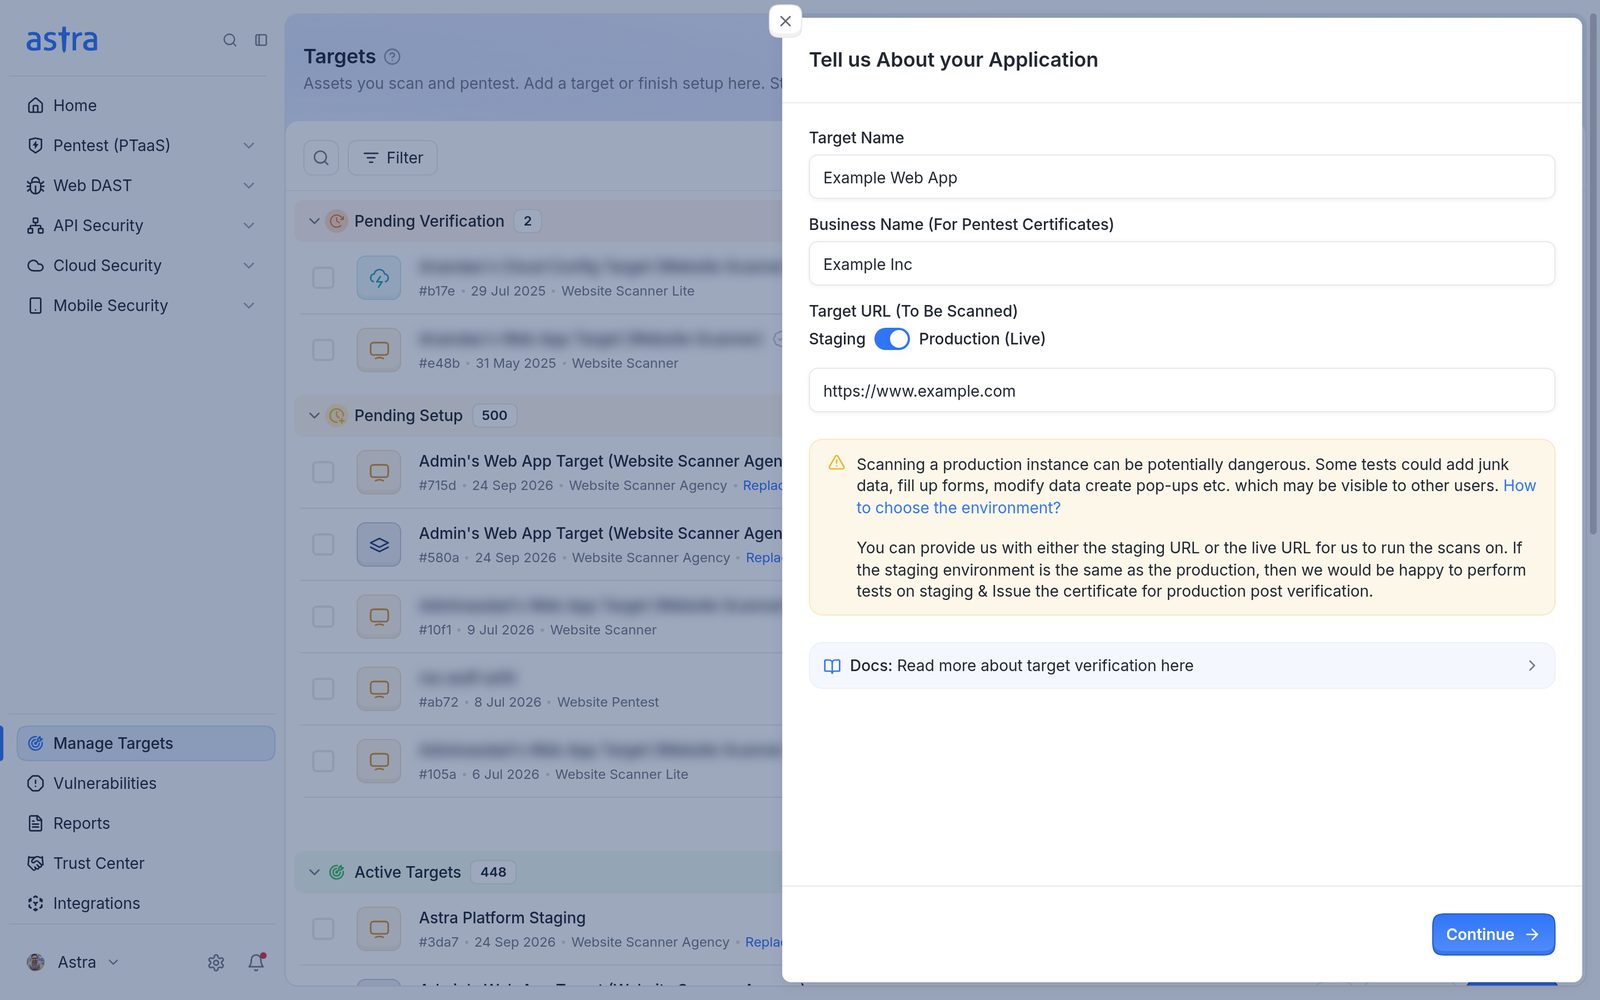
Tell us About your Application, with Target Name, Business Name, the environment switch and Target URL.
Important
Scans can submit forms, create test data and trigger pop-ups that real users may see. Use a staging copy of the application when one is available. For pentests, Astra can test staging and issue the certificate for production after verification.
Choose a verification method
Select any one Verification Method offers three options. Pick one and click Continue.
| Method | What it needs |
|---|---|
| File Upload (Recommended) | An HTML file on the web server |
| DNS Verification | A TXT record on the domain |
| Manual Verification | A request to Astra's support team. Use it only when File Upload and DNS Verification aren't possible. |
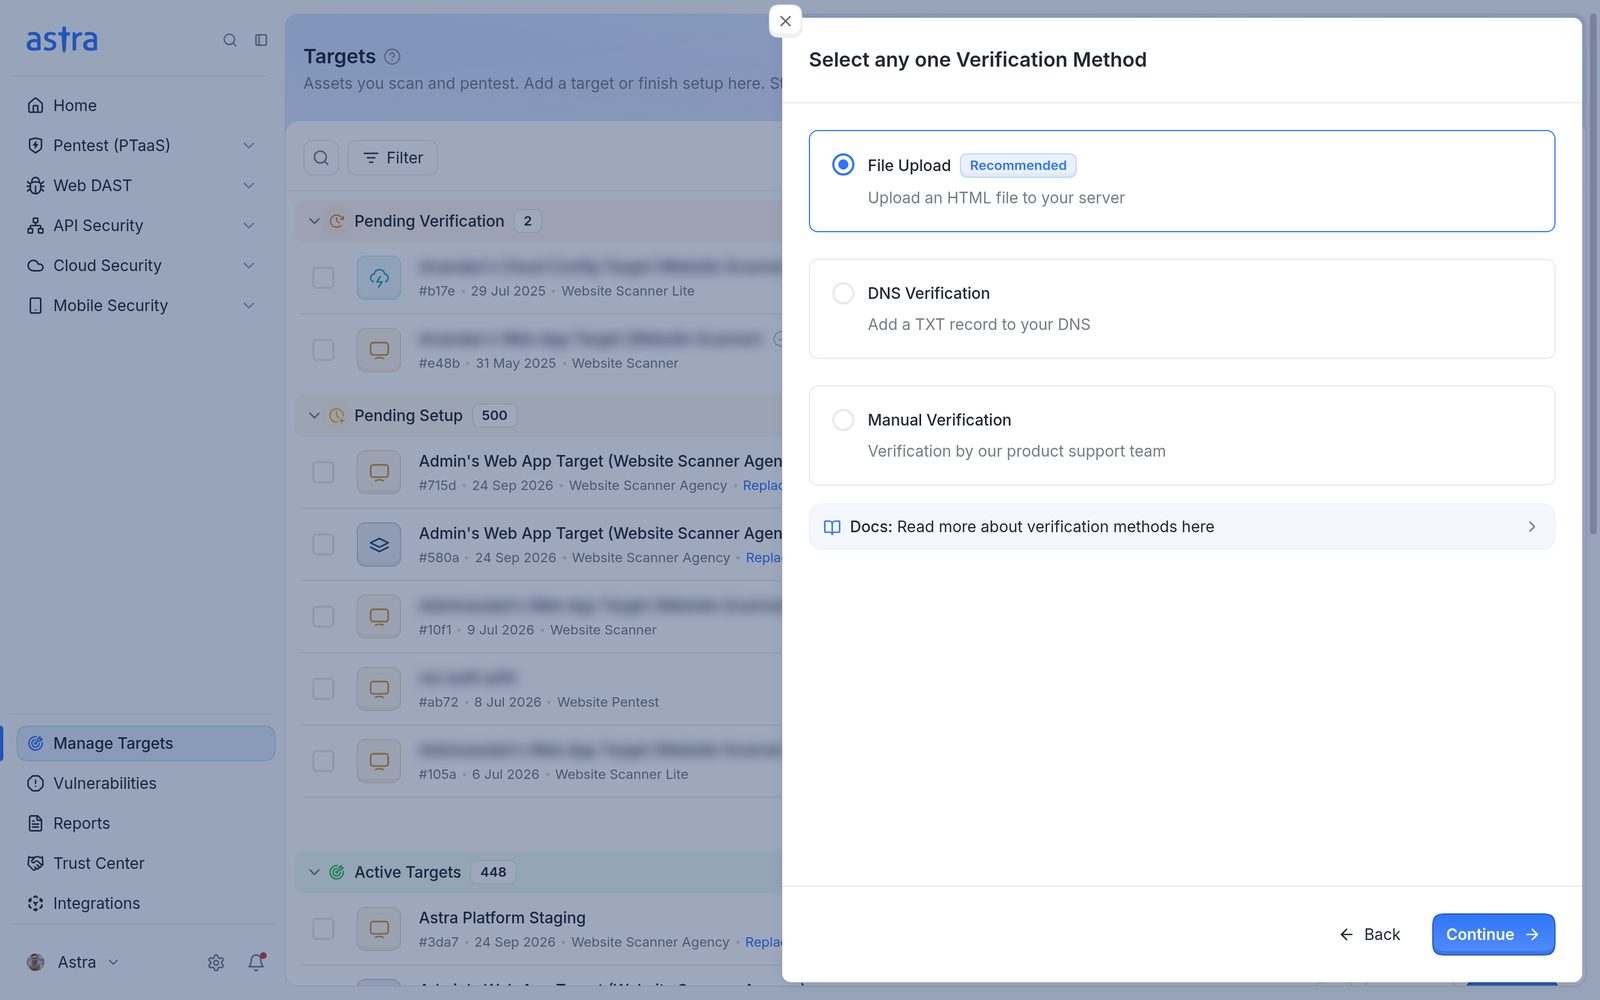
Select any one Verification Method, with File Upload, DNS Verification and Manual Verification.
File Upload
- Click Download Verification File.
- Put the file in the root folder of the application, so that it opens at the address shown on screen.
- Open that address in a browser to check that the file loads.
- Click Verify HTML File.
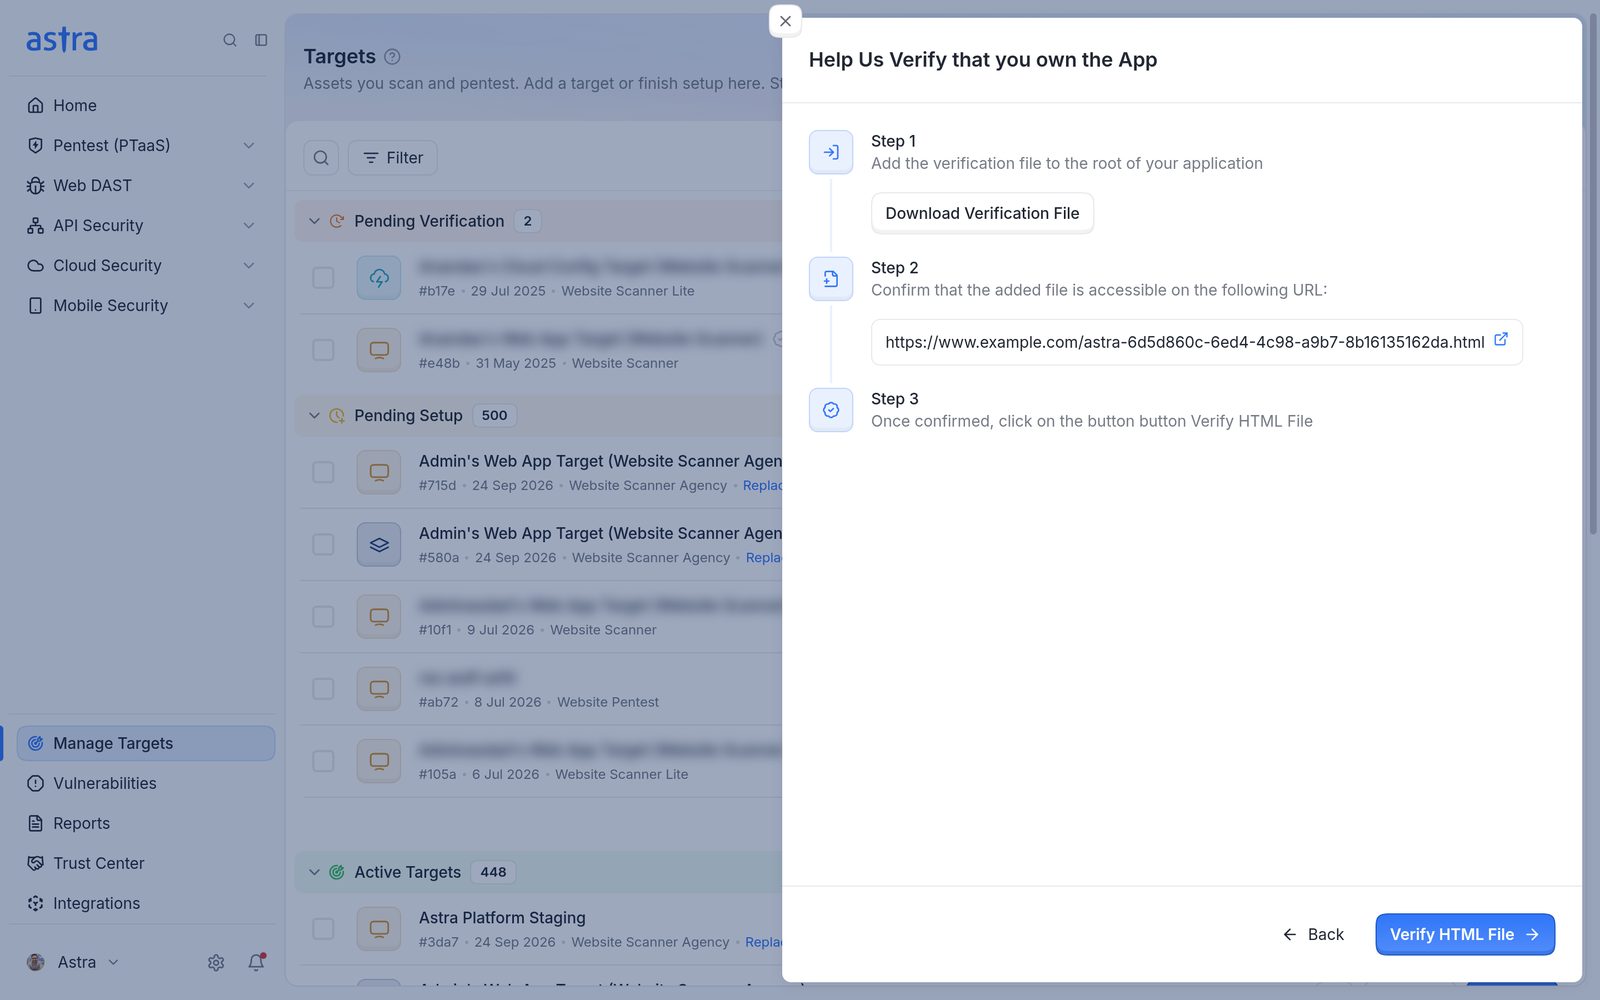
The File Upload method, with Download Verification File, the address the file must load from and Verify HTML File.
DNS Verification
- Sign in to the domain's DNS provider.
- Add a TXT record with the values shown on screen:
- Name:
@for the root domain. For a subdomain, use only the subdomain part, for exampleapiforapi.example.com. - TTL: Auto.
- Content: the token shown on screen, starting with
astra-target-verification=.
- Name:
- Click Verify DNS Record.
If verification fails, check that the record matches the values on screen. Once the DNS change has propagated, click Verify DNS Record again.
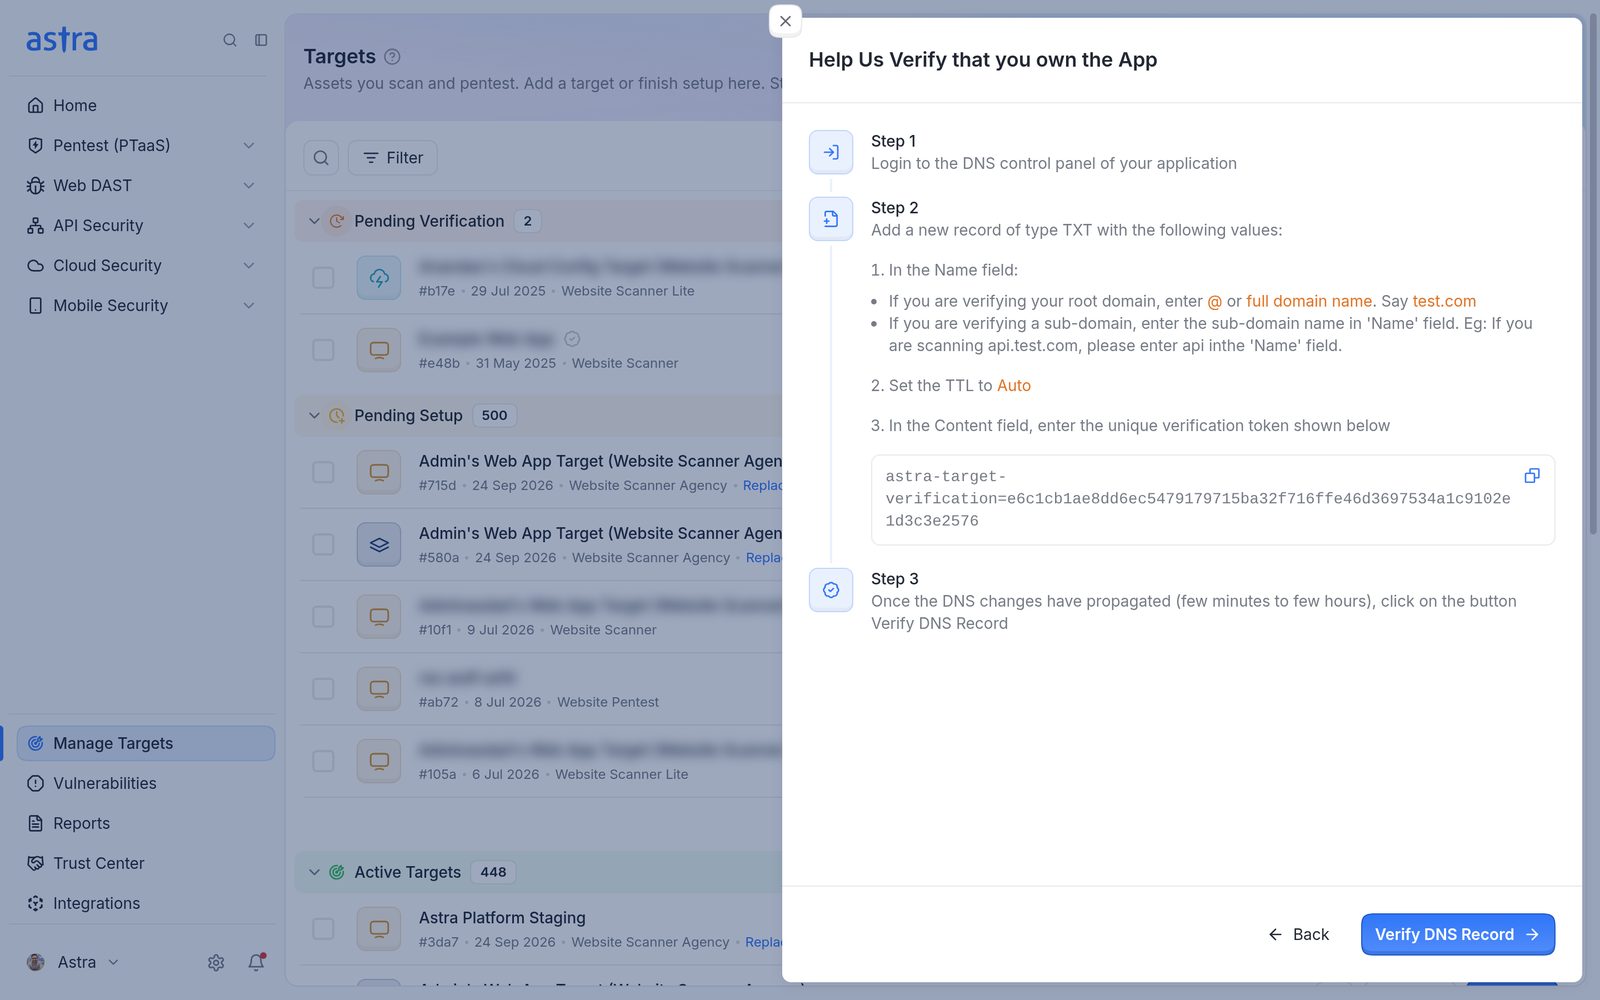
The DNS Verification method, with the TXT record values and Verify DNS Record.
Manual Verification
Use this only when neither File Upload nor DNS Verification is possible.
- Click Submit Verification Request.
- Astra's support team confirms ownership by other means. The dashboard notes that manual verification may take 12 to 24 hours.
An email arrives once the request is approved.
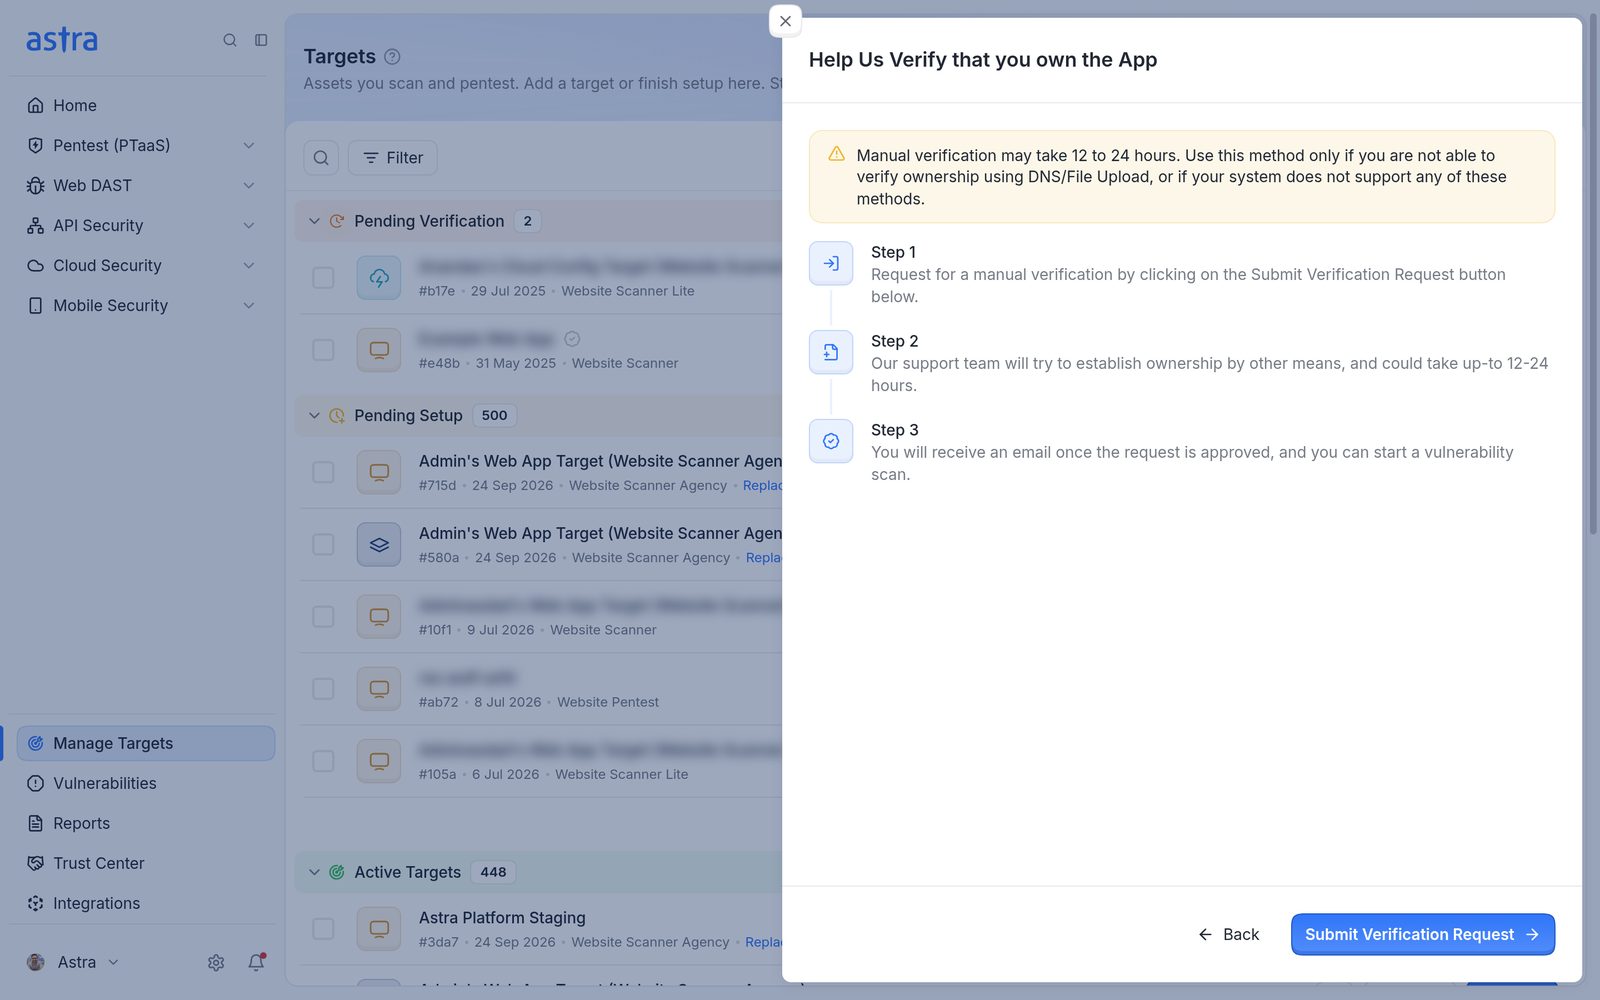
The Manual Verification method, with Submit Verification Request.
After verification
The target moves to Pending Setup. Click Start - Scan Setup to continue straight to setup. Read more in How to finish setting up a target.
FAQ
Can I change the URL of a target that's still in Pending Verification?
Yes. Click Verify, enter the new address in Target URL (To Be Scanned) and click Continue.
My target has been in Pending Verification for a long time. What's wrong?
Verification doesn't complete on its own. Click Verify and complete one of the methods. With File Upload or DNS Verification, the check runs when Verify HTML File or Verify DNS Record is clicked. Manual Verification may take 12 to 24 hours after the request is submitted.