How to mark a false positive or accept a risk
Last updated: November 3, 2026
Mark False Positive is for findings that aren't real vulnerabilities. Accept Risk is for real vulnerabilities the organization has decided to keep. Both can stop future scans from reporting the same finding again.
Mark a false positive
Use this when a finding isn't a real vulnerability, for example when the application already blocks the attack.
- Open the vulnerability, or select several on a scan's Vulnerabilities tab and click Update Status.
- Click Mark False Positive.
- Enter a reason. It's required.
- Choose whether to Exclude from future scans, then confirm.
Before confirming, the dialog points out that:
- The item will be removed from active risk dashboards and compliance reports.
- The organization takes responsibility for the remaining risk. Marking a real vulnerability as a false positive can lead to non-compliance.
- The change is logged permanently with the user's ID and the time.
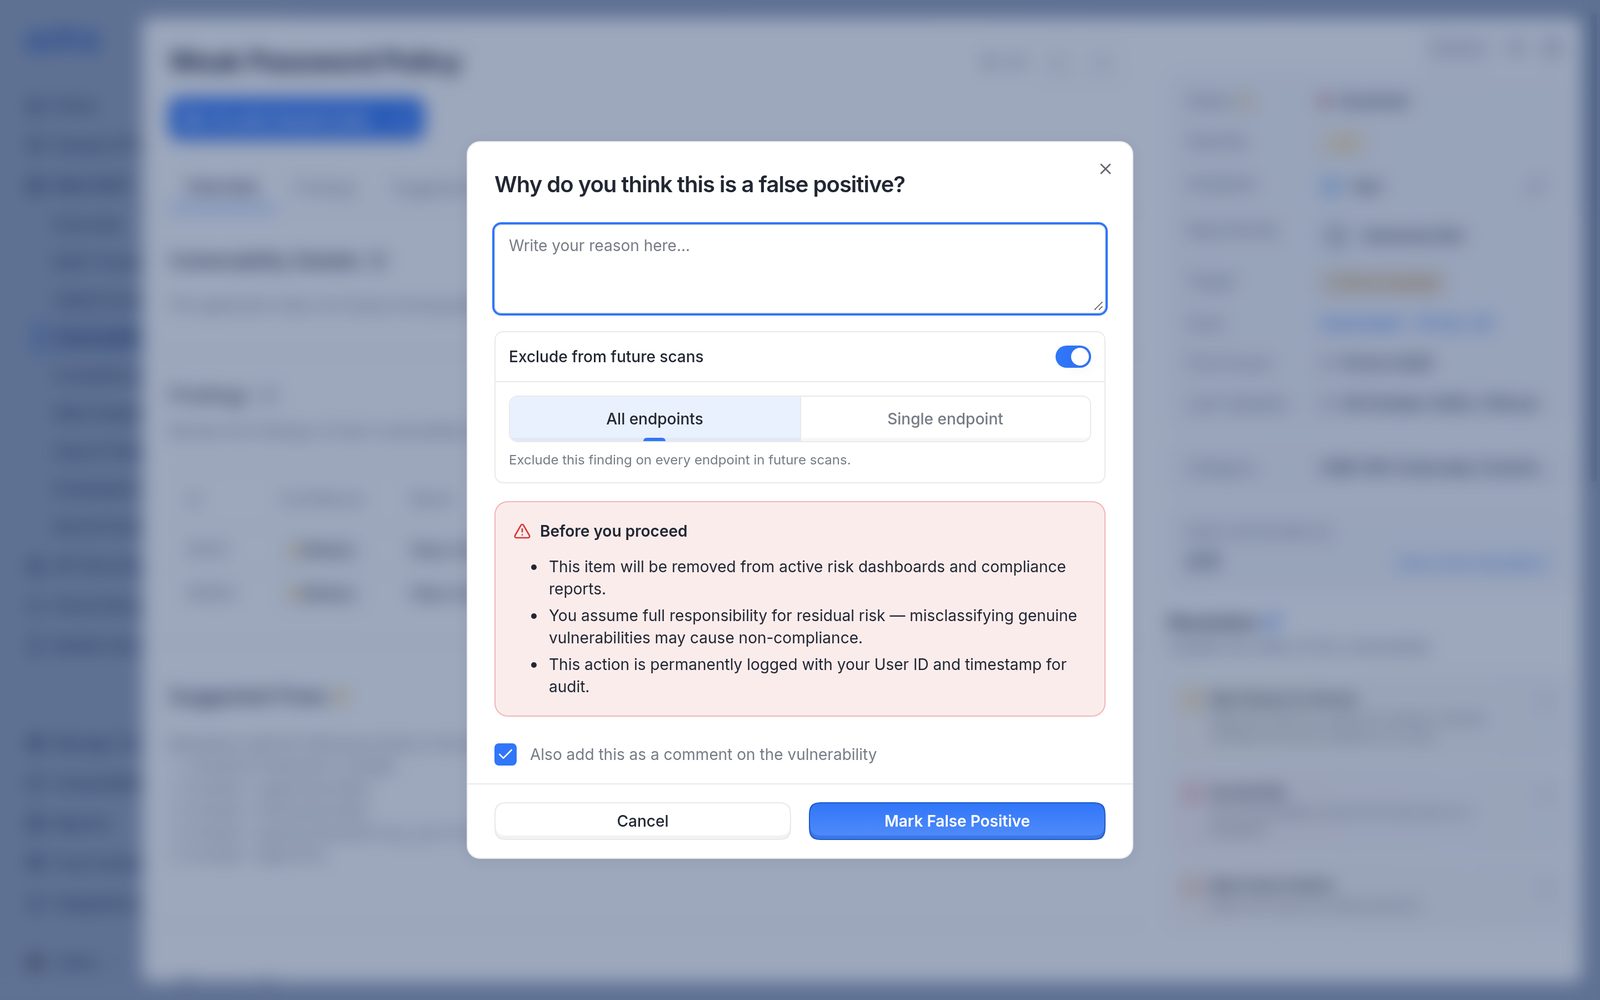
The false positive dialog, with the reason, Exclude from future scans and the points to check before confirming.
To reverse it, open the vulnerability and click Unmark False Positive, with a reason. It returns to Unsolved and counts in dashboards and reports again.
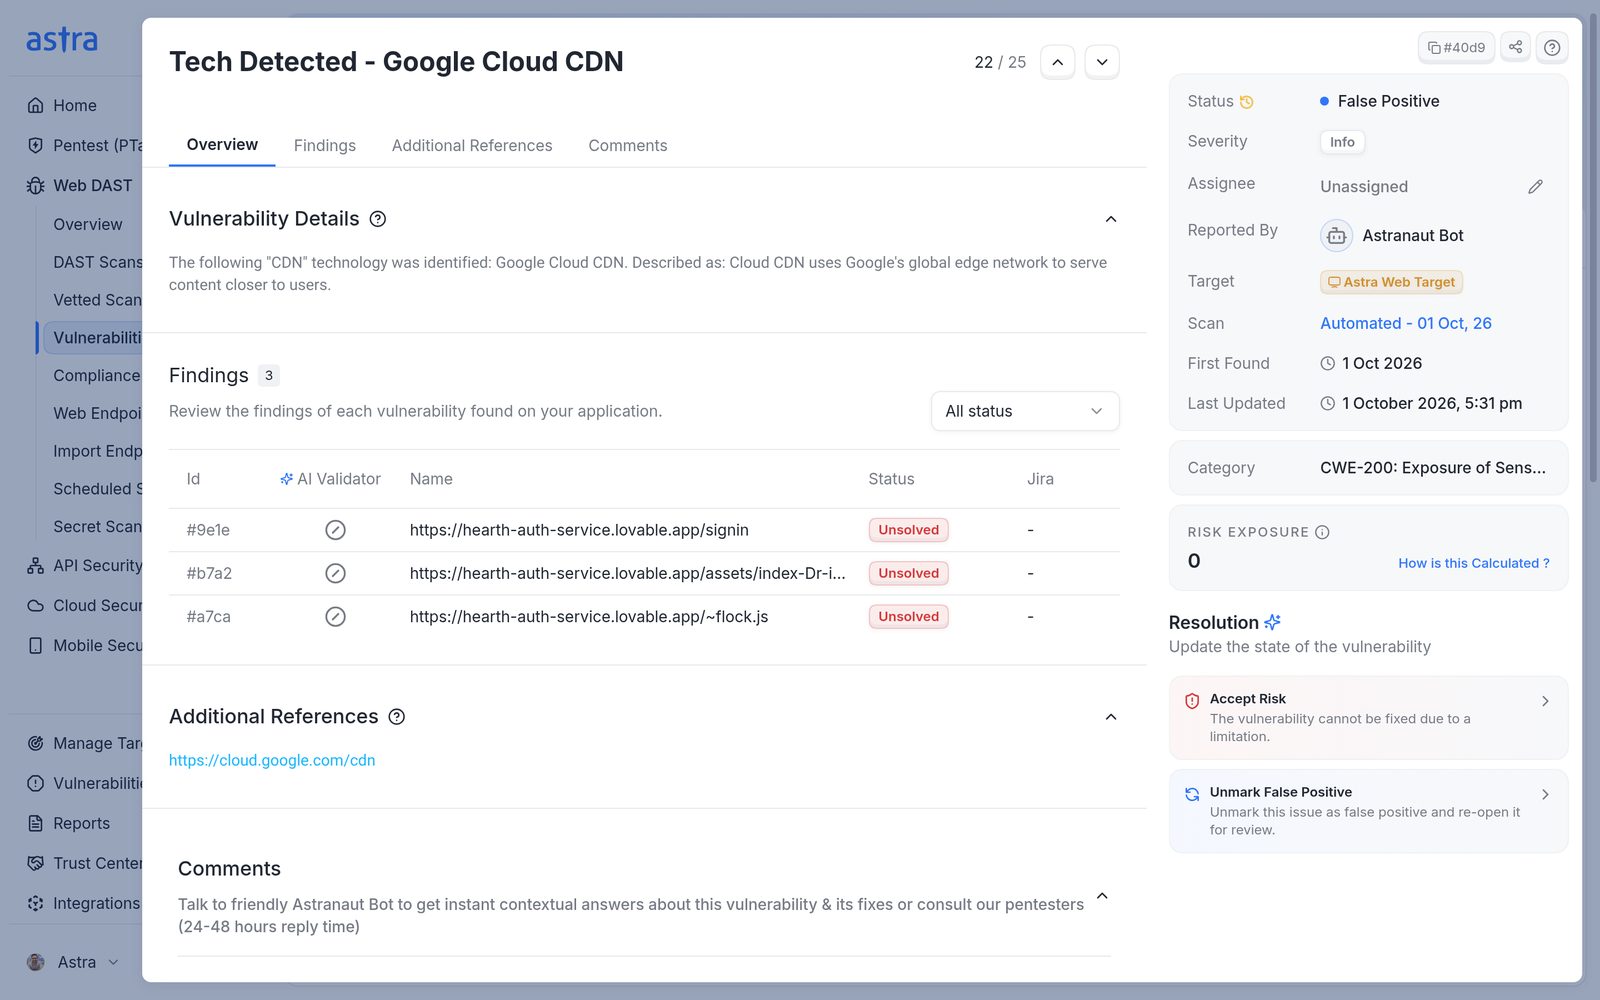
A False Positive vulnerability, with Accept Risk and Unmark False Positive.
Note
Some organizations limit false positive changes to admins. In that case, only company and workspace admins can mark, unmark or move false positives.
Accept a risk
Use this when the organization knows about a real vulnerability and has decided to keep it, for example because of a technical limitation.
- Open the vulnerability and click Accept Risk.
- Explain why in the reason. It's optional, except when moving a false positive to accepted risk.
- Choose whether to Exclude from future scans, then click Accept Risk.
The status changes to Accepted Risk and the message Risk accepted confirms it. Later, it can be sent for review with Mark Ready for Review or reopened with Reject Fix.
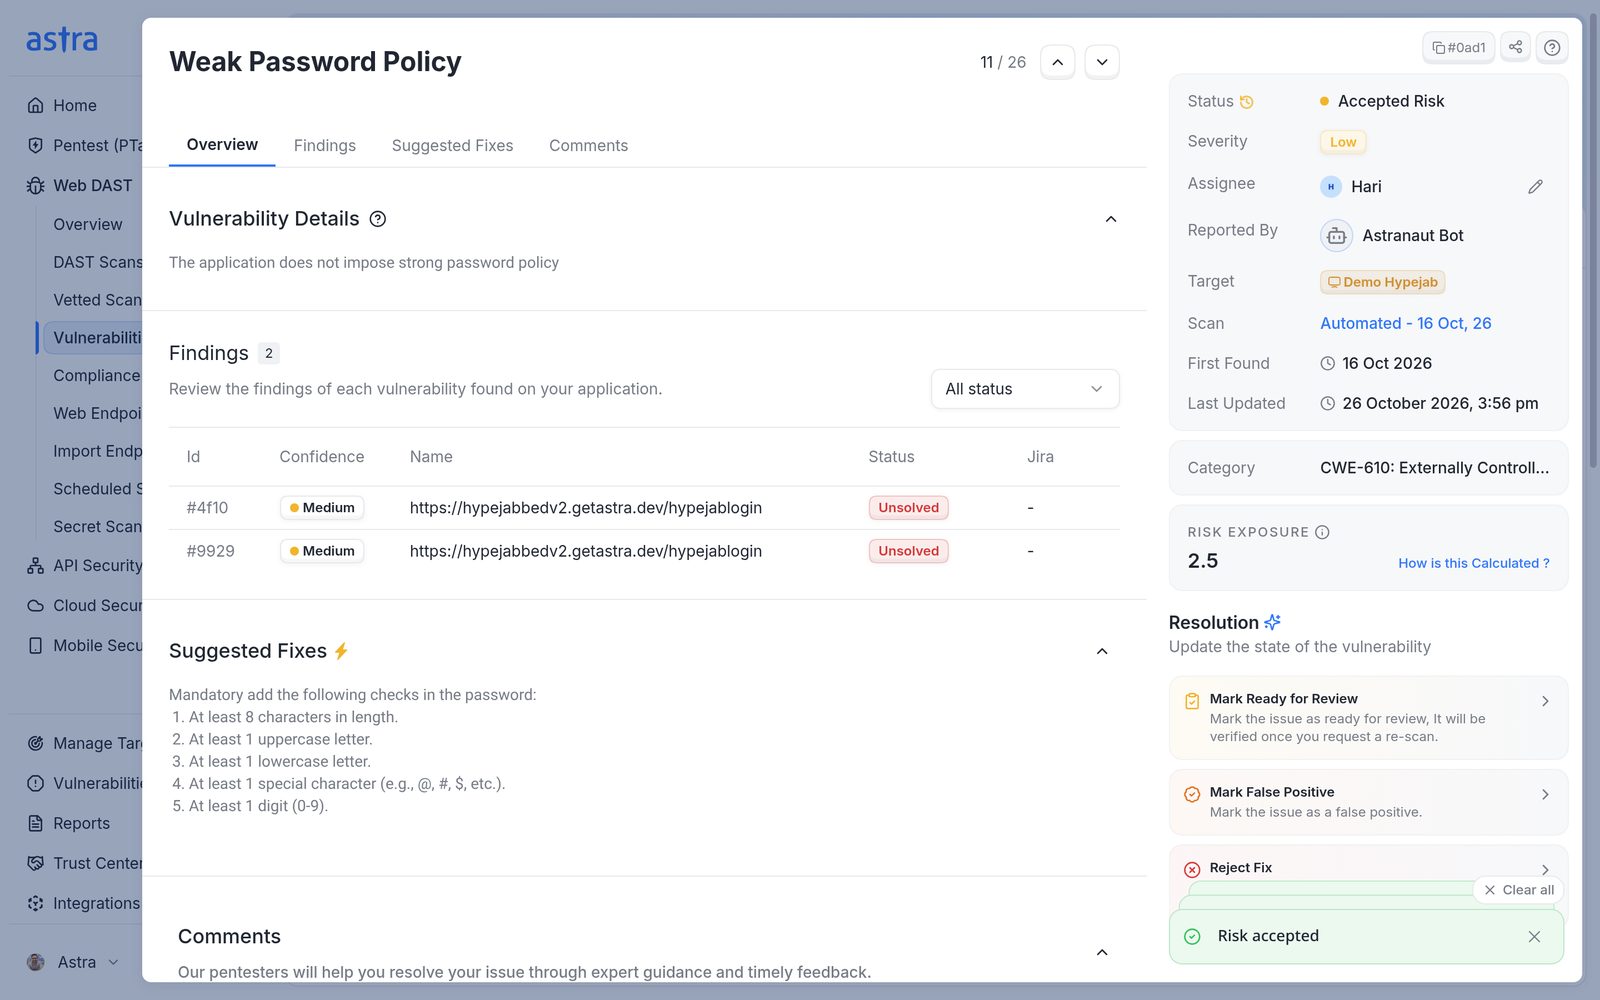
A vulnerability after Accept Risk, with the status Accepted Risk.
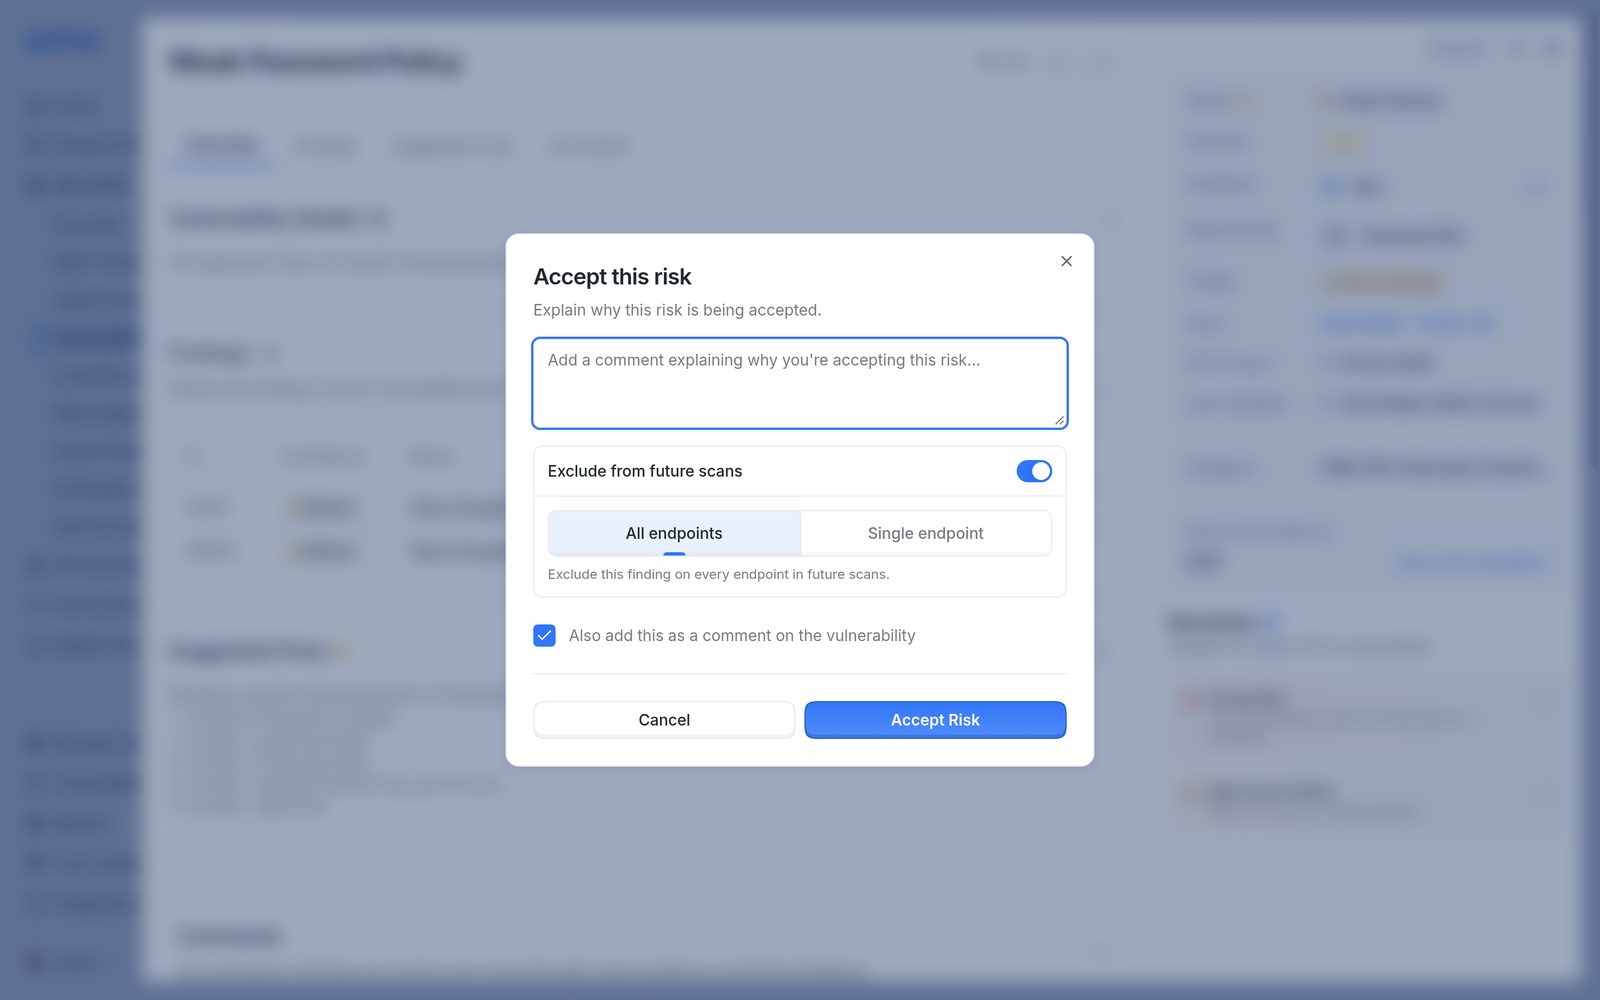
The Accept this risk dialog, with the reason and Exclude from future scans.
Exclude a finding from future scans
Exclude from future scans is in both dialogs and is switched on by default. It stops later automated scans from reporting the same finding.
- All endpoints: the finding is excluded on every endpoint.
- Single endpoint: the finding is excluded only at the URL entered, for example
https://www.example.com/path. Other endpoints can still be flagged.
Switch it off to change the status without affecting future scans. Exclusions are listed per target under Excluded Scan Rules in the target's settings, where they can be removed.
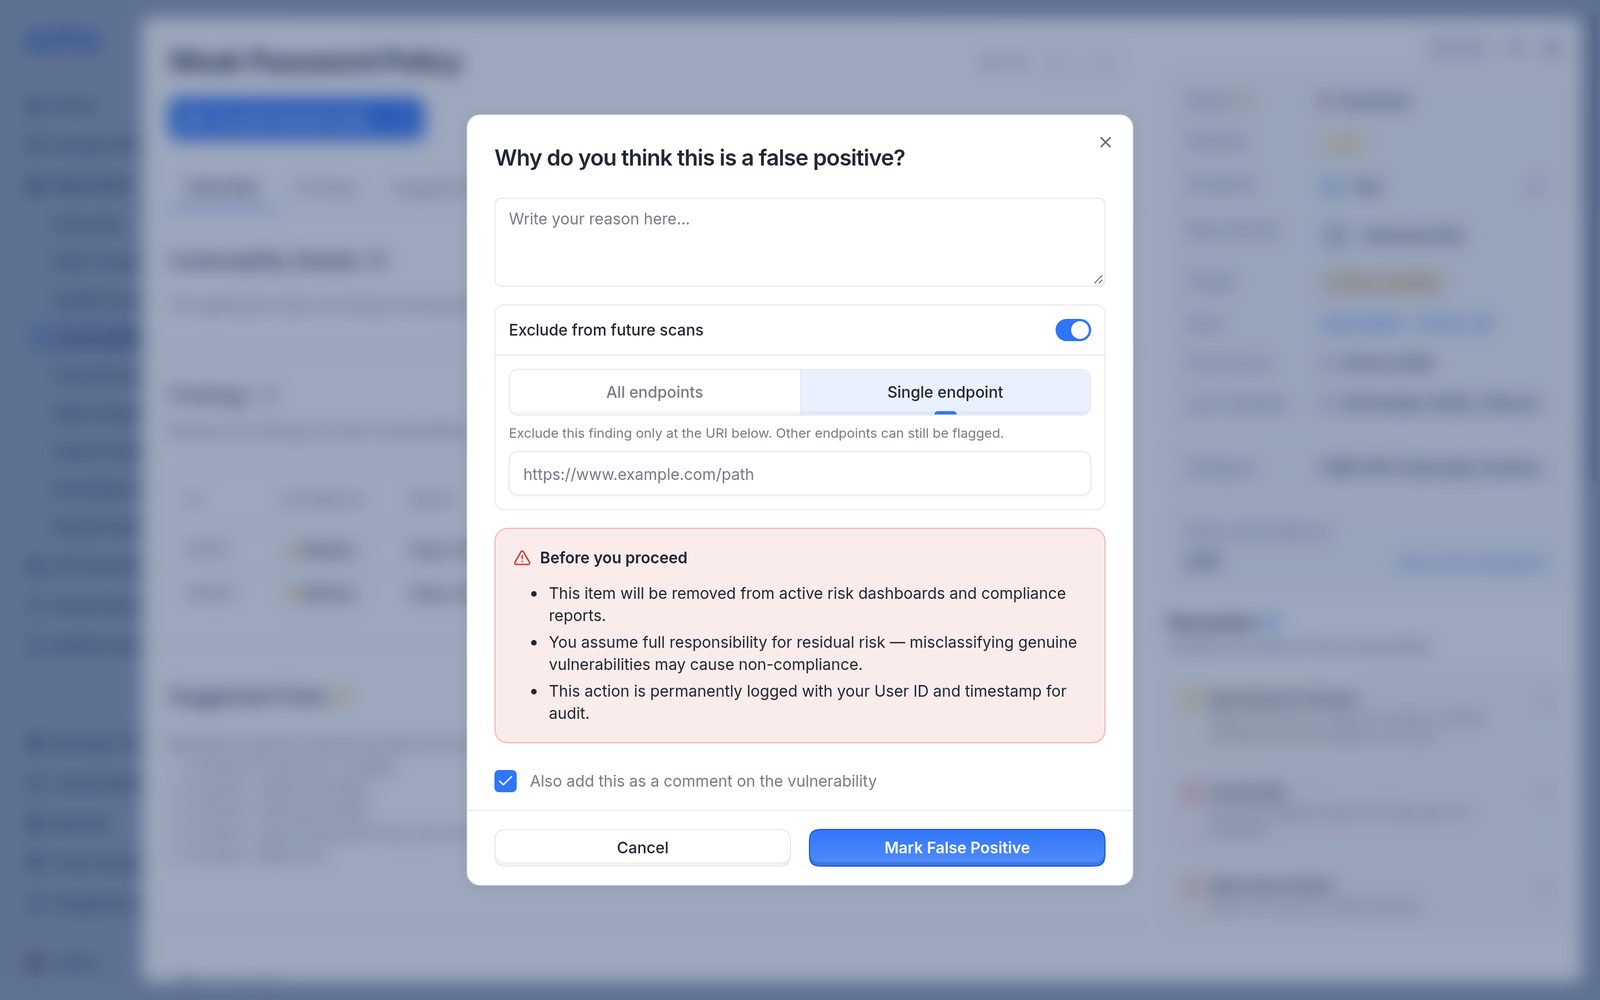
Single endpoint selected, with the URL to exclude.
FAQ
Which option should be chosen under "Exclude from future scans" when marking a false positive?
Choose All endpoints if the finding is wrong everywhere it appears. Choose Single endpoint and enter the URL if it's wrong only at that address. Switch the option off to keep scanning for it.