How to request expert vetting for automated scans
Last updated: November 12, 2026
Vetting is an expert review of an automated scan. Astra's pentesters check the reported vulnerabilities, confirm the real risks and remove edge-case false positives. You get a vetted report with confirmed findings and remediation advice.
Availability
Vetting is included in the Annual Scanner Plan. Vetting requests are counted per target, and each scan you send for vetting uses one request.
Which scans can be vetted
You can request vetting for completed automated scans on web, API and cloud targets. You can't request vetting for:
static analysis scans
Automated Crawling (Web) runs
scans that are still running, failed or were cancelled
scans that already have a vetting request
Request vetting for one or more scans
Open Vetted Scans under Web DAST, API Security or Cloud Security.
Click Request Vetting. Astra opens the list of your scans.
In the Scan Completed section, select the scans you want vetted.
Click Request Vetting in the toolbar.
In Request Expert Vetting, check the scans and the number of vetting requests that will be used.
Click Request Vetting. The button shows how many scans you selected.
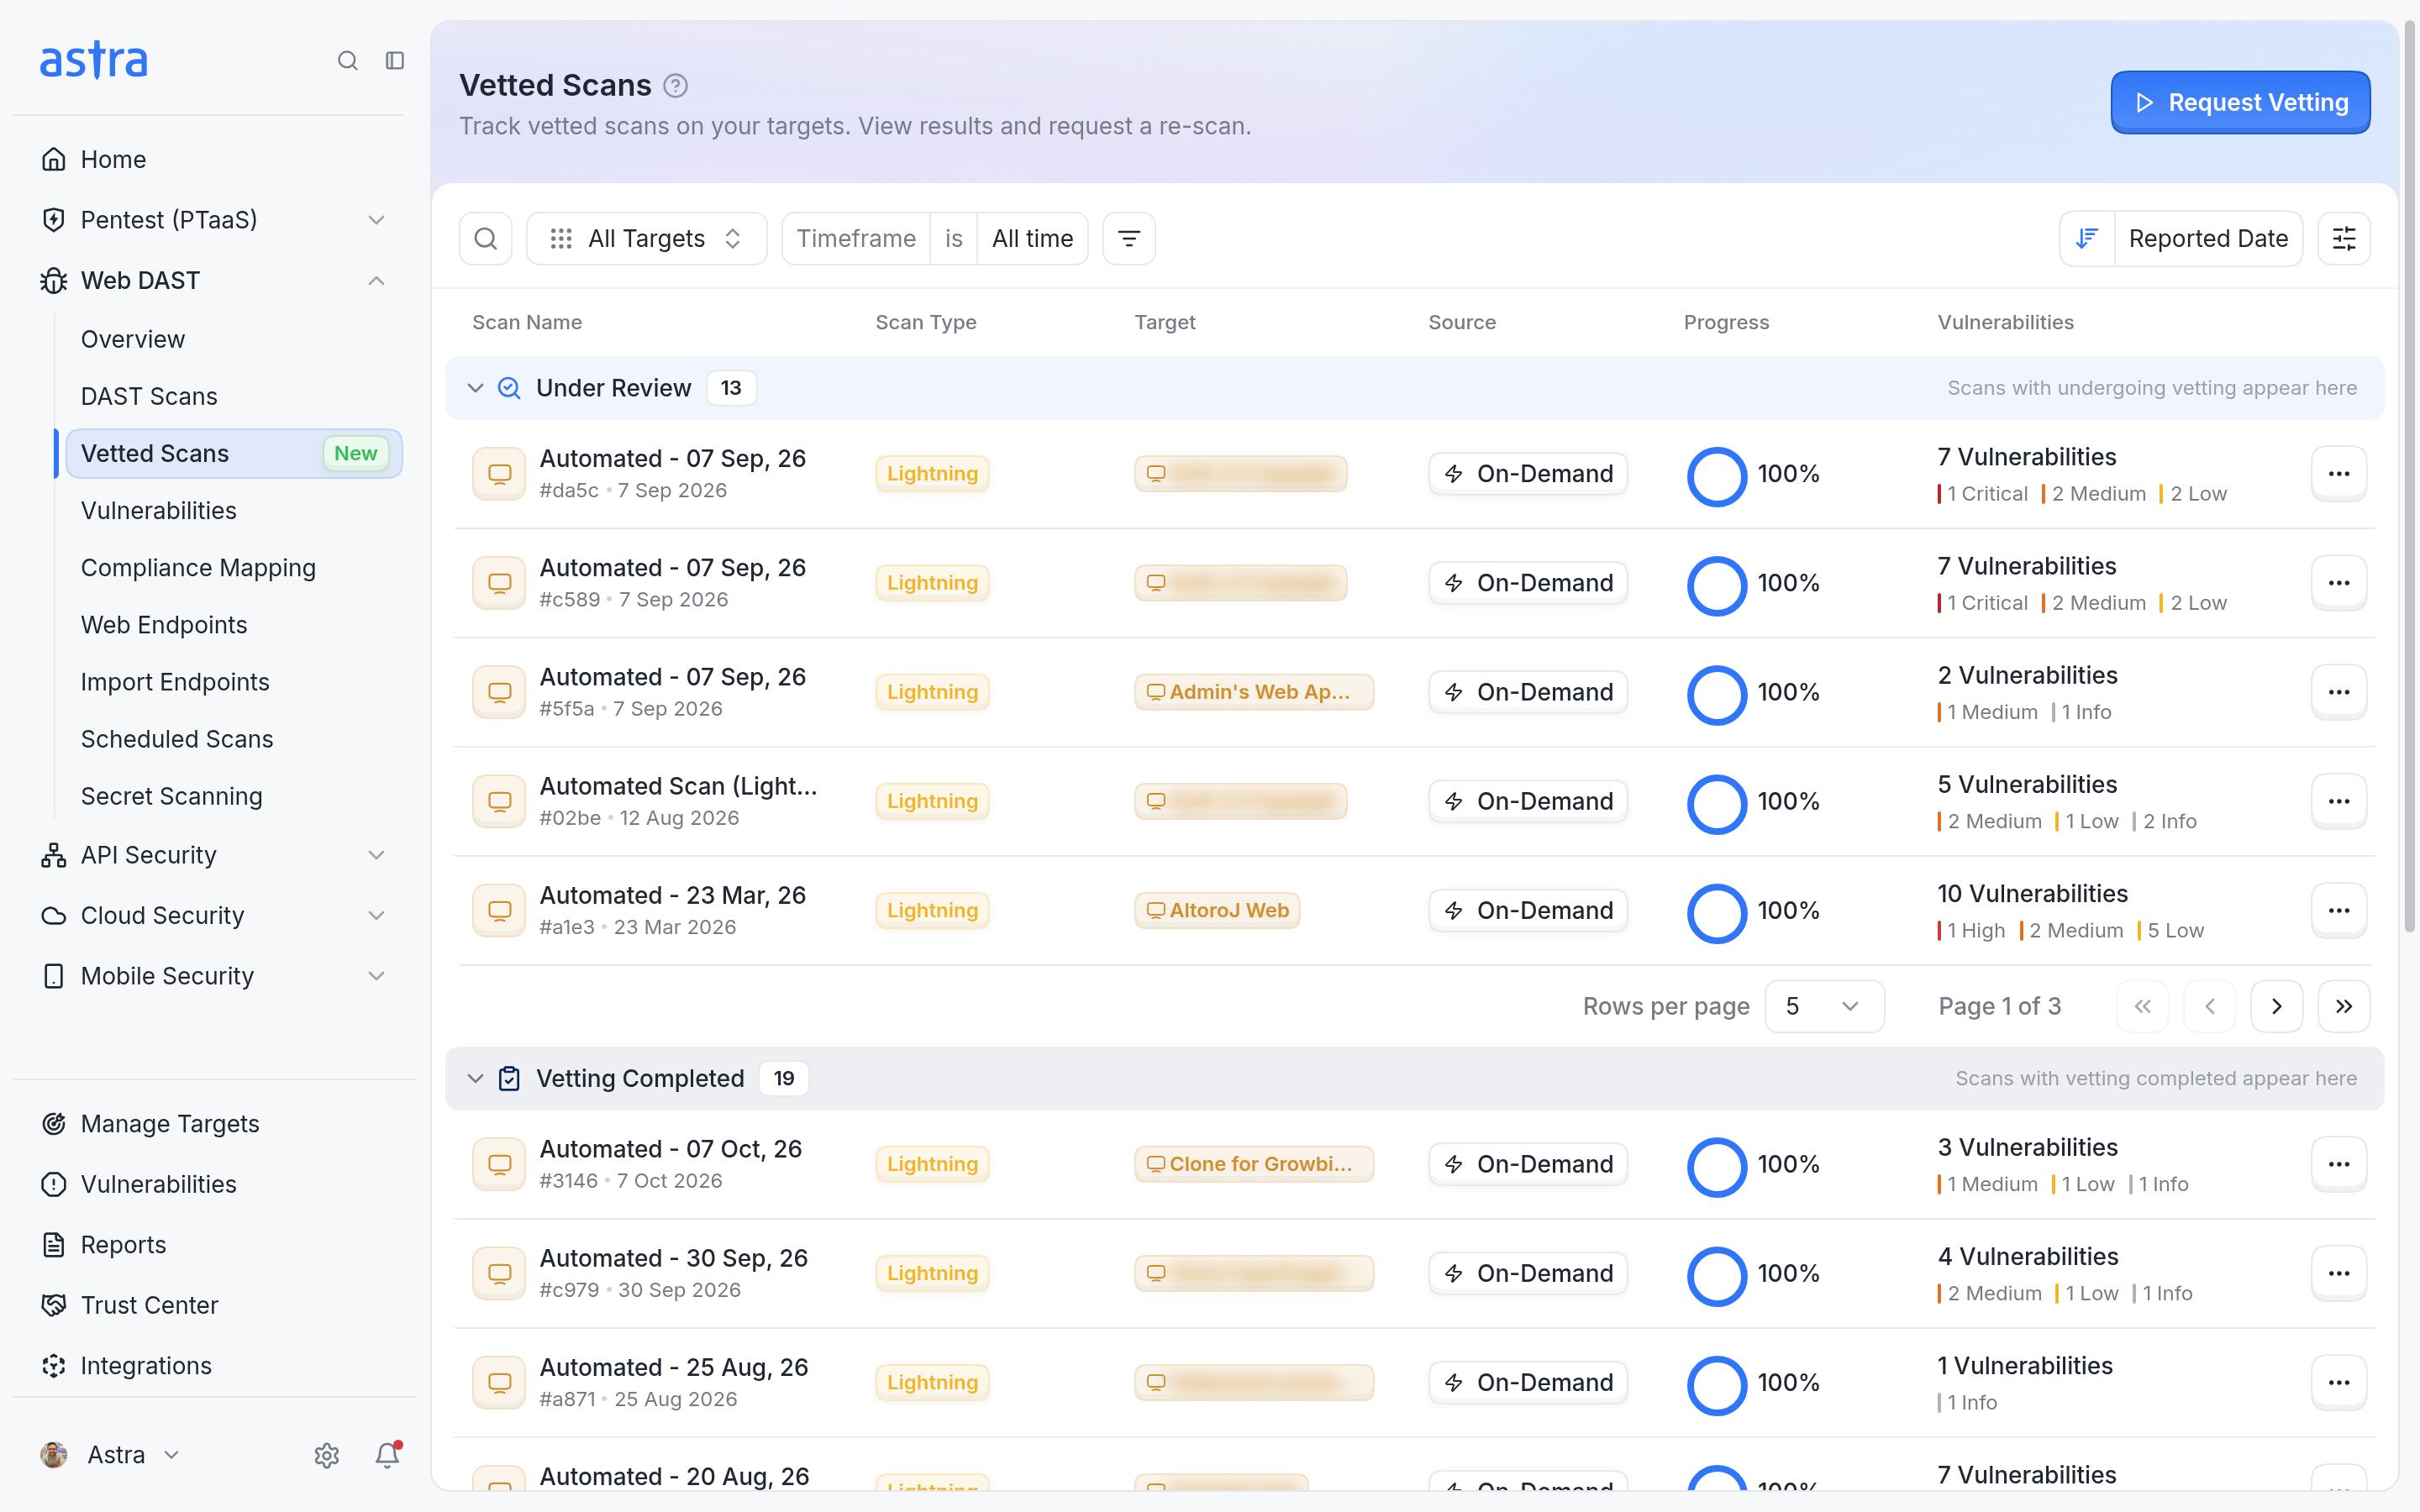
The Vetted Scans page lists scans sent for vetting. Request Vetting is at the top right.
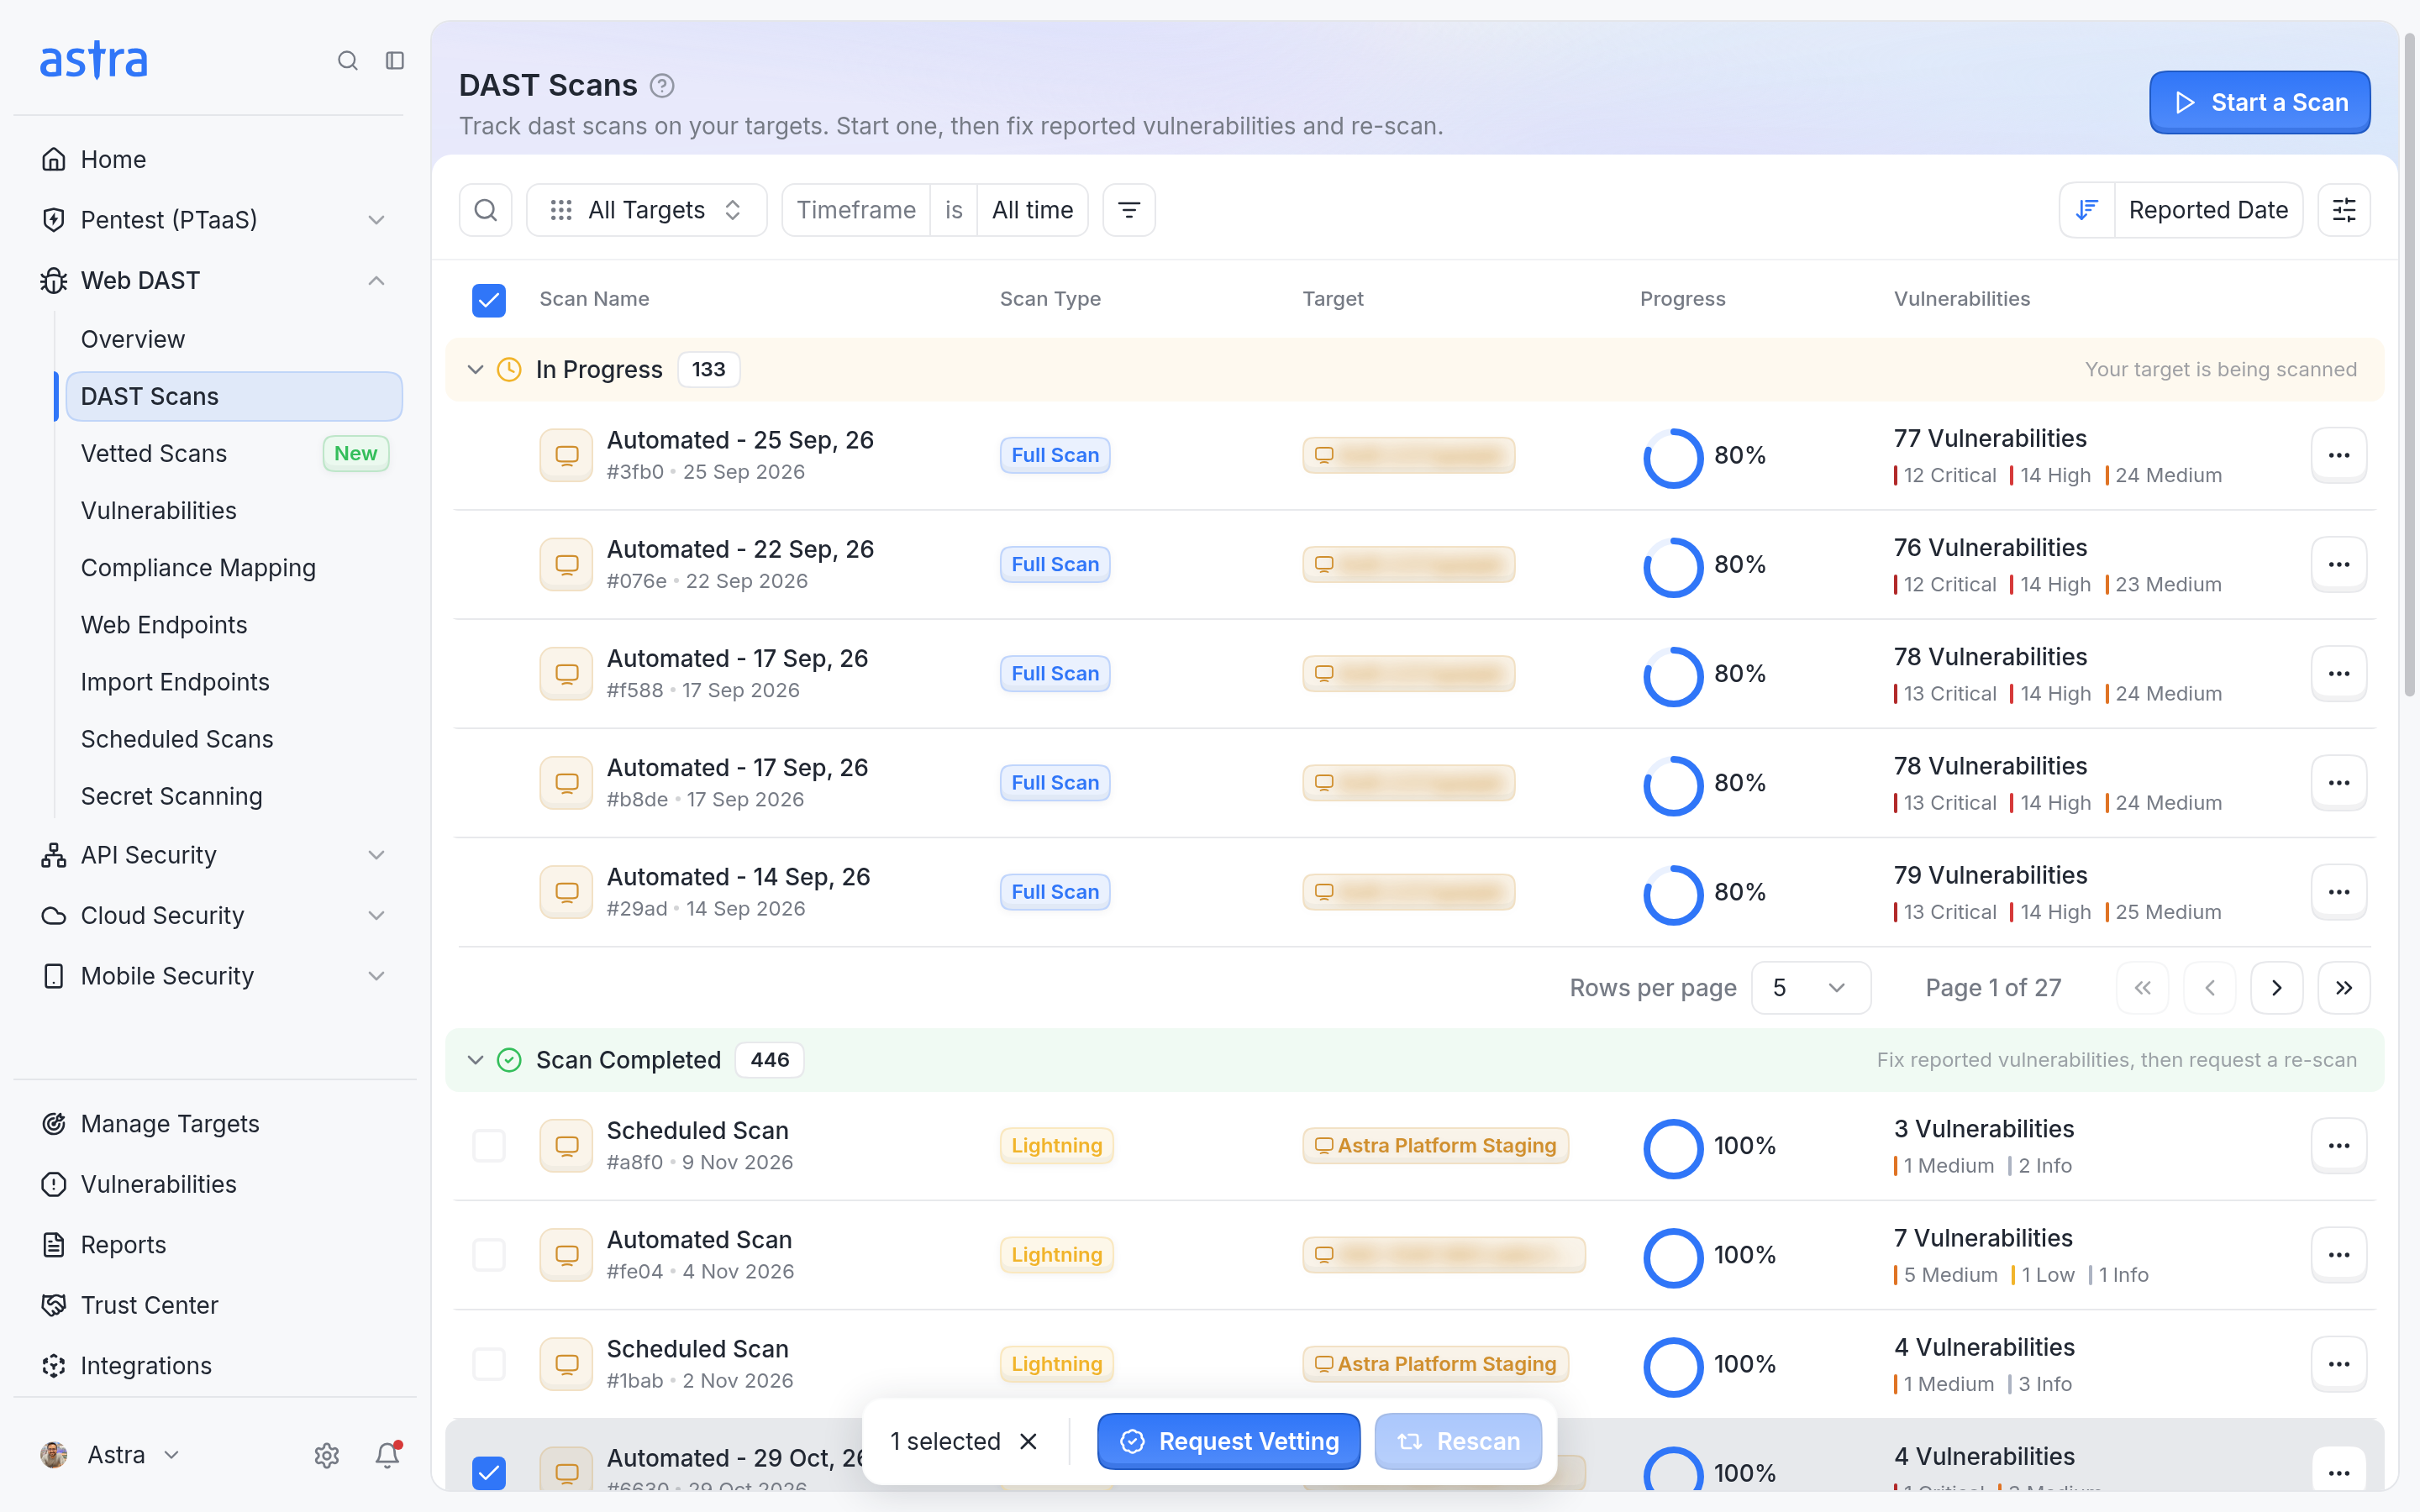
Select completed scans and click Request Vetting in the toolbar.
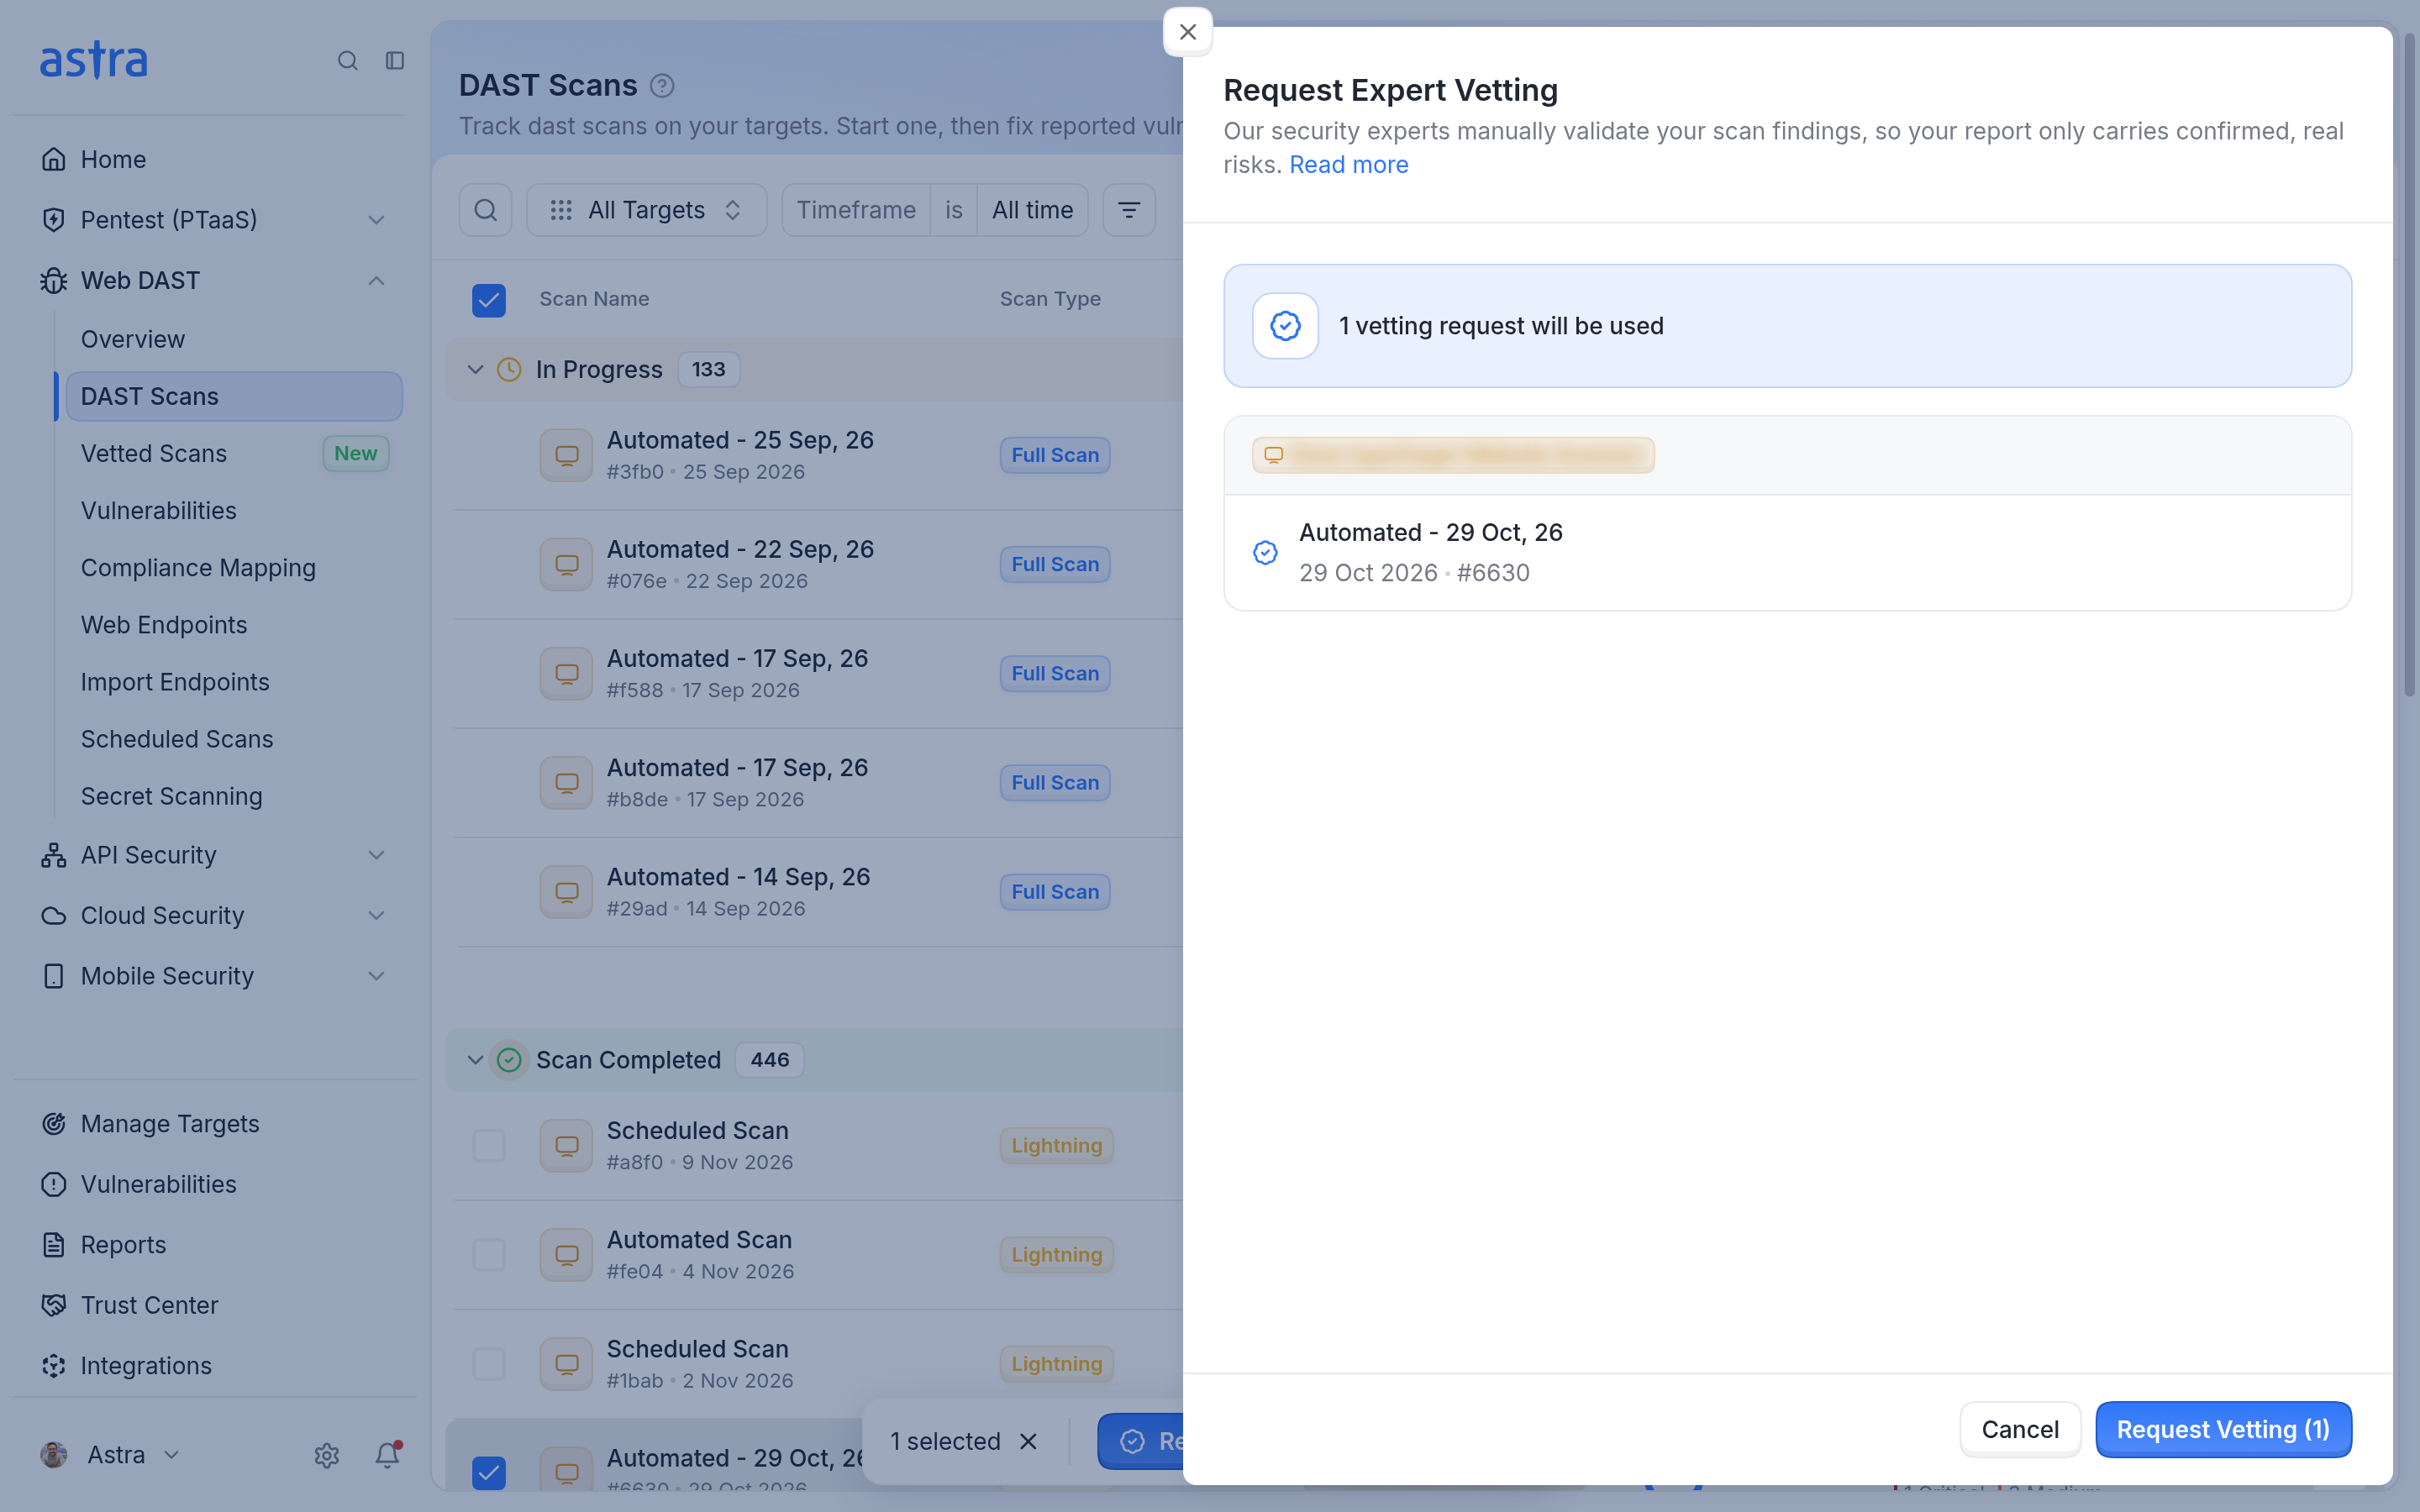
Request Expert Vetting shows how many vetting requests the scans will use.
When the request goes through, Astra shows "Vetting requested successfully". Click View Vetted Scans to follow the scans.
Track vetted scans
The Vetted Scans page lists every scan sent for vetting, with its target, progress and vulnerabilities. Open a scan to review the vetted findings. To retest fixes, request a rescan. Read more in How to request a rescan.
To see how vetting fits with the other scan types, read Scan types and expert vetting explained.
Why a scan can't be selected
Hover over a scan that can't be selected to see why. The messages include:
Message | What it means |
|---|---|
Vetting is available once the scan is completed | The scan is still running. |
Vetting is not available for cancelled scans | The scan was cancelled. |
Vetting is not available for failed scans | The scan failed. |
Vetting has already been requested for this scan | The scan is already sent for vetting. |
Vetting is included in the Annual Scanner Plan. Upgrade to unlock expert validation. | Your plan doesn't include vetting. |
Vetting is no longer available for this scan — the request window has expired. | The scan is too old to send for vetting. |
You've utilized your vetting requests. Contact support to increase your limit. | The target has no vetting requests left. |
FAQ
How do I request vetting for a cloud scan?
Open Cloud Security > Vetted Scans, click Request Vetting, select the completed cloud scan, and then click Request Vetting.
The scan says my vetting limit is reached. How do I get more vetting requests?
The message "You've utilized your vetting requests. Contact support to increase your limit." means the target's vetting requests are used up. Contact Astra support at help@getastra.com to increase the limit.