How to View False Positives for a Scan or Pentest
Last updated: September 14, 2026
When a finding is marked as a false positive, it is kept out of your main vulnerability list so you can focus on issues that need action. The finding is still saved with the scan or pentest - it is just hidden until you choose to show it.
A finding can be marked as a false positive by:
AI agents, during Hybrid or Auto assessments
Astra pentesters, during a manual pentest or when vetting scan results
You or your team, after reviewing a finding and confirming it is not a real issue
This article explains how to display those findings for a specific scan or pentest, and from the Vulnerabilities page.
Who Should Read This
This article is for developers, security engineers, and anyone reviewing scan or pentest results in the Astra dashboard.
Prerequisites
Before you start, make sure that:
You can sign in to the Astra dashboard.
The scan or pentest has finished reporting vulnerabilities.
At least one finding on that scan or pentest has been marked as a false positive. If none have been marked yet, the False Positive section will be empty after you enable it.
Instructions: How to View False Positives
Option 1: From a specific scan or pentest
Use this when you want to see false positives that belong to one assessment.
Open the Web DAST or Pentest section.
Open the scan or pentest you want to review.
Go to the Vulnerabilities tab.
Next to the search bar, click the filter icon.
Open Sections.
Select False Positive.
A False Positive section appears in the list. Click any finding to open its details, including why it was marked as a false positive.
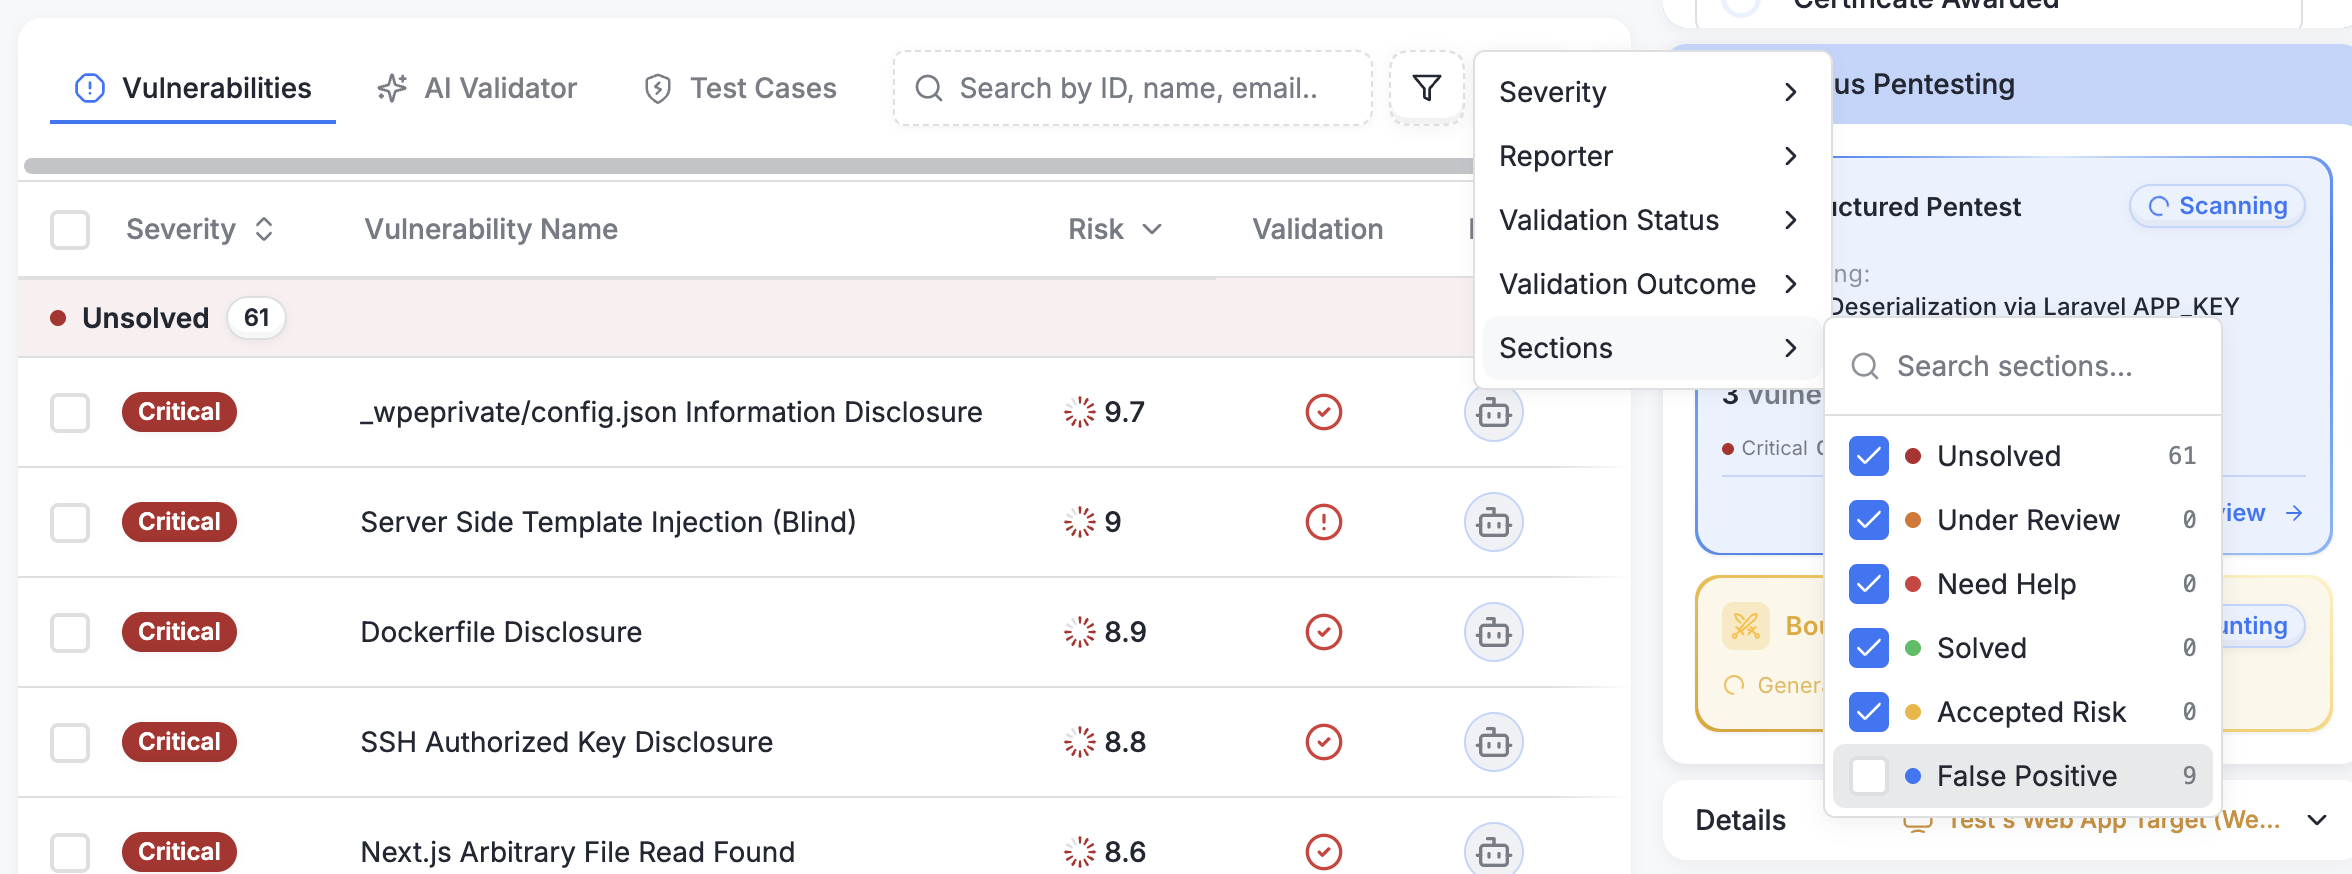
On the Vulnerabilities tab, open the filter icon, choose Sections, then select False Positive
Option 2: From the Vulnerabilities page
Use this to review false positives across scans and pentests for the selected target.
Open Vulnerabilities from the left sidebar.
Click Sections.
Select False Positive.
The Vulnerabilities page shows findings for the selected target across different scans or pentests.
Your section choice is remembered the next time you open the page. To hide the section again, open Sections and clear False Positive.
Who marks false positives?
Marked by | When it happens |
|---|---|
AI agents | During Hybrid and Auto assessments, when a finding is determined not to be a valid issue |
Astra pentesters | During a manual pentest, or when vetting automated scan results |
Your team | When you mark a finding as a false positive from the vulnerability details panel |
To mark a finding yourself, see 📄 How to Mark and Manage False Positives in Your Scan Results
Best Practices
Review the False Positive section after each Hybrid or Auto assessment so you know what was filtered out of the main list.
Open a finding if you disagree with the classification. Add a comment on the vulnerability, or contact Astra Support.
If you mark a finding yourself, include a clear reason so your team has context later.
FAQ
I enabled False Positive, but I do not see any findings.
No findings on this scan or pentest have been marked as a false positive yet. The section only lists findings that already have that status.
Why are false positives hidden until I enable the section?
They are kept out of the main list so you can focus on actionable issues. You can show them at any time from Sections.
Does showing this section change reports or future scans?
No. Enabling the section only changes what is visible in the dashboard. Marking a finding as a false positive — and optionally excluding it from future scans — is a separate action.