How to scan applications with restricted access
Last updated: May 26, 2025
When running a vulnerability scan on a target with restricted access - you might have to update your security rules to allow our scanners access. Such restrictions are commonly seen on staging, or testing environments.
| If you need assistance with such configurations - create a support ticket or reach out to your account manager
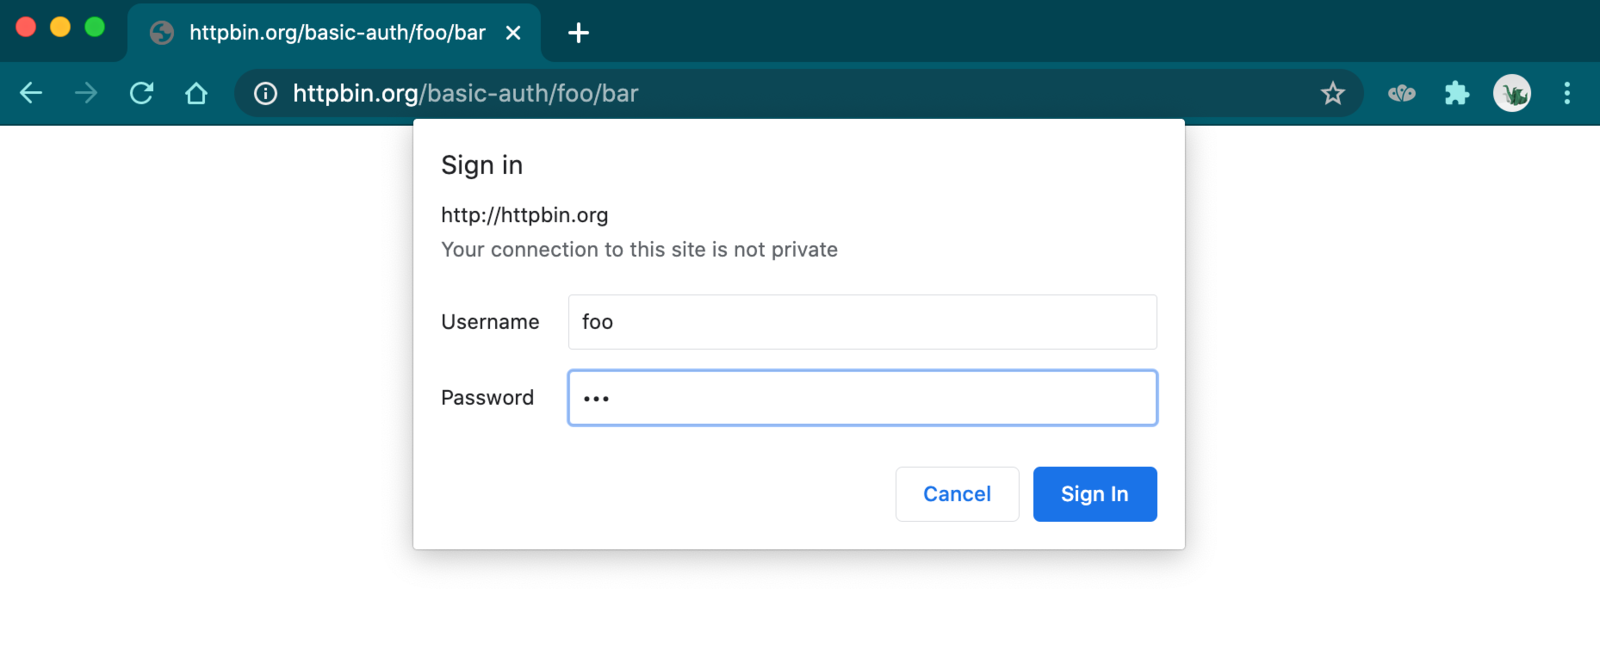
My target is secured with HTTP Basic Authentication.
If your target is secured with HTTP Basic Authentication, you can pass the username & password in the target URL. It can be passed in the following format:
https://username:password@example.com/
For eg: If the username is john and the password is test1234 then the final target URL should be https://john:test1234@example.com
If you do not see an option to update the target URL, you can create a support ticket with the final target URL.
My target is only accessible from certain IP addresses.
| We've added IP-based whitelisting. This helps improve our scanning capabilities by allowing us to bypass captcha/2fa on many websites. It's now much simpler to set up our scanner on popular firewalls.
You have the option to whitelist these scanner IPs in order to conduct scans within a restricted environment. All requests originating from our automated scanner will exclusively use the following set of static IPs, as listed here
Additionally, you can implement an exclusion in your security rule to disable the access restrictions for a secret HTTP header instead.
Visit the Settings page for your target, and click on Configure Scanner
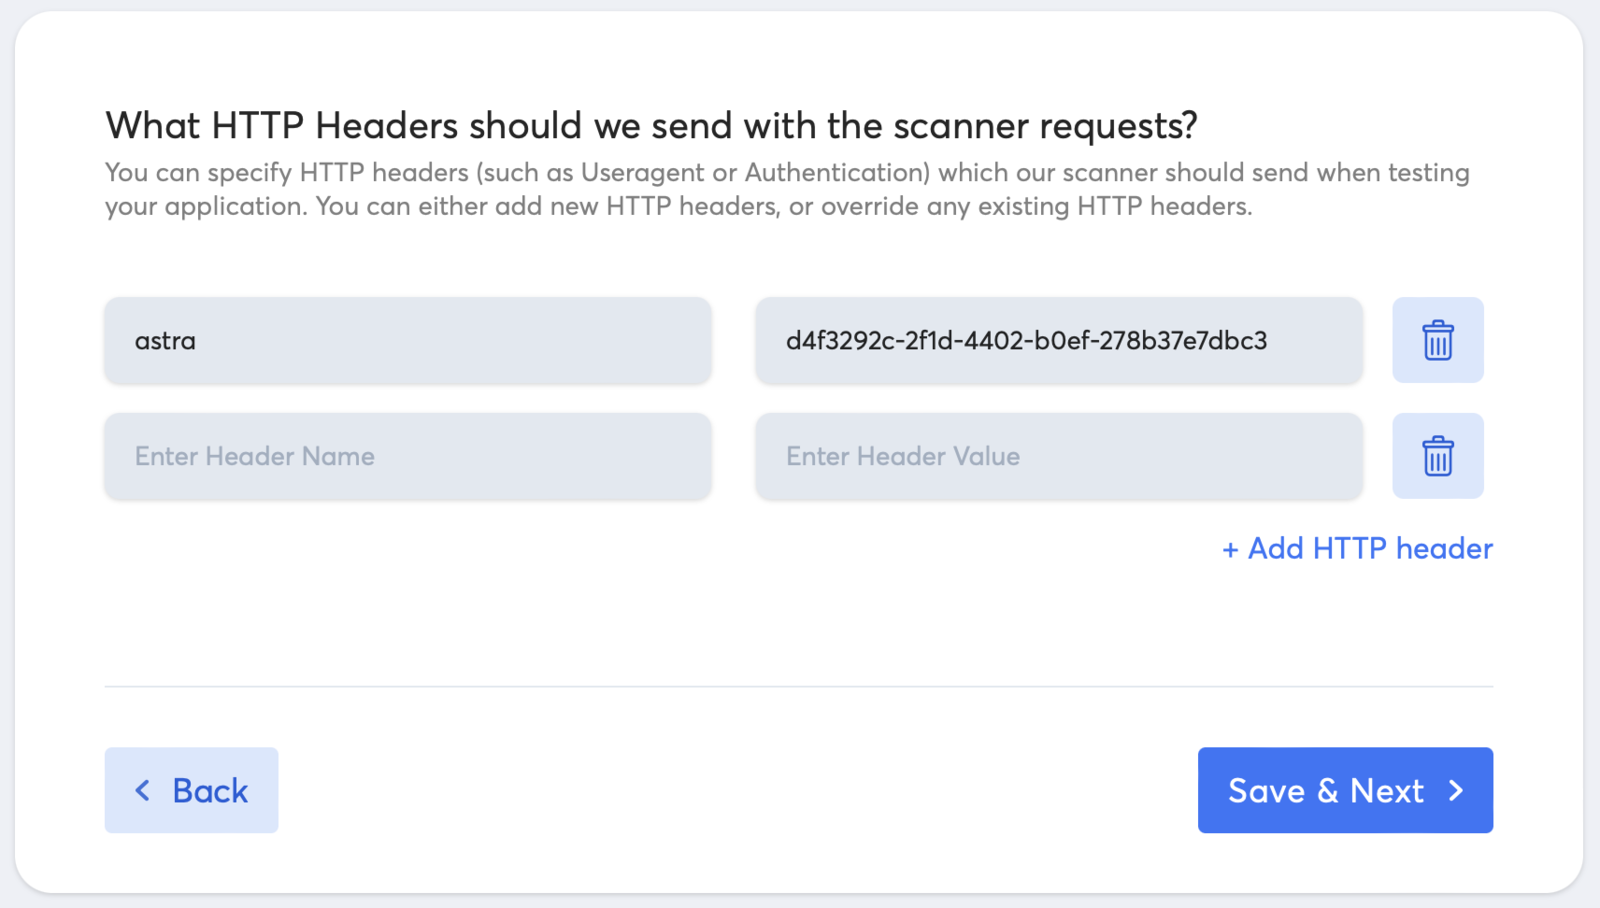
Select Add HTTP headers in the left sidebar
Now click on + Add HTTP header to enter a new and unique HTTP request header
Enter
astraas the Header Name and enter a secure token such as a UUID (https://guidgenerator.com/) for the Header Value as shown below. From the next vulnerability scan onwards, all HTTP Requests our scanner sends to the target will contain the said HTTP header.
Update the security rule in your target to allow all HTTP requests which contain the HTTP header you have just created
Example of NGINX configuration
http {


  # installed for getastra.com # DAST checking

  map $http_astra $authentication {

    default "Restricted Access";

    "" "off";

  }


  server {

    # ...


    satisfy any;

    auth_basic           $authentication;

    auth_basic_user_file /etc/nginx/.htpasswd;


    allow nnn.nnn.nnn.nnn;


    # ...

  }

}
You can verify the same by making a cURL request with the said header:
curl -H "Accept: text/html" -H "astra: " -X GET https://HOSTNAME
If the configuration is implemented correctly, you should be able to access the target and a password or block page should not be visible.