Overview : Team management
Last updated: June 8, 2026
Summary
The Team Settings page is an essential part of your workspace settings that allows you to manage your teams efficiently. From this page, you can create new teams, add or remove team members, assign teams to specific targets, and delete teams.
This setting is part of your workspace settings, meaning you must first select a workspace to view and manage teams specific to that workspace
Who Should Read This
Security leads and workspace admins use this page to organize their teams around specific targets. It is also useful for project managers who need to control which team members have access to particular scan results or assets.
Key Functions
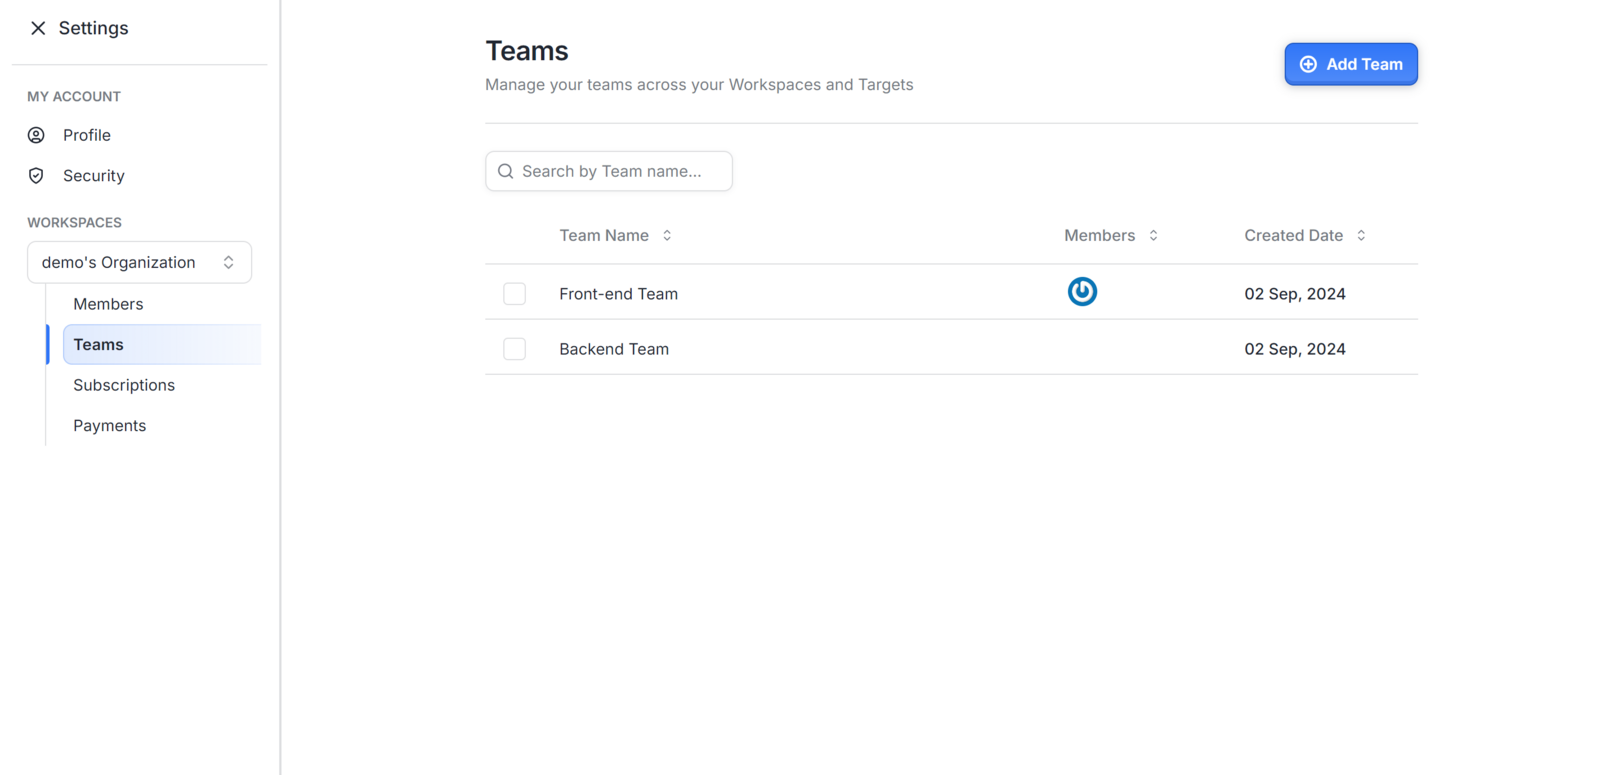
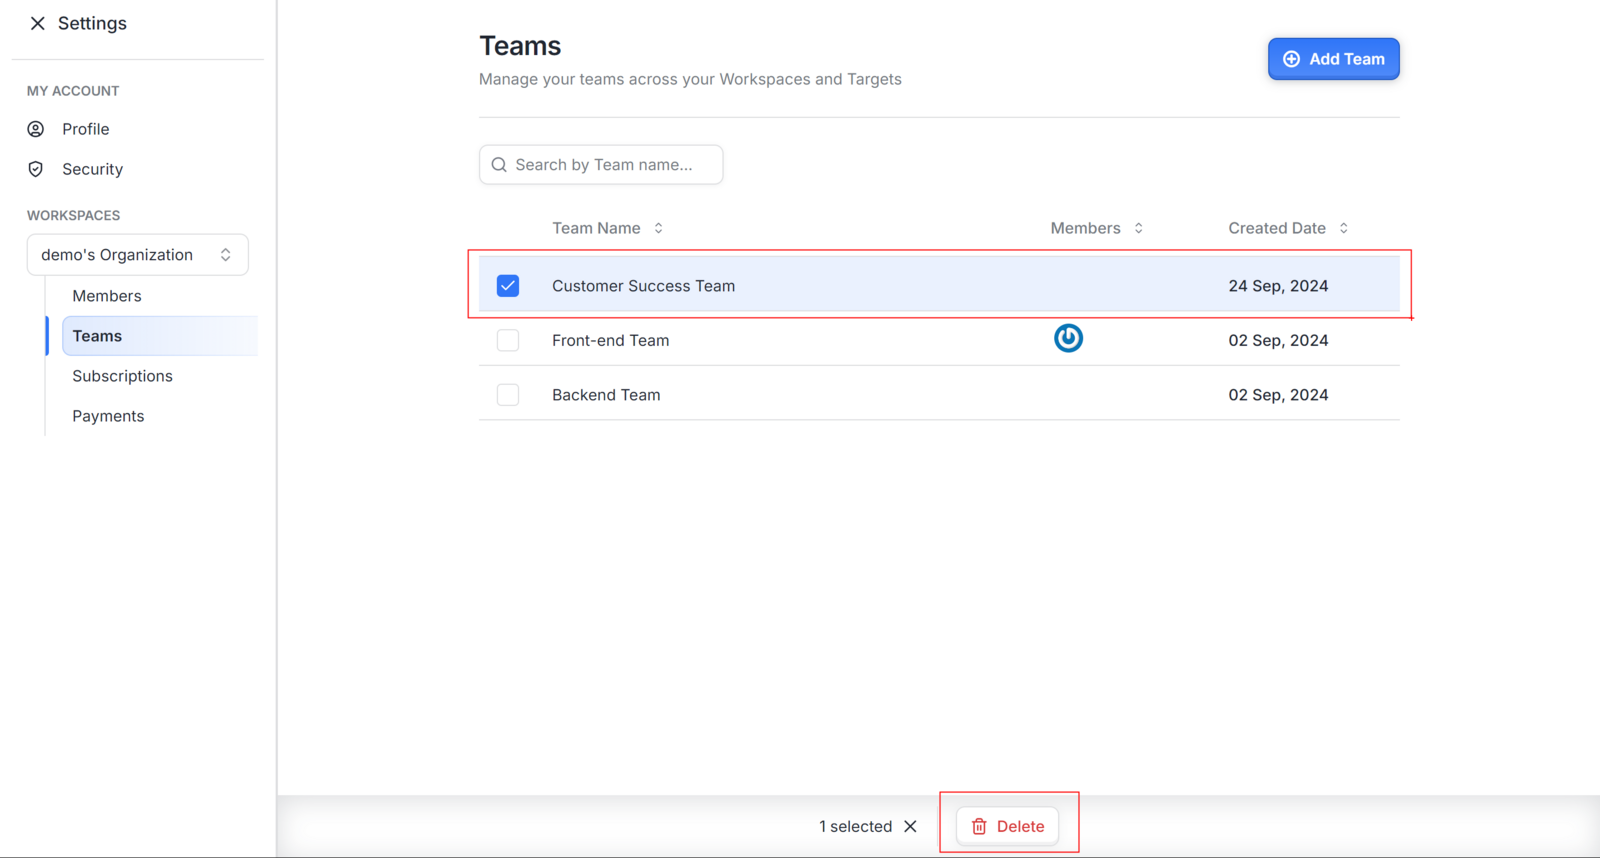
The Teams table is the central element of this page. It shows each team's name, the number of members in it, and the date it was created. You can select multiple rows using checkboxes to delete several teams at once.
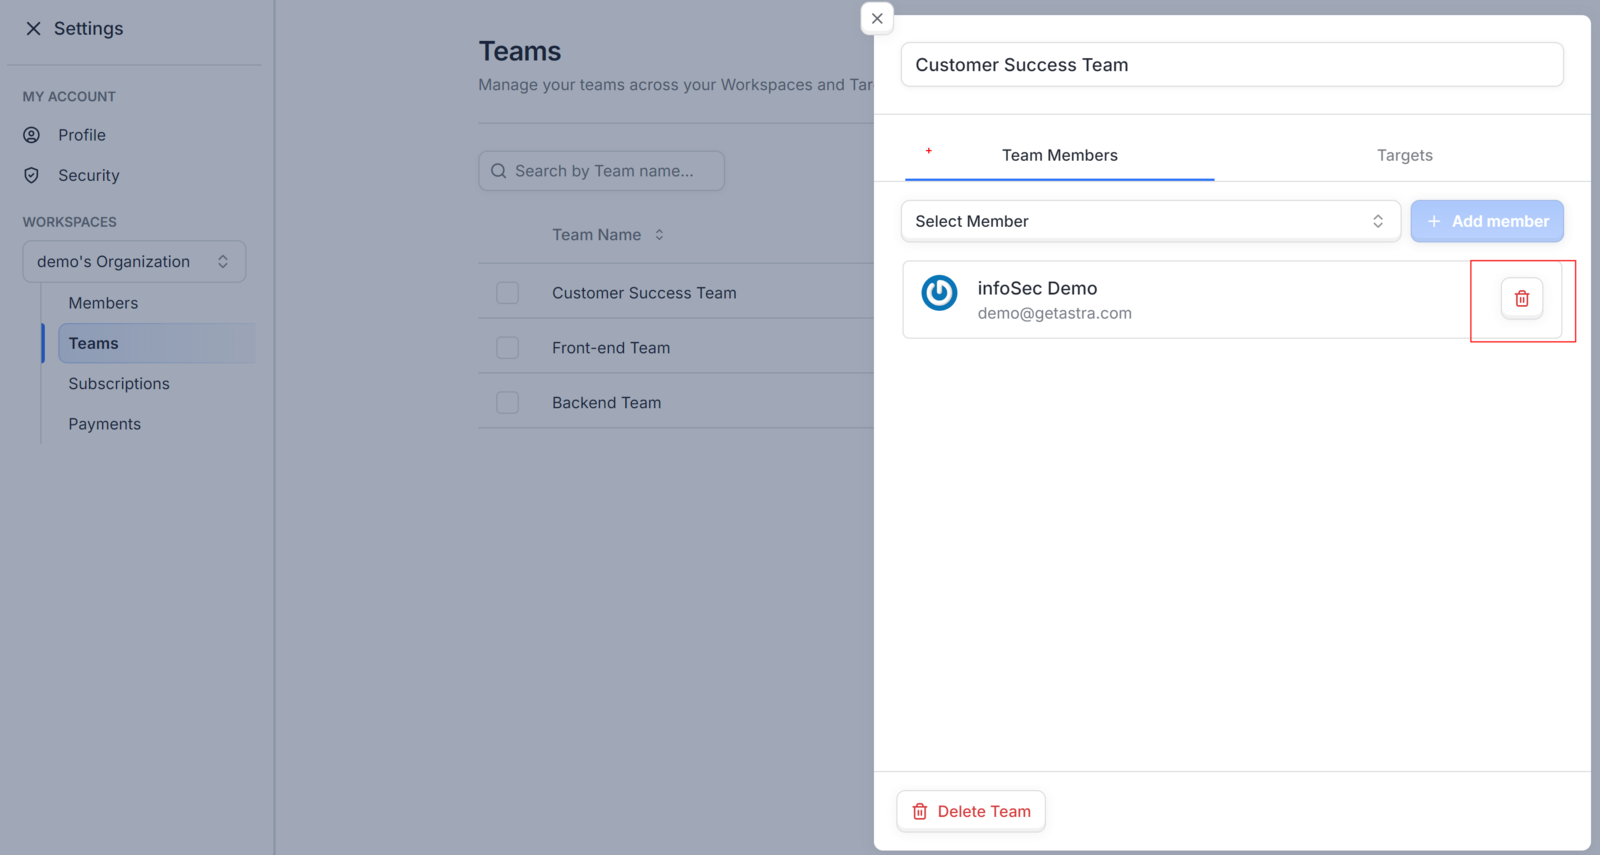
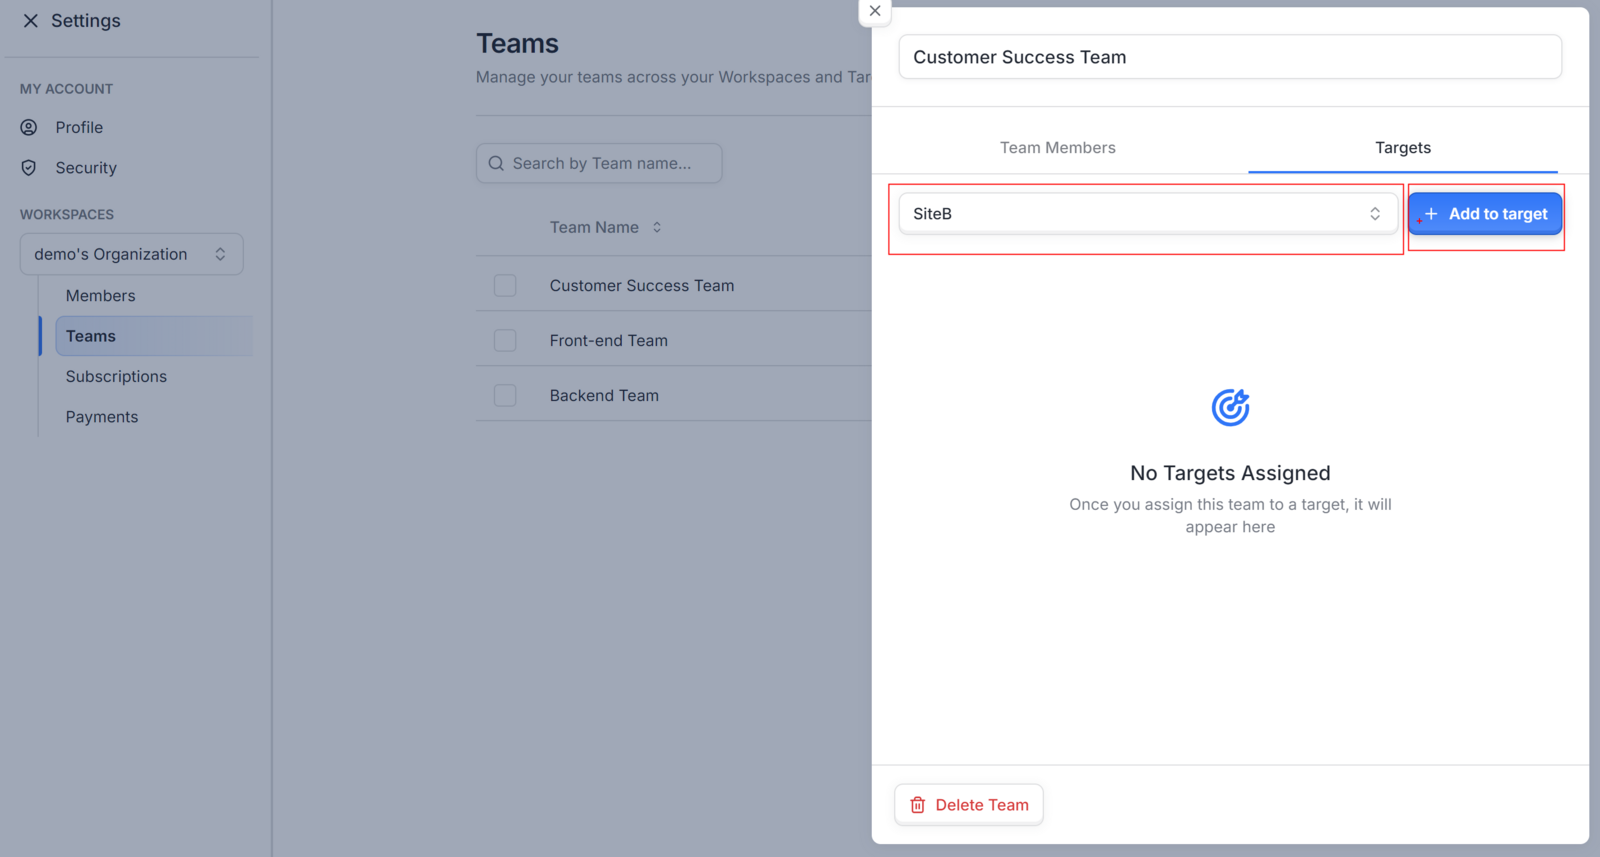
The Edit Team side sheet opens when you click any team row. It has two tabs. The Team Members tab lets you add or remove individual members. The Targets tab lets you link the team to one or more scan targets.
Team Name: The name of the team.
**Members: **The number of members in the team.
**Created Date: **The date when the team was created.
Additionally, users can perform bulk team deletions using the checkboxes available in the table.
Available Actions
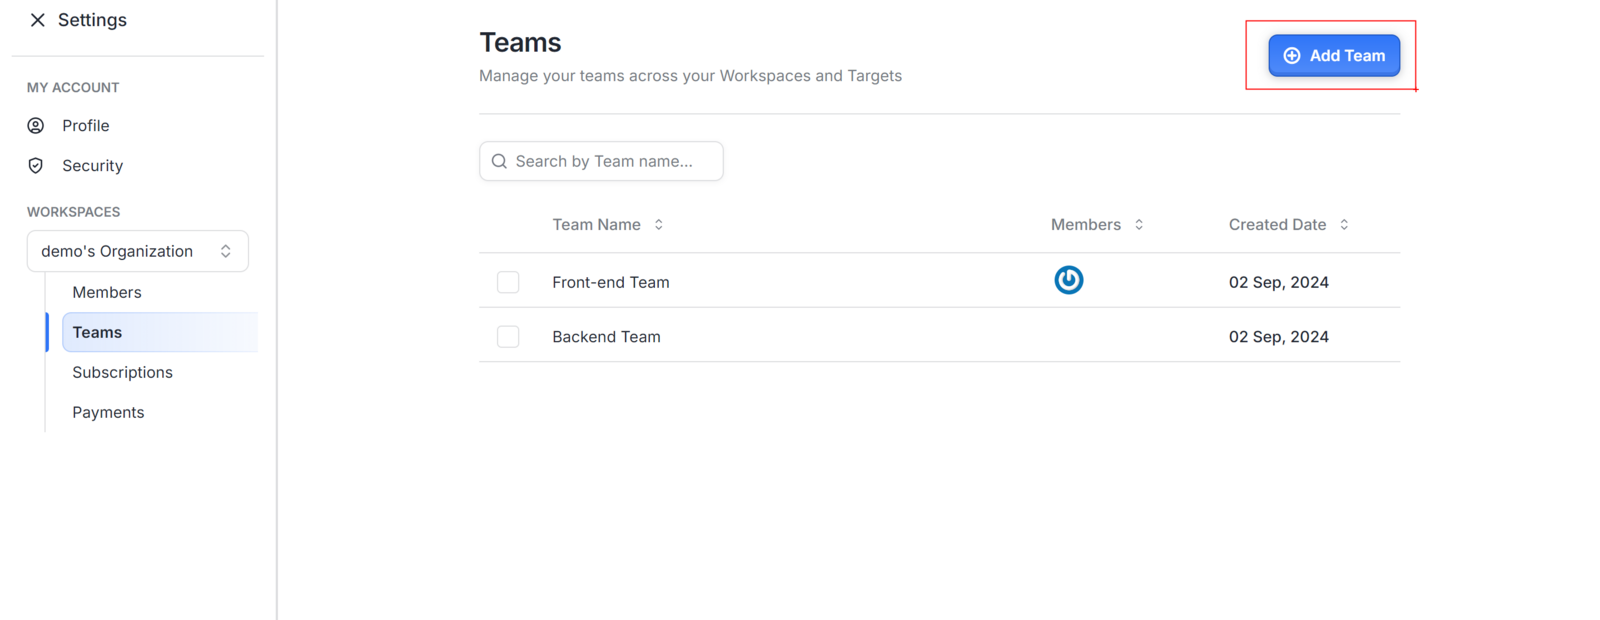
From the Teams table, you can click Add Team at the top right to create a new team. Clicking any existing team row opens the Edit Team side sheet where you can manage members and target assignments. Checkboxes on each row enable bulk deletion of teams you no longer need.
Creating a Team
Open Settings page from the Dashboard
Navigate to the Teams section within your workspace settings, then click the Add Team button located at the top right.
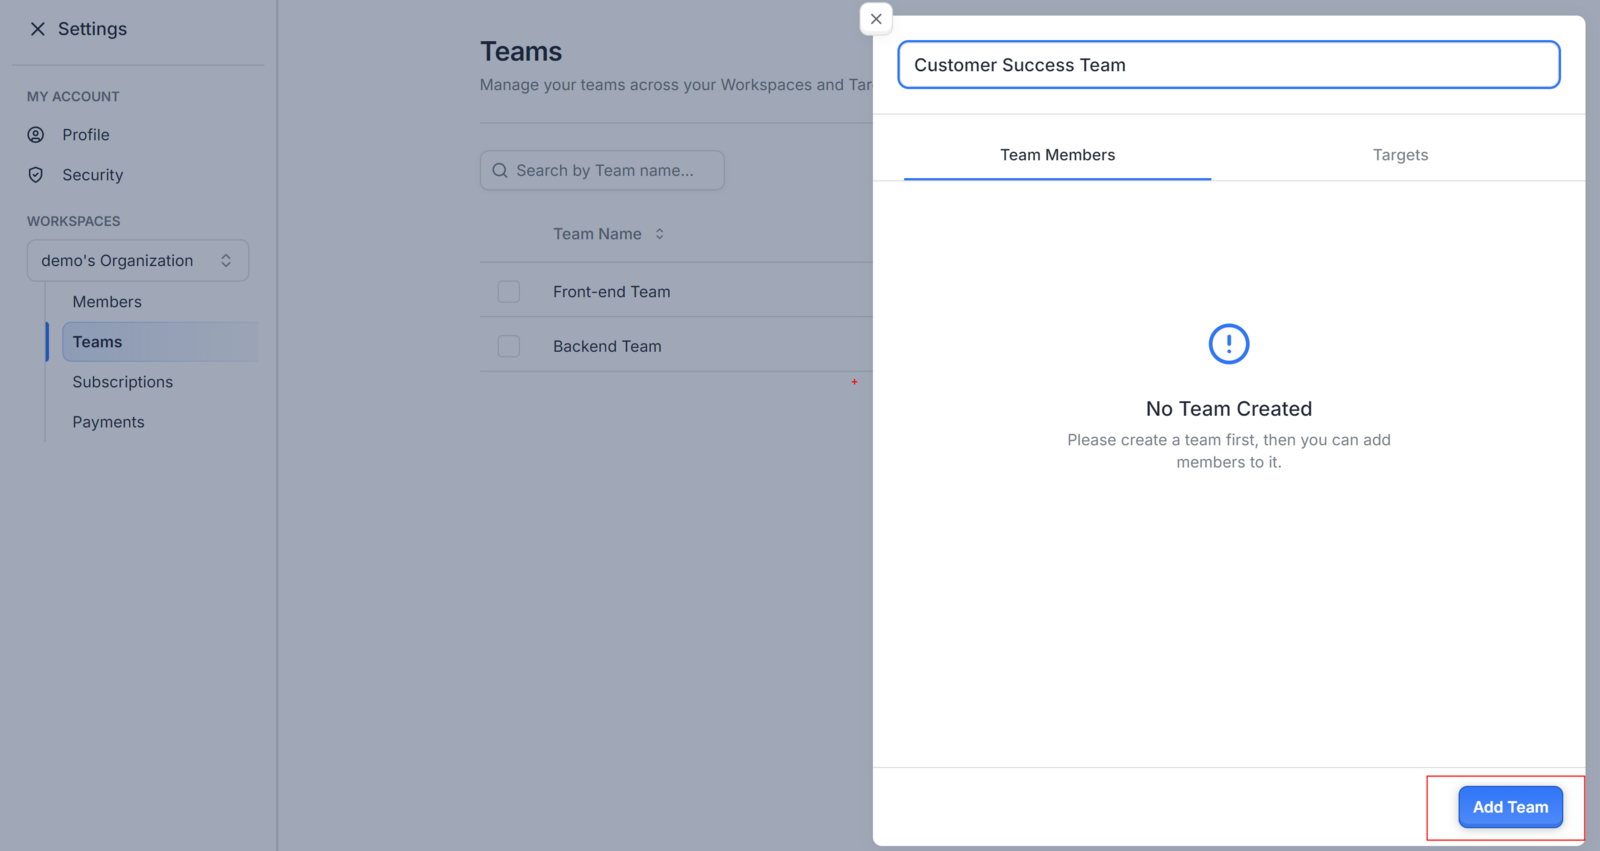
A side sheet will appear on the right side of your screen. In the side sheet, enter the desired name for your new team and click on Add Team
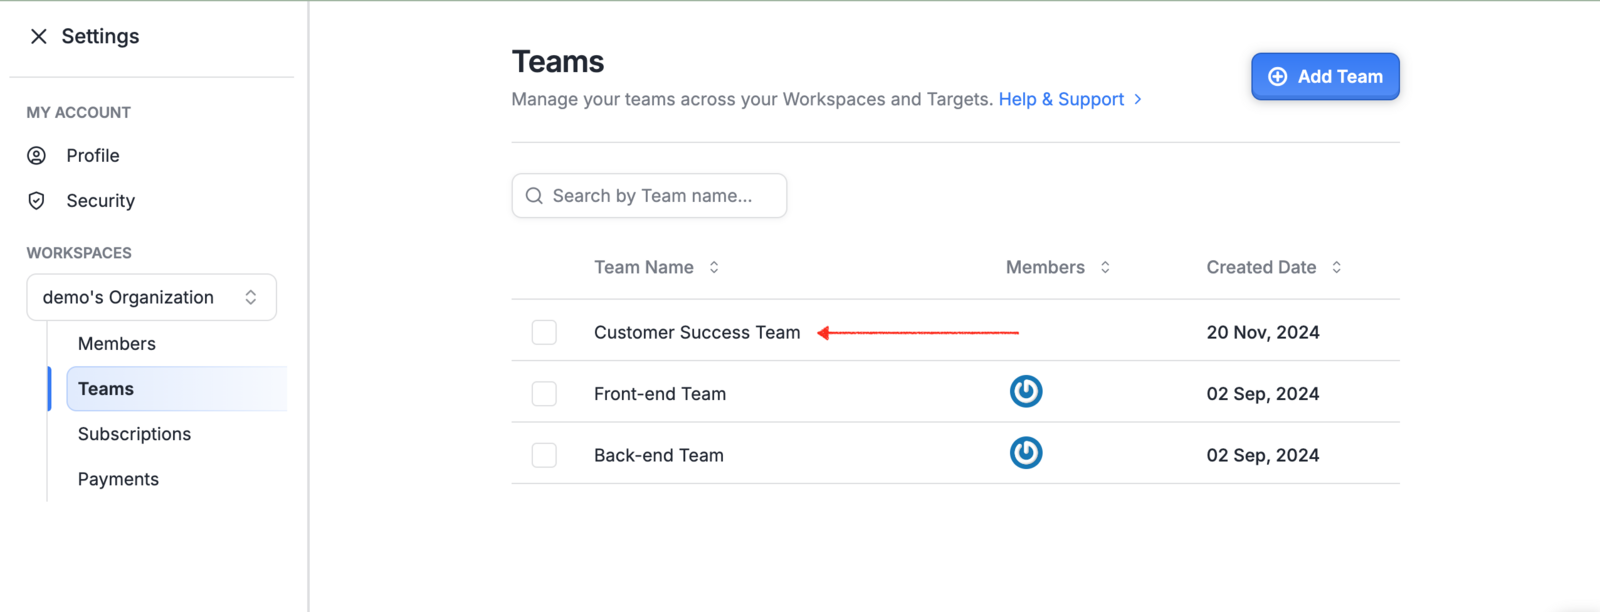
A success message will appear confirming that your team has been created. The Teams table will automatically update, displaying the newly added team.
You can add team members only after a team has been created
Adding Team Members
Click the team row in the Teams table
In the Edit Team sheet, go to the Team Members tab
Select a member and click Add Team Member
To remove a member, select them and click Delete
Assigning a Team to a Target
Click the team row in the Teams table
In the Edit Team sheet, switch to the Targets tab
Select a target and click Add to Target
To remove, select the target and click Delete
Deleting a Team
Select the team row and click Delete Team at the bottom left
A success message confirms the deletion
Best Practices
Create teams that mirror your internal structure, such as grouping by product area or security function, so that vulnerability assignments and target access stay organized. Assign teams to targets before scans begin so that findings are immediately routed to the right people. Only add members who already exist in the workspace, as external users cannot be added to teams directly from this page.
Troubleshooting
If the Teams section is not visible, confirm that you have selected a workspace from the workspace switcher. If a newly created team does not appear in the table, refresh the page. If a member cannot be added to a team, verify that they have an active account within the selected workspace.