How to set-up network device target
Last updated: October 11, 2026
Introduction
Before your Network Device Pentest begins, the Astra security team needs details about the device being tested. This guide walks you through adding a network device target in the Astra dashboard. You’ll enter the target name, the device’s IP addresses, its firmware version, any login credentials the testers need, and whether a VPN is required. Accurate details help the assessment start on time and stay within the agreed scope.
Prerequisites
Have the following ready before you start:
IP addresses in scope. Gather every IPv4 or IPv6 address of the device to be tested. Have your IT team review and approve the list, since it defines the scope of the engagement.
Device details. Note the firmware version (required) and the make and model (optional).
Login credentials (if applicable). Have the credentials the testing team will use to access the device.
VPN access (if the device is on a private network). Know whether a VPN is needed to reach the device. If you use one, have the connection details ready and share them through your Customer Success Manager (CSM), not the portal.
Firewall allowlisting. If a firewall is in place, whitelist the Astra IP ranges so scan traffic isn’t blocked.
Scoping call completed. For publicly accessible devices, you’ll be taken to schedule a scoping call with the sales team when you add the target. Once it’s done, you can add the target and complete the details below.
For the complete checklist, see📄 How to Submit Prerequisites for Network and Server Audit
Step-by-Step Instructions
The setup has two steps, and a progress indicator at the top right shows how many you’ve completed (for example, “1 of 2 steps completed”).
Step 1: Get Started
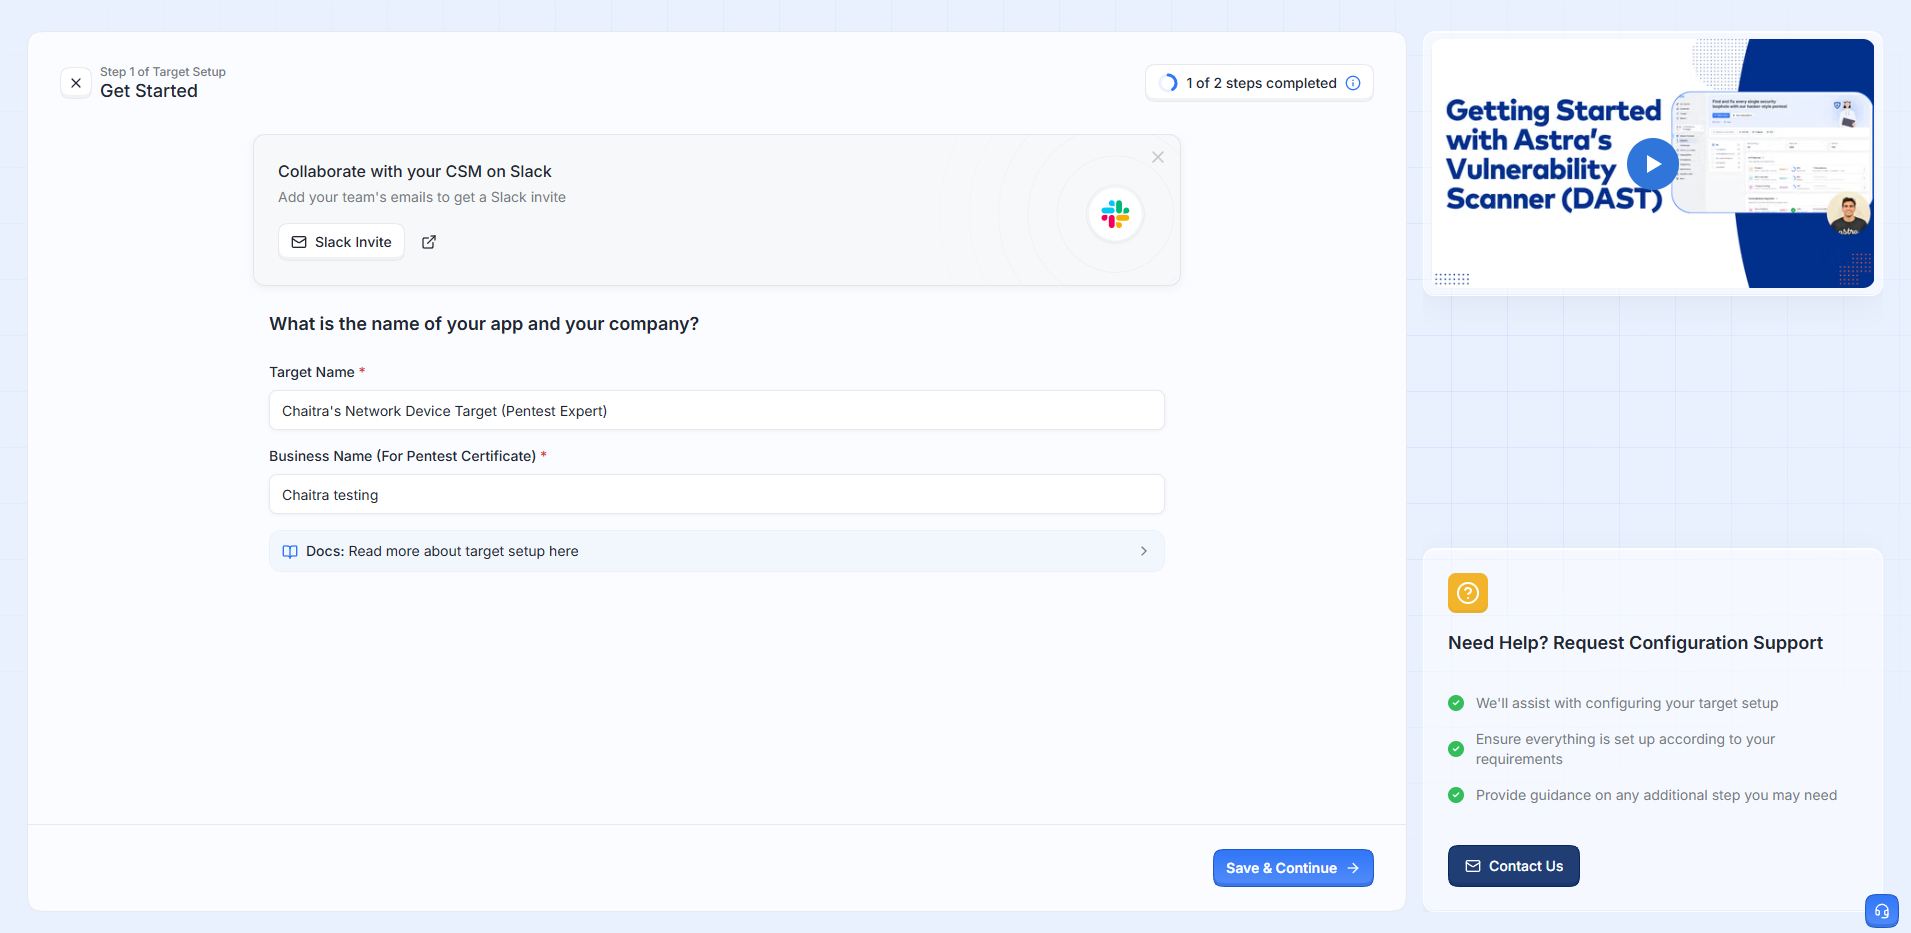
In the Astra dashboard, go to "Manage Targets" [ Left bottom] and click the "setup" for the respective target.
(Optional) Use the Collaborate with your CSM on Slack banner to add your team’s email addresses and click Slack Invite. This gets your team a Slack invite to talk to your CSM directly.
Enter the Target Name (required). Use a name that helps you identify the device later, for example “Head Office Firewall”.
Enter the Business Name (For Pentest Certificate) (required). This is the company name that will appear on your Pentest Certificate, so enter it exactly as you want it displayed.
Click Save & Continue.
Step 2: Additional Note
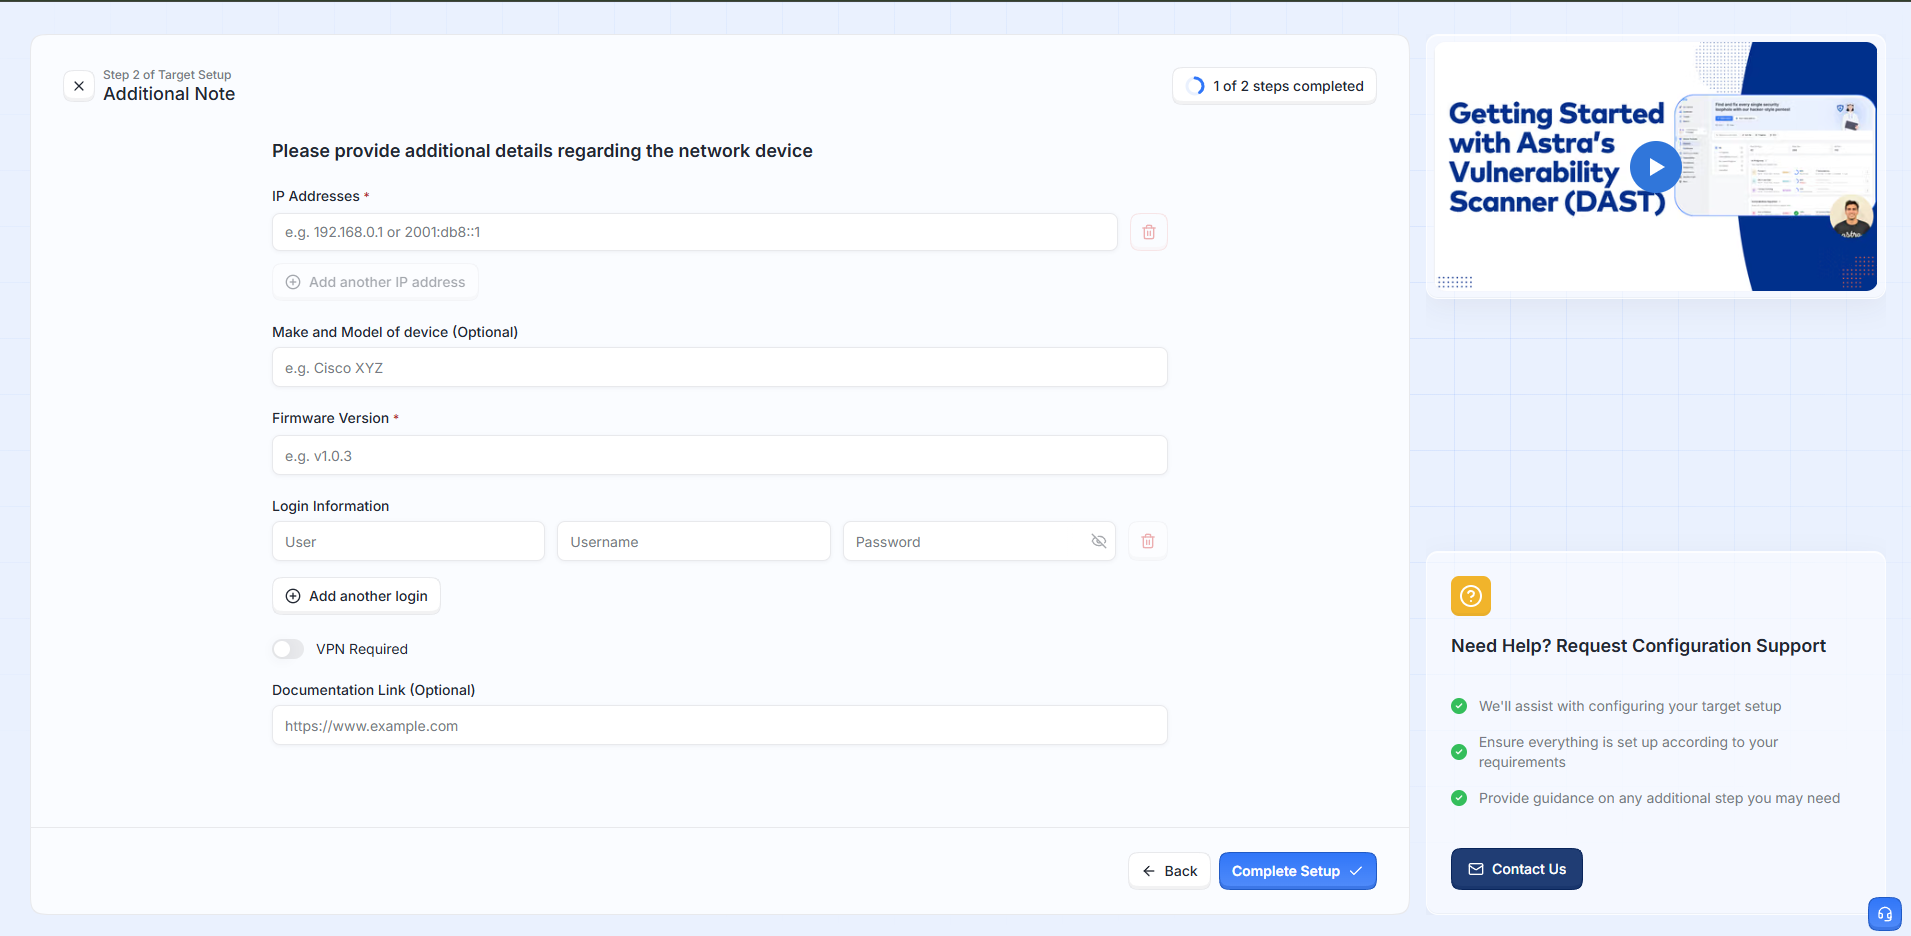
On the Please provide additional details regarding the network device page, fill in the following.
IP Addresses (required). Enter the device’s IPv4 or IPv6 address, for example
192.168.0.1or2001:db8::1. To add more, click Add another IP address. To remove an entry, click the delete (trash) icon next to it.Make and Model of device (optional). Enter the manufacturer and model, for example “Cisco XYZ”.
Firmware Version (required). Enter the version currently running on the device, for example
v1.0.3.Login Information. Enter the User, Username and Password the testing team should use. The eye icon shows or hides the password. To add more credentials, click Add another login. To remove a set, click its delete icon.
VPN Required. Turn this toggle on if the device can only be reached through a VPN. Your CSM will then coordinate VPN access and credentials with you.
Documentation Link (optional). Add a link to any vendor or internal documentation about the device, for example
https://www.example.com.Click Complete Setup. To change anything from Step 1, click Back.
Expected Outcome
After you click Complete Setup, the target is saved and both steps show as completed. You can track the engagement on your Astra dashboard, and your CSM will coordinate timelines and communication with you. If the device is on a private network or VPN, your CSM will also arrange VPN access with you before testing begins.
Frequently Asked Questions
Which IP address formats are supported?
You can enter both IPv4 (for example,192.168.0.1) and IPv6 (for example,2001:db8::1) addresses. Use Add another IP address if the device has more than one.Can I add more than one IP address or login?
Yes. Use Add another IP address and Add another login to add as many as you need.What if I don’t know the make, model or firmware version?
The make and model are optional. The firmware version is required. You can usually find it in the device’s admin console or settings page, or in its vendor documentation.Is the device accessible only through a VPN?
Turn on the VPN Required toggle and contact your CSM. Direct portal submission isn’t enough for devices inside a private network.Is the device a physical, on-premise device?
Testing on-site devices requires an Astra tester to visit your location, which involves additional cost. Contact your CSM to discuss logistics, scheduling and pricing before proceeding.What is the Business Name used for?
It’s the company name printed on your Pentest Certificate, so make sure it’s spelled correctly.Can I edit the details after completing setup?
Contact your CSM or write to help@getastra.com for the feasibility of same.Testing traffic is being blocked even after whitelisting.
Confirm that all Astra IP ranges were added and that the rules are applied at the right layer (perimeter firewall vs. host-based). Contact your CSM if it persists.