How to Set Up a Web App Target
Last updated: September 21, 2026
Introduction
This guide walks you through setting up a web application target for DAST Scanner and Pentest
Prerequisites
Defining a Target for the Vulnerability Scanner: Webapp Scanner
What Are the Prerequisites for a Web Application Pentest?: Webapp Pentest
Instructions
Once your target is purchased and confirmed by CSM, Log in to Astra Dashboard and go to "Target" section. You will find the target in Pending Setup state.
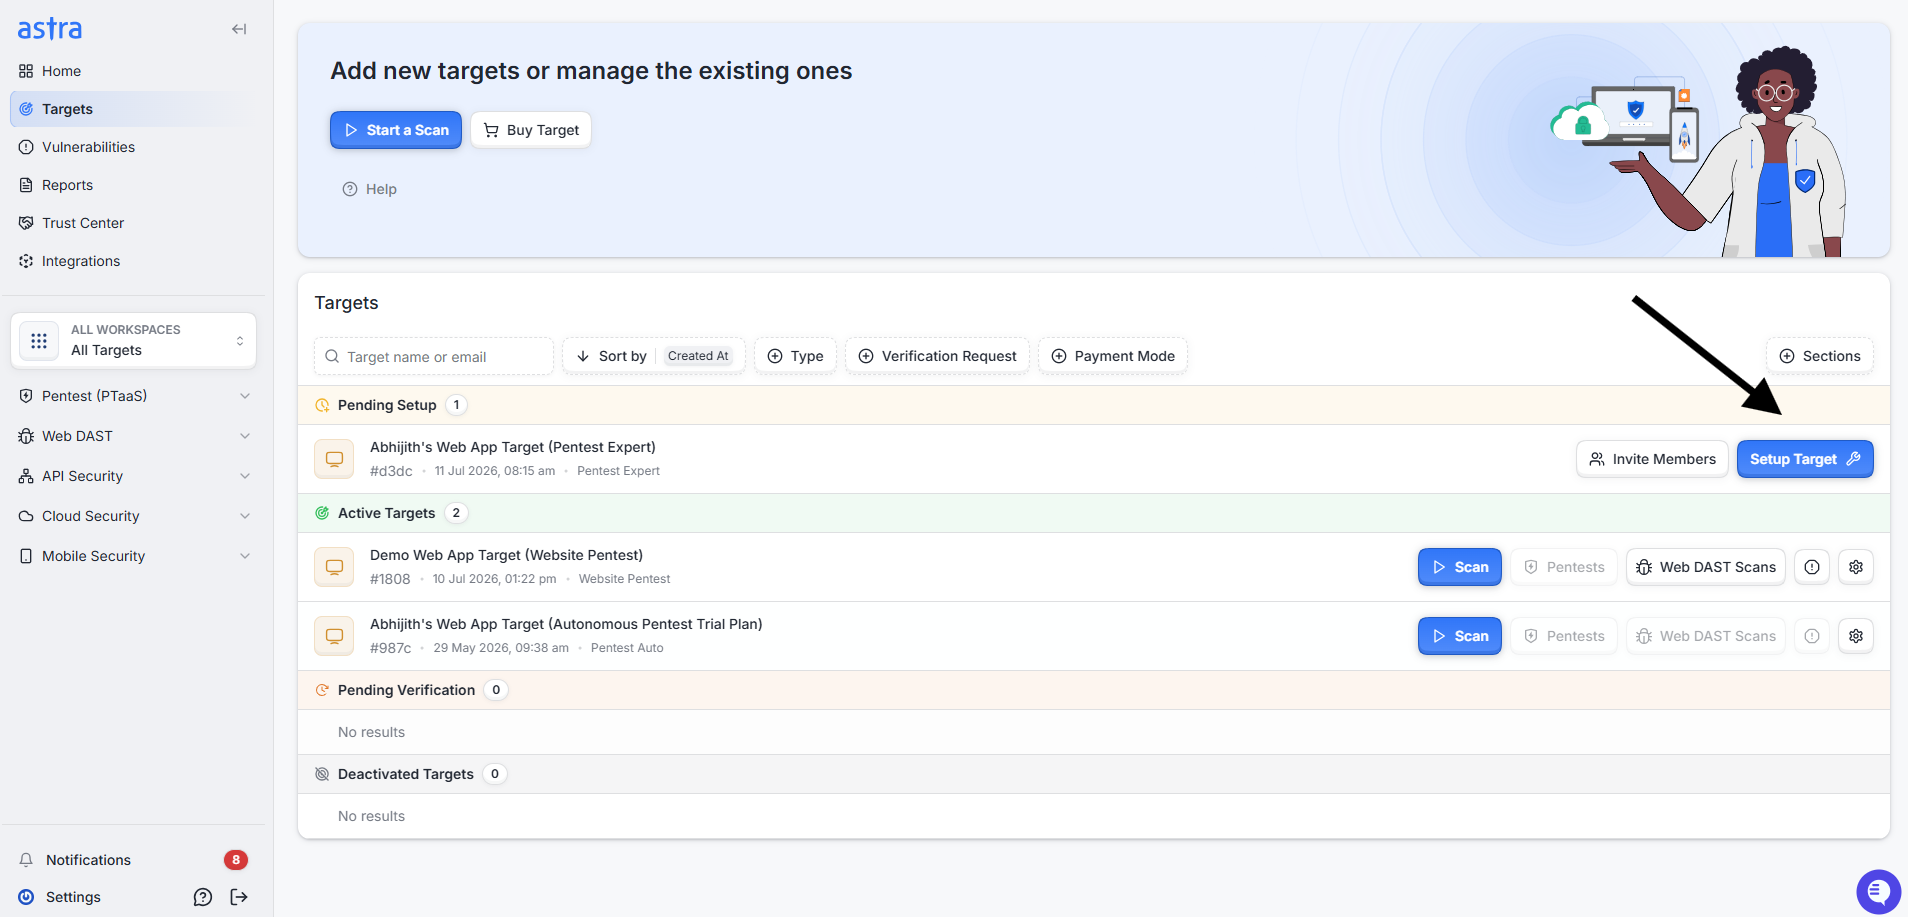
Step 1: Click "Setup Target" and add below details
Add the website main URL you want the scanner to scan.
Enter a name for the target. Use the official business name, and ensure it matches the name on your pentest certificate.
Select the environment: Production or Staging.
📄 Should I run a vulnerability scan on Production or Staging environment?
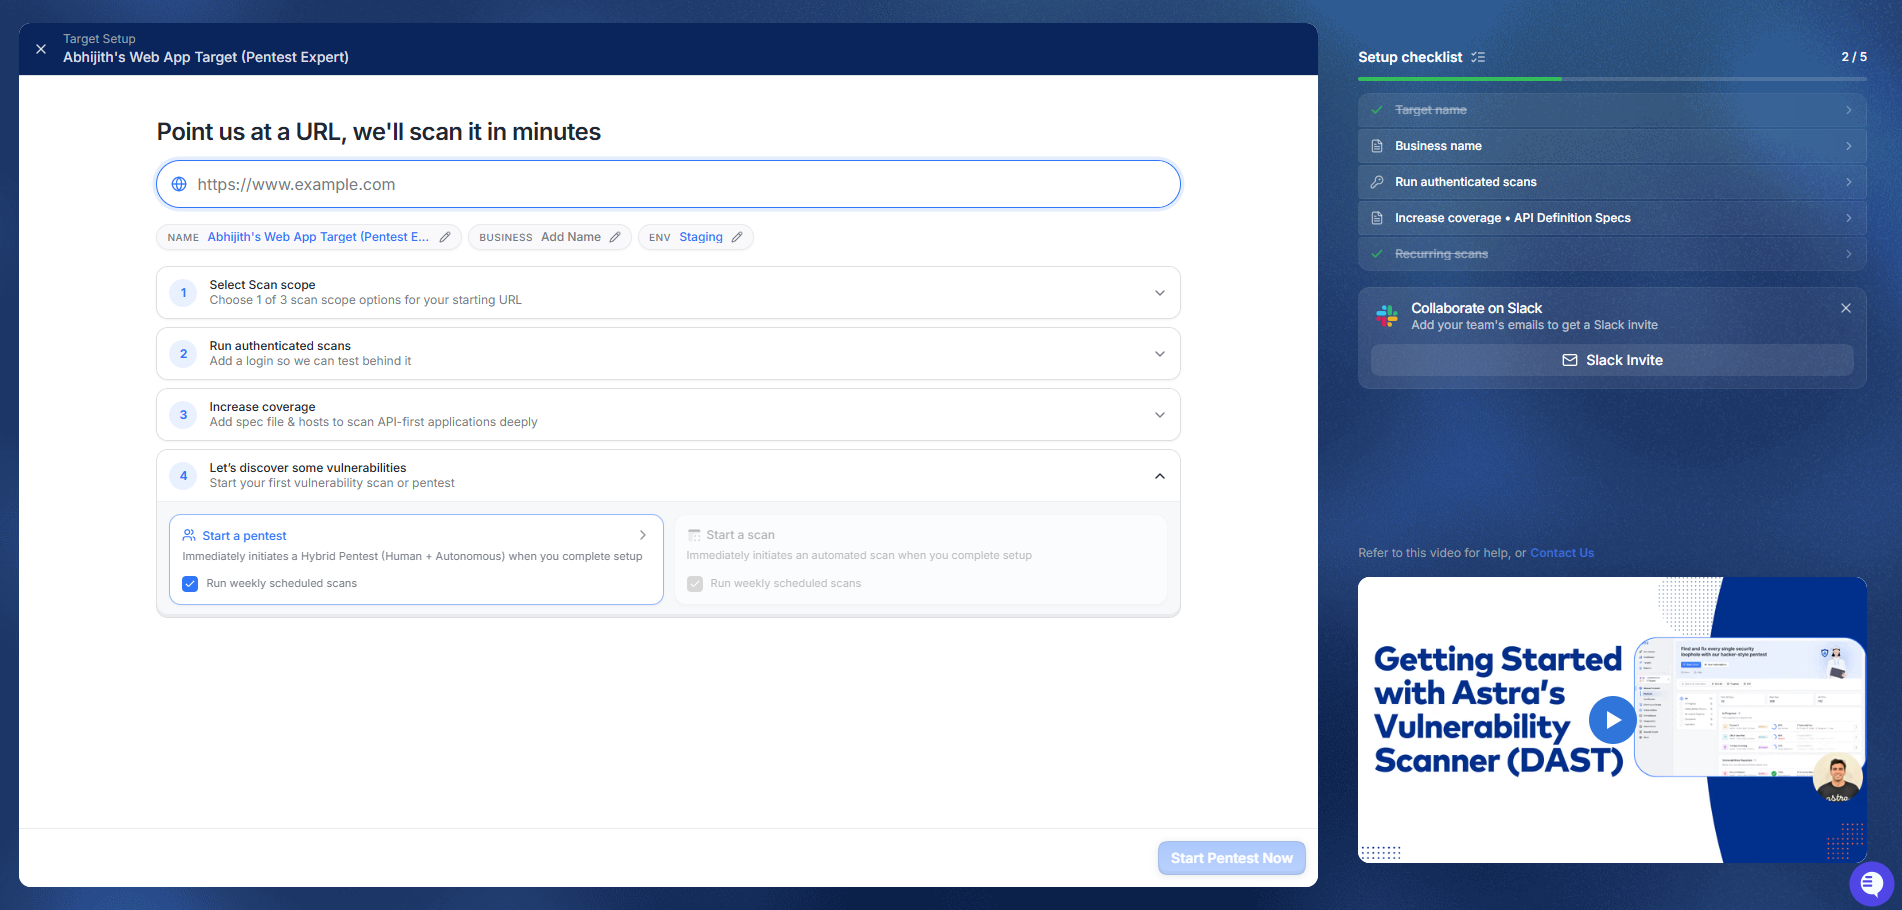
Step 2: Select the scope for the vulnerability scanning. Choose from:
Starting URL : All URLs starting with dash.xyz.com/admin will be scanned
Target Subdomain : All pages with hostname dash.xyz.com will be scanned, but pages with api.xyz.com as hostname will not be scanned
All subdomains : All pages with dash.xyz.com, api.xyz.com hostname will be scanned since both of them have the same domain name i.e. xyz.com
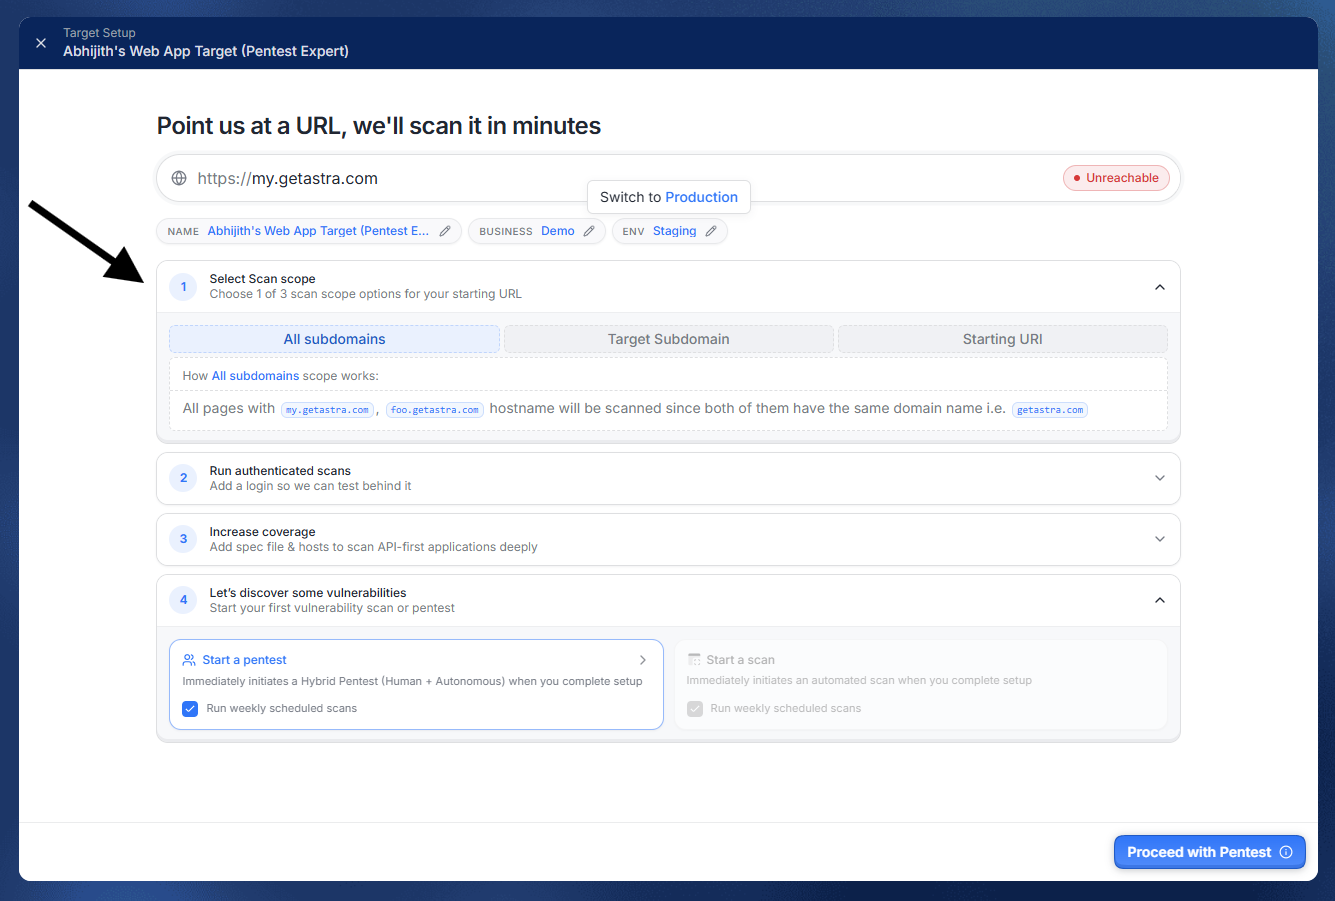
Step 3: Set up Authenticated Scans.
Add a login recording along with the user credentials so the scanner can crawl your website successfully.
📄 How to Record a Login Sequence with Chrome DevTools Recorder
If you use MFA or an authenticator app, We need to add a custom puppeteer script. Please reach out to the CSM or help@getastra.com to add the custom script for your target
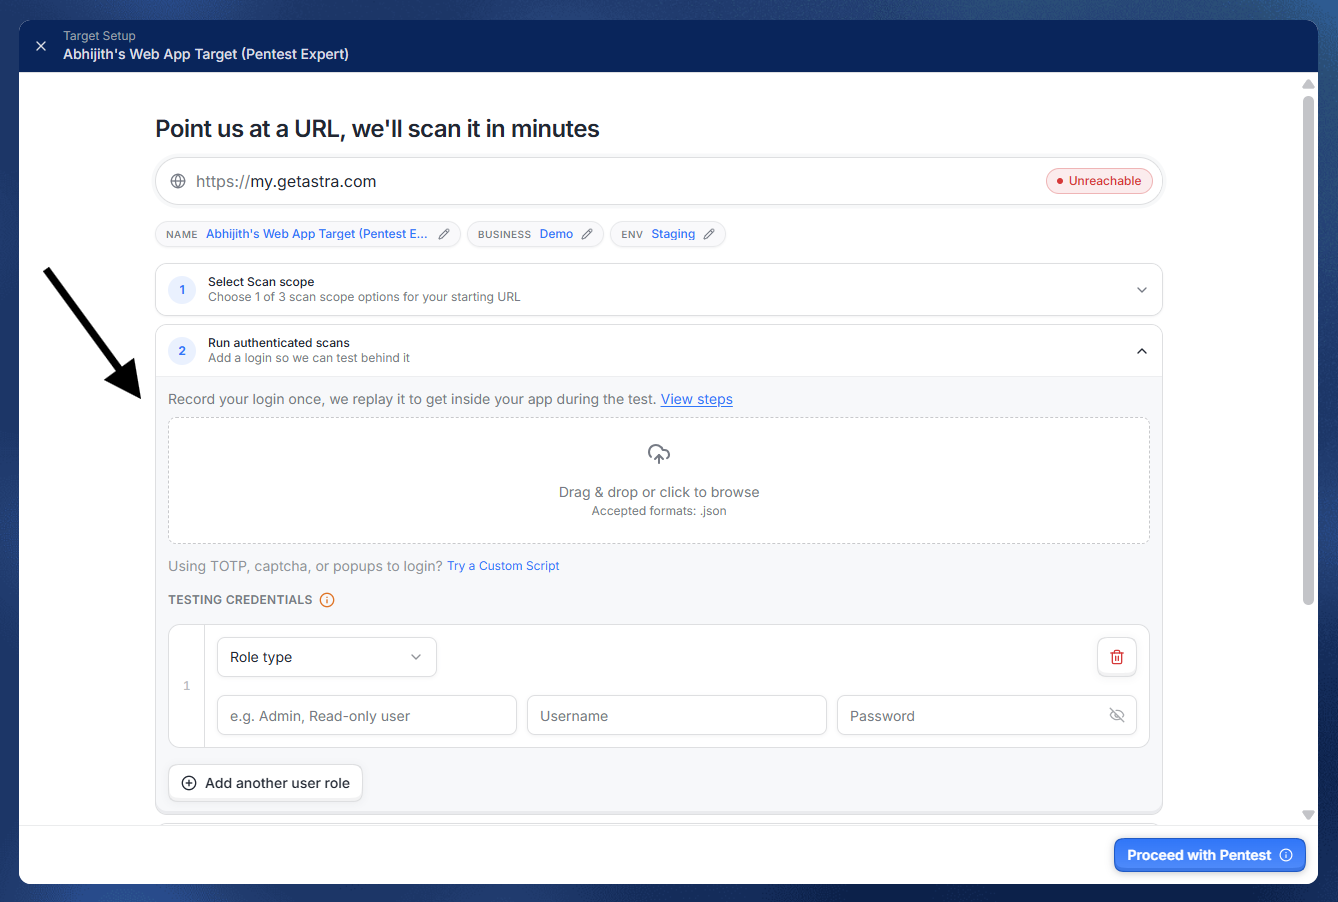
Set the Coverage for the scan. Add any API documents or additional scopes around the website you want included.
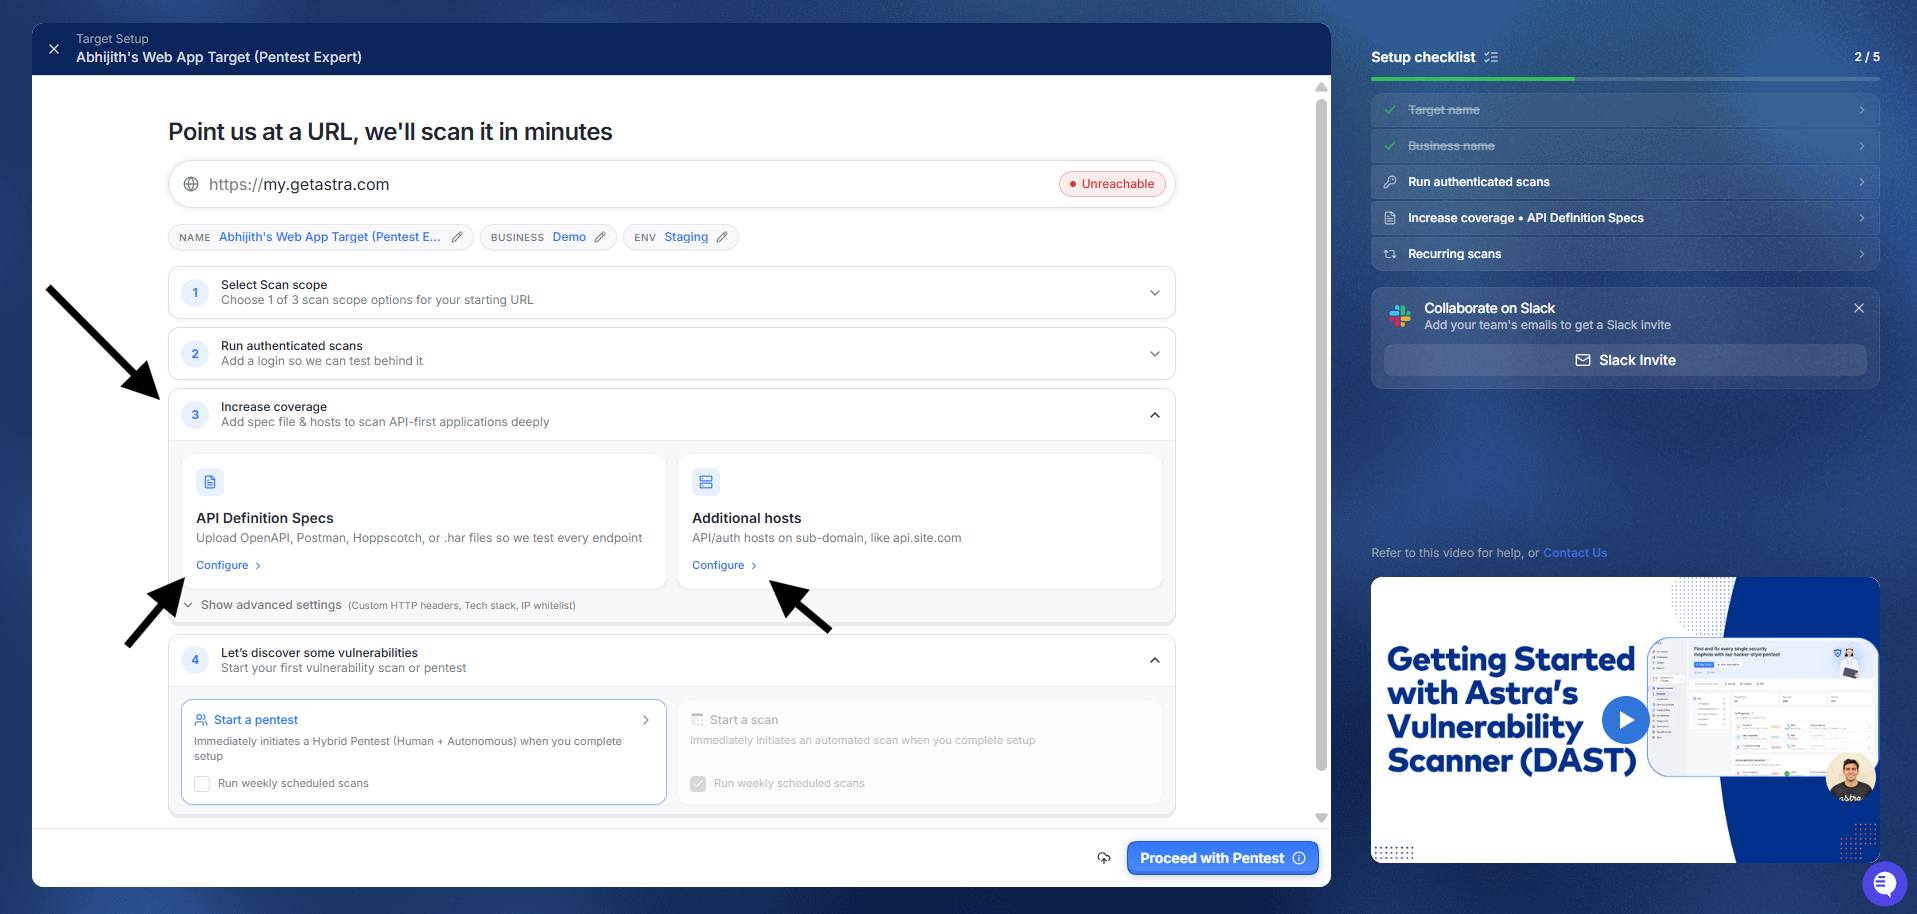
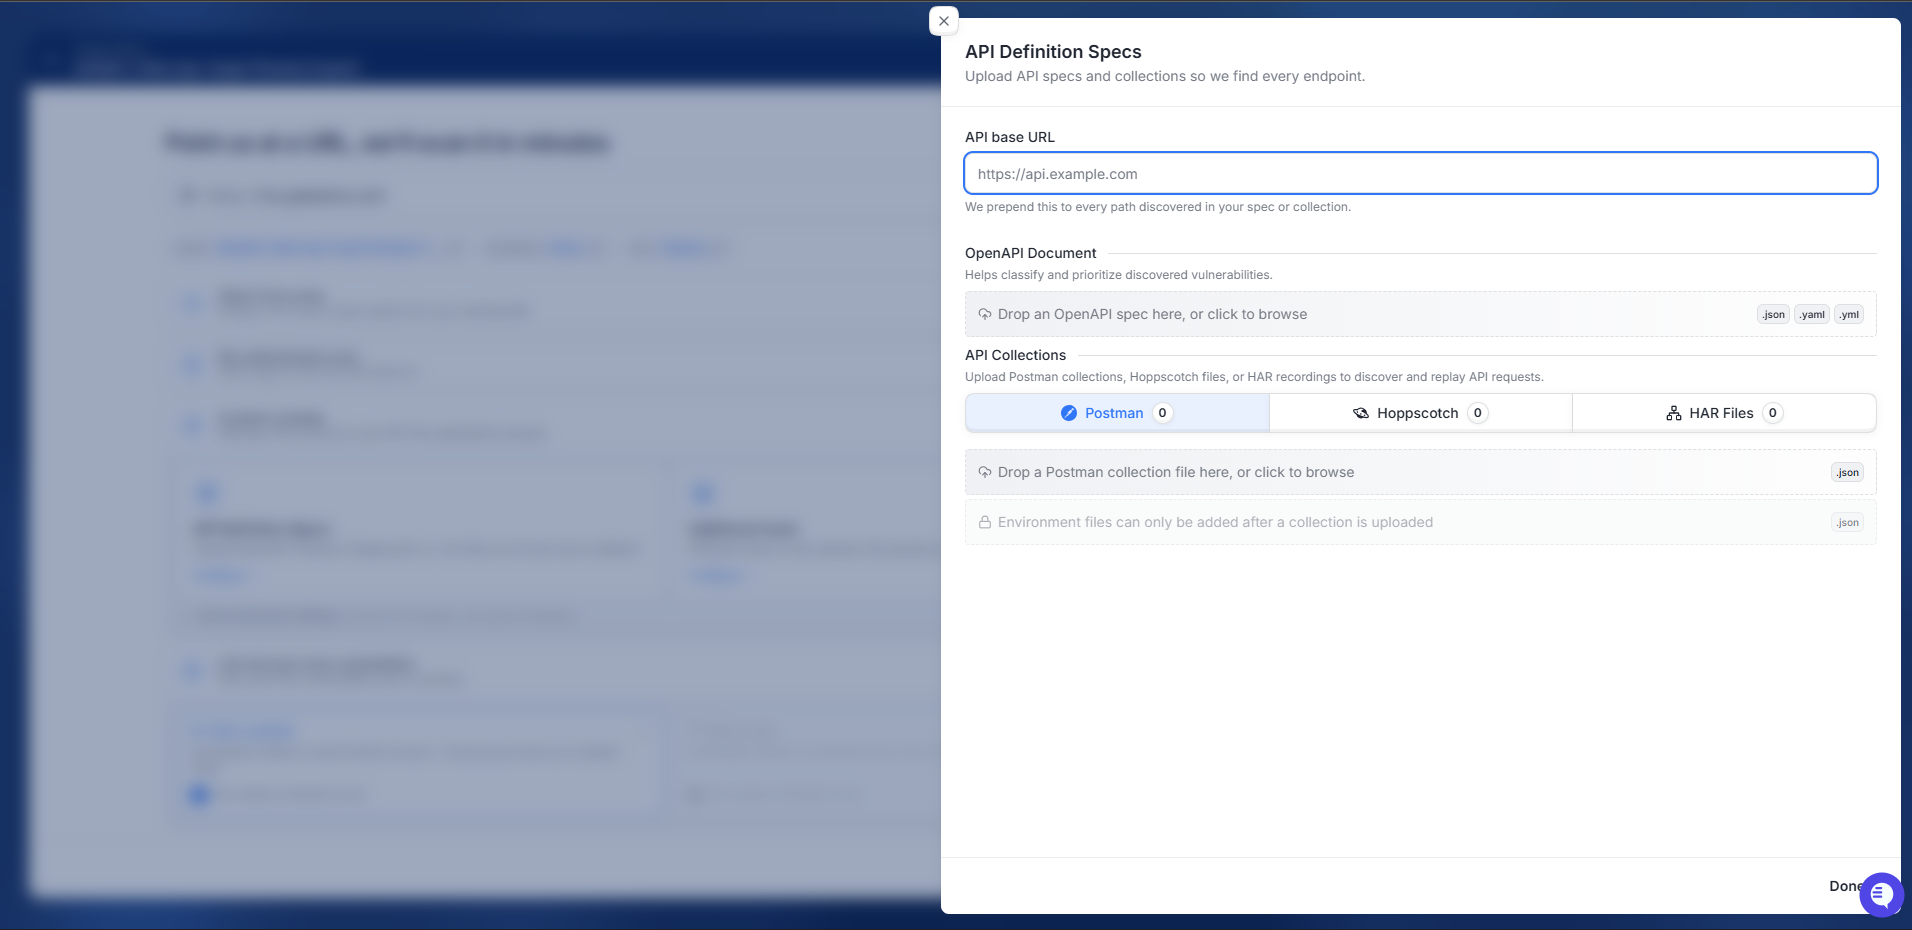
Add API definition scopes from Hopscotch, a HAR file, or a Postman collection, along with the relevant URL.
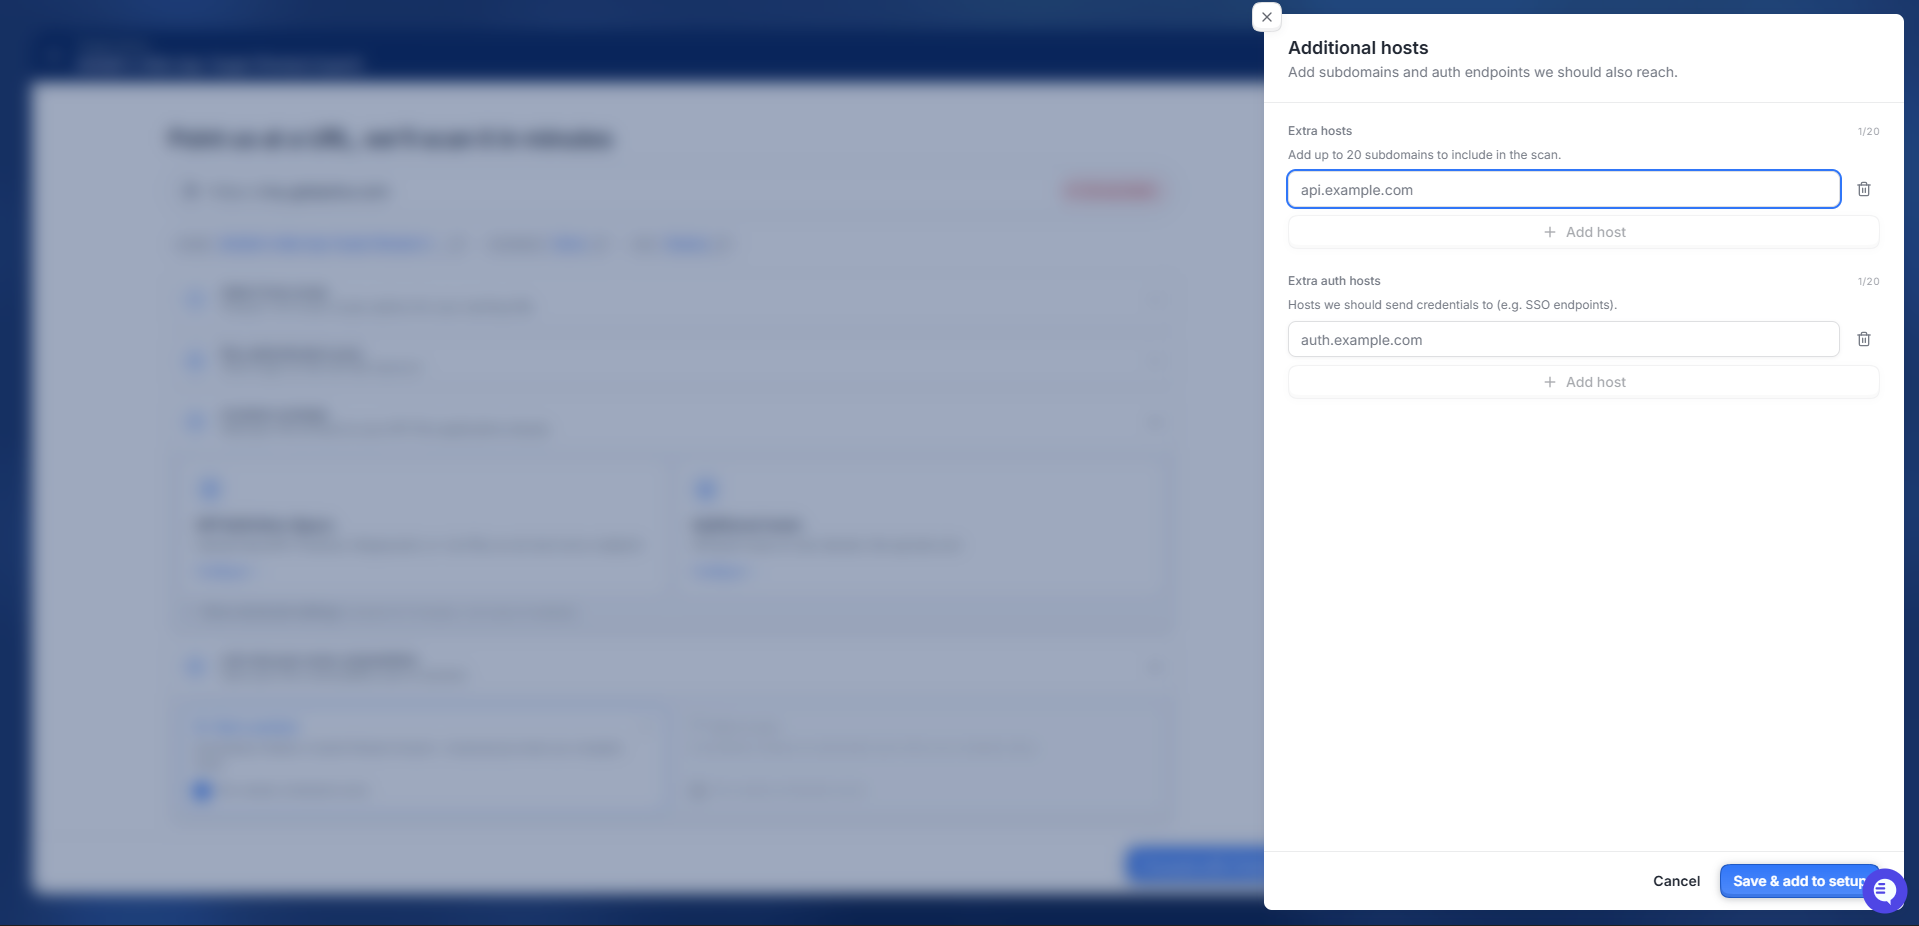
Add Additional Hosts if needed. You can add multiple hosts along with their authentication details.
Click Show Advanced Settings to configure additional scan options.
(Optional) Add Custom HTTP Headers to include authentication tokens or other custom headers with every scan request.
(Optional) Specify your application's Tech Stack so Astra can perform additional technology-specific security checks.
(Optional) Click Get IPs under IP Whitelist to retrieve Astra's scanner IP addresses and allowlist them in your firewall or WAF if necessary.
Select the scan type:
One-time scan
Scheduled scan (daily or weekly)
Click Start Scan.
Expected Outcome
The scan status appears on the right-hand side of the screen, along with vulnerabilities as they are detected and their details.
Once the scan is complete, the site map becomes visible, showing all crawled pages along with any vulnerabilities found.
Best Practices
Use your official registered business name when naming the target so it matches your pentest certificate.
Double-check the environment selection (Production vs. Staging) before starting the scan to avoid scanning the wrong environment.
For sites behind MFA, always complete the custom script setup before starting the scan, or the crawler may fail to authenticate.
Keep API definition files (Postman collection, JSON, etc.) up to date to ensure full coverage during the scan.