How to Sign an Android Application for Security Testing
Last updated: June 8, 2026
Introduction
Before Astra's security engineers can assess your Android application, you need to provide a signed APK file. An unsigned APK cannot be installed on a device during testing and will throw errors during the installation process. Signing your APK ensures it can be properly deployed and evaluated as part of your mobile security assessment.
Who Should Read This
This article is for Android developers or anyone responsible for preparing a mobile application build for submission to Astra's security testing team. You will need access to your project in Android Studio and permission to generate release builds.
Prerequisites
Before you begin, ensure that:
You have Android Studio installed and your project is open and building successfully.
You have permission to generate release builds for the application.
You have a secure location ready to store the keystore file (.jks) that will be generated during this process. This file is critical — losing it means you cannot sign future builds with the same key.
Your application's code is in the state you want tested. The APK you upload should reflect the version of the app Astra will assess.
Step-by-Step: Generating a Signed APK in Android Studio
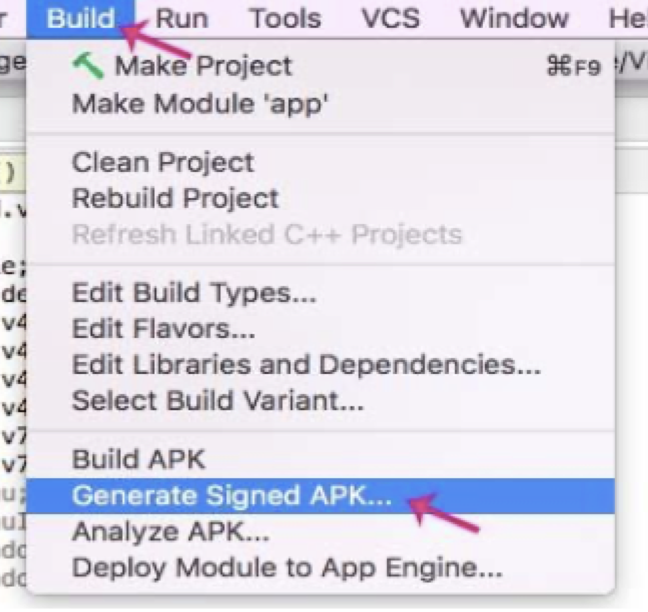
Step 1: Open the Generate Signed APK Dialog
Open your Android project in Android Studio.
From the top menu, click Build.
Select Generate Signed Bundle / APK from the dropdown.
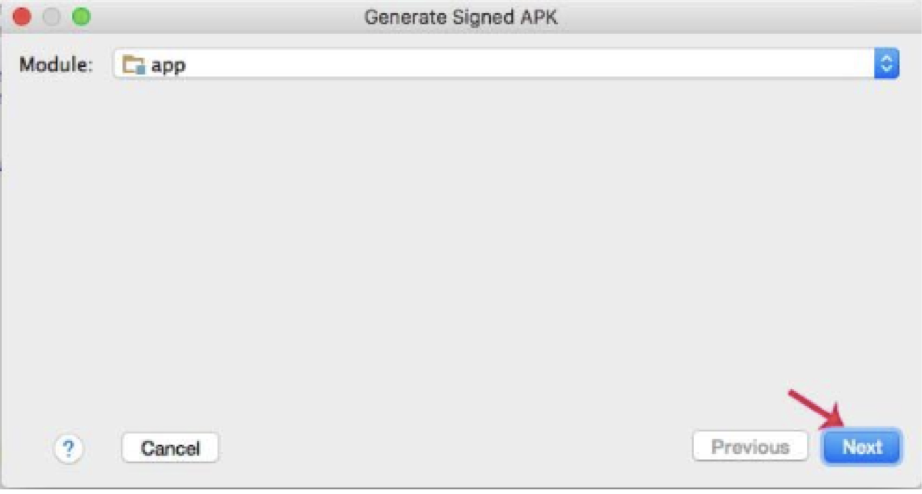
In the dialog that appears, select APK and click Next.
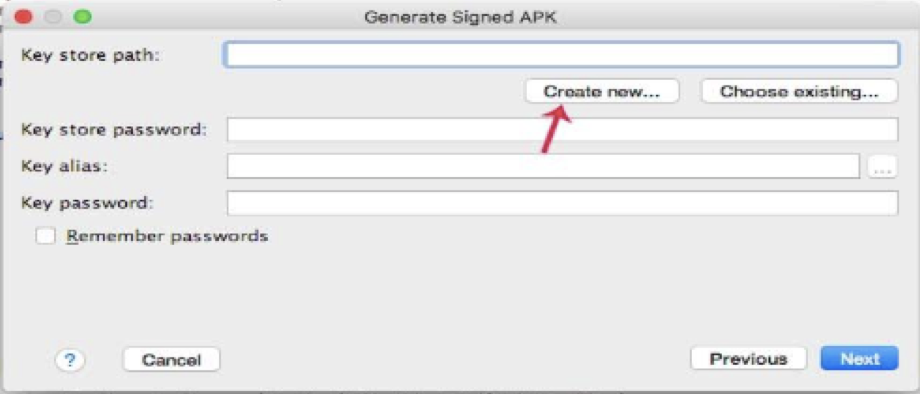
Step 2: Create a New Keystore
If you do not already have a keystore file, you will need to create one now.
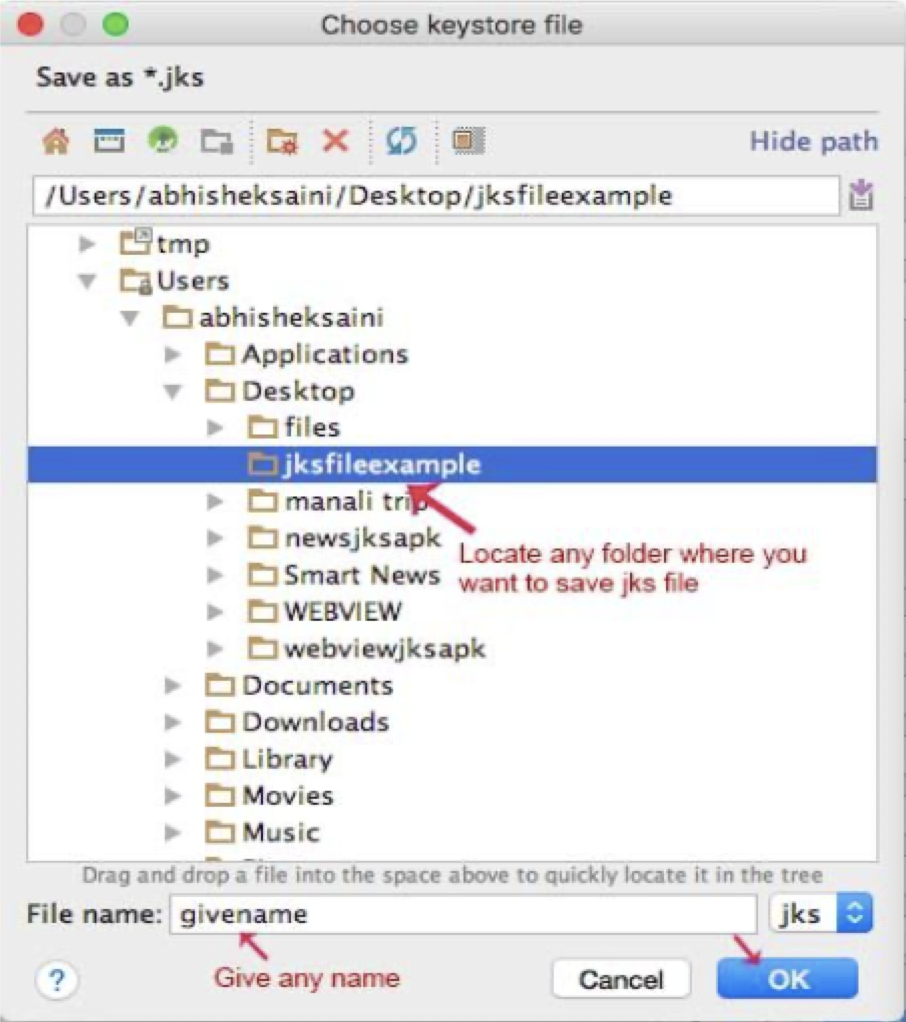
In the Key Store Path field, click Create New.
Click the ... (browse) button to choose where the keystore file will be saved on your system.
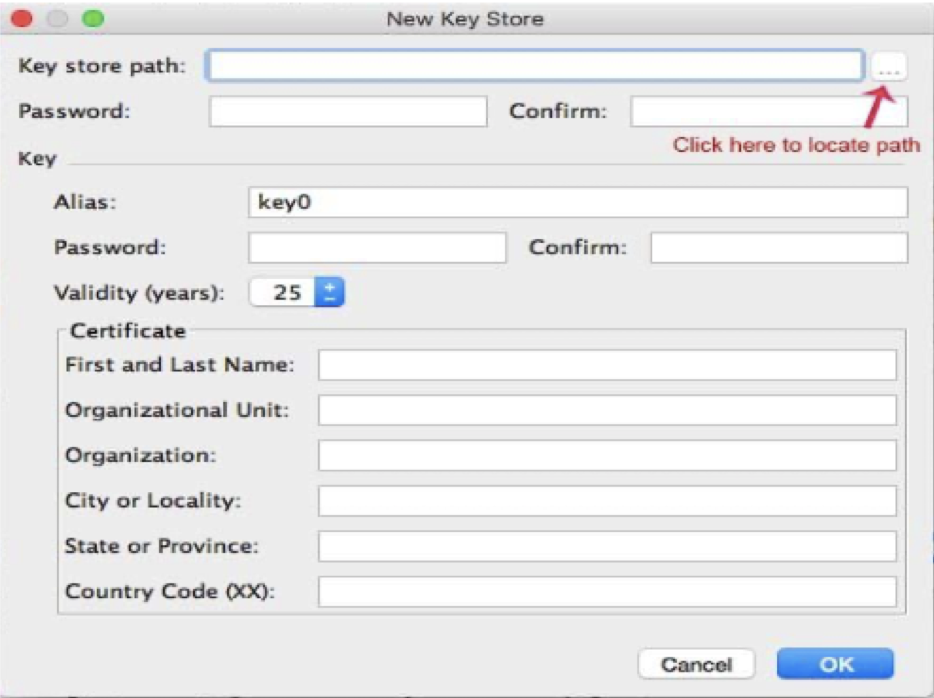
Navigate to your preferred save location, enter a name for the .jks file, and click OK. [Click on ... (dots) to locate the path]
Fill in the required fields:
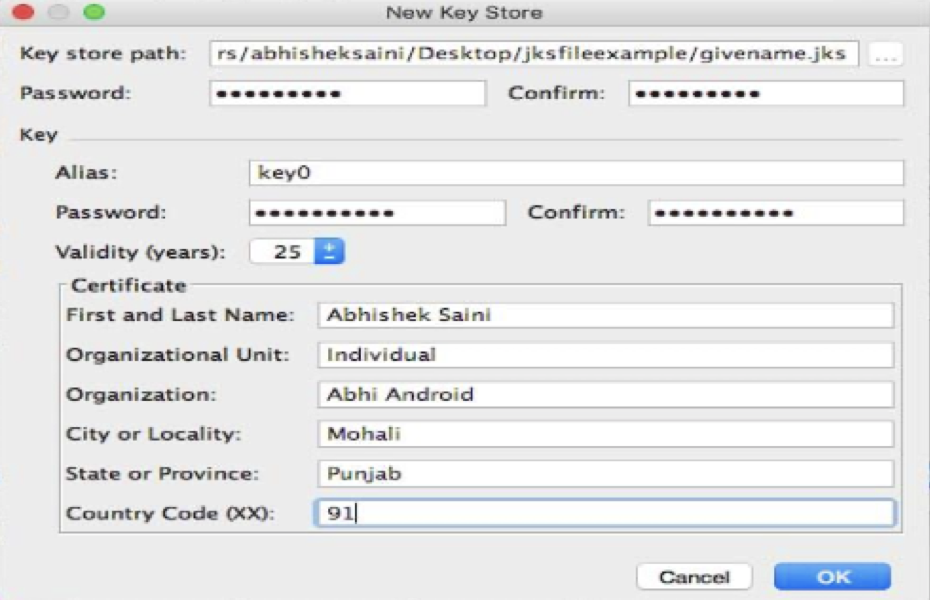
Important: Store your keystore file and both passwords in a secure location. If you lose the keystore, you will not be able to sign future versions of the app with the same key, which can cause issues with app store updates.
Step 3: Confirm Keystore Details and Proceed
Back in the Generate Signed APK dialog, confirm that the Key Store Path, Key Alias, and passwords are correctly populated.
Click Next to proceed to the build configuration step.

Step 4: Configure the Build
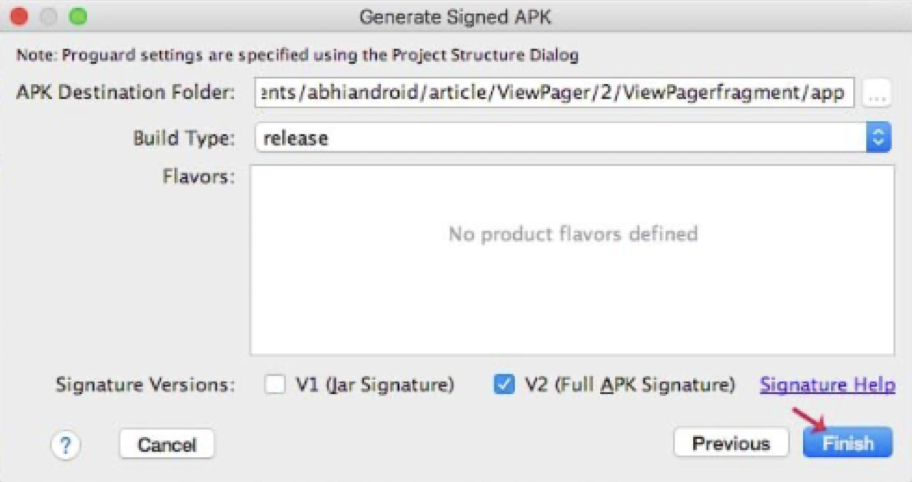
Review or update the Destination Folder where the signed APK will be saved after generation.
Set the Build Type to Release.
Under Signature Versions, select both V1 (Jar Signature) and V2 (Full APK Signature) for the broadest compatibility.
Click Finish to generate the signed APK.
Android Studio will build and sign the APK. Once complete, a notification will appear in the bottom right corner of the IDE with a link to the output folder.
Step 5: Locate and Upload the Signed APK
Navigate to the destination folder you selected in Step 4. Your signed APK file will be there, typically named something like app-release.apk.
Log in to your Astra dashboard and navigate to your iOS/Android Target Setup.
In the Upload IPA/APK File step, drag and drop your signed APK file into the upload area or click to browse and select it.
Expected outcome:
The APK is successfully uploaded and your target setup can proceed to the next configuration step.
Best Practices
Use a dedicated testing keystore rather than your production release keystore when submitting builds to third parties including security vendors. This keeps your production signing credentials separate and secure.
Label your keystore files clearly so you can identify which key was used to sign which build. For example: projectname-testing-keystore.jks.
Back up your keystore file and passwords in a secure secrets manager or encrypted storage immediately after creation.
Submit the release build rather than a debug build. Release builds more accurately reflect what your users will install and provide a more realistic security assessment.
Ensure the APK matches the version you want tested. If you make code changes after signing and uploading, you may need to generate and upload a new signed APK.
Troubleshooting
Android Studio is not showing the "Generate Signed Bundle / APK" option. Ensure you have an Android application module selected in the project structure. This option is not available for library modules. If the option is greyed out, check that your project has synced successfully with Gradle.
I forgot my keystore password. Unfortunately, keystore passwords cannot be recovered if lost. You will need to create a new keystore and sign a new build with it. For security testing purposes, this is acceptable — simply generate a new keystore and signed APK to upload.
The APK installation fails during testing. Confirm that the build type was set to Release and that signature versions V1 and V2 were both selected during the signing process. An APK signed only with V1 may fail to install on newer Android versions, and an unsigned or debug-only build will also fail.
Android Studio shows a build error after I click Finish. Check the Build output panel at the bottom of Android Studio for specific error messages. Common causes include mismatched passwords, an invalid keystore path, or a Gradle build failure unrelated to signing. Resolve any build errors in your project first before attempting to generate the signed APK again.
My APK file is very large. Will that cause issues with the upload? Astra supports APK uploads for standard application sizes. If your APK is unusually large, raise a support ticket before uploading and our team can advise on the best approach.