How to add a user credential for a web target
Last updated: November 12, 2026
A user credential tells Astra how to sign in to a web application as one user, so that scans and pentests can test the pages behind the login. This article walks through adding a user credential, choosing its login method, adding a login recording or custom script, checking the sign-in result, and managing user credentials.
Availability
These screens appear when Enable AI Sign-in is turned on for the target. To learn how AI Sign-in works, how to turn it on and what each status means, read Set up user credentials with AI Sign-in.
Open the user credentials
User credentials are managed in the target's settings.
Open the target, and then open its Settings.
Click User Credentials.
When the target has no user credentials yet, the page shows the three parts of the setup and an Add User Credentials button. Once user credentials are added, the page lists each one with its Privilege Level, Login Method, Additional Details and Status.
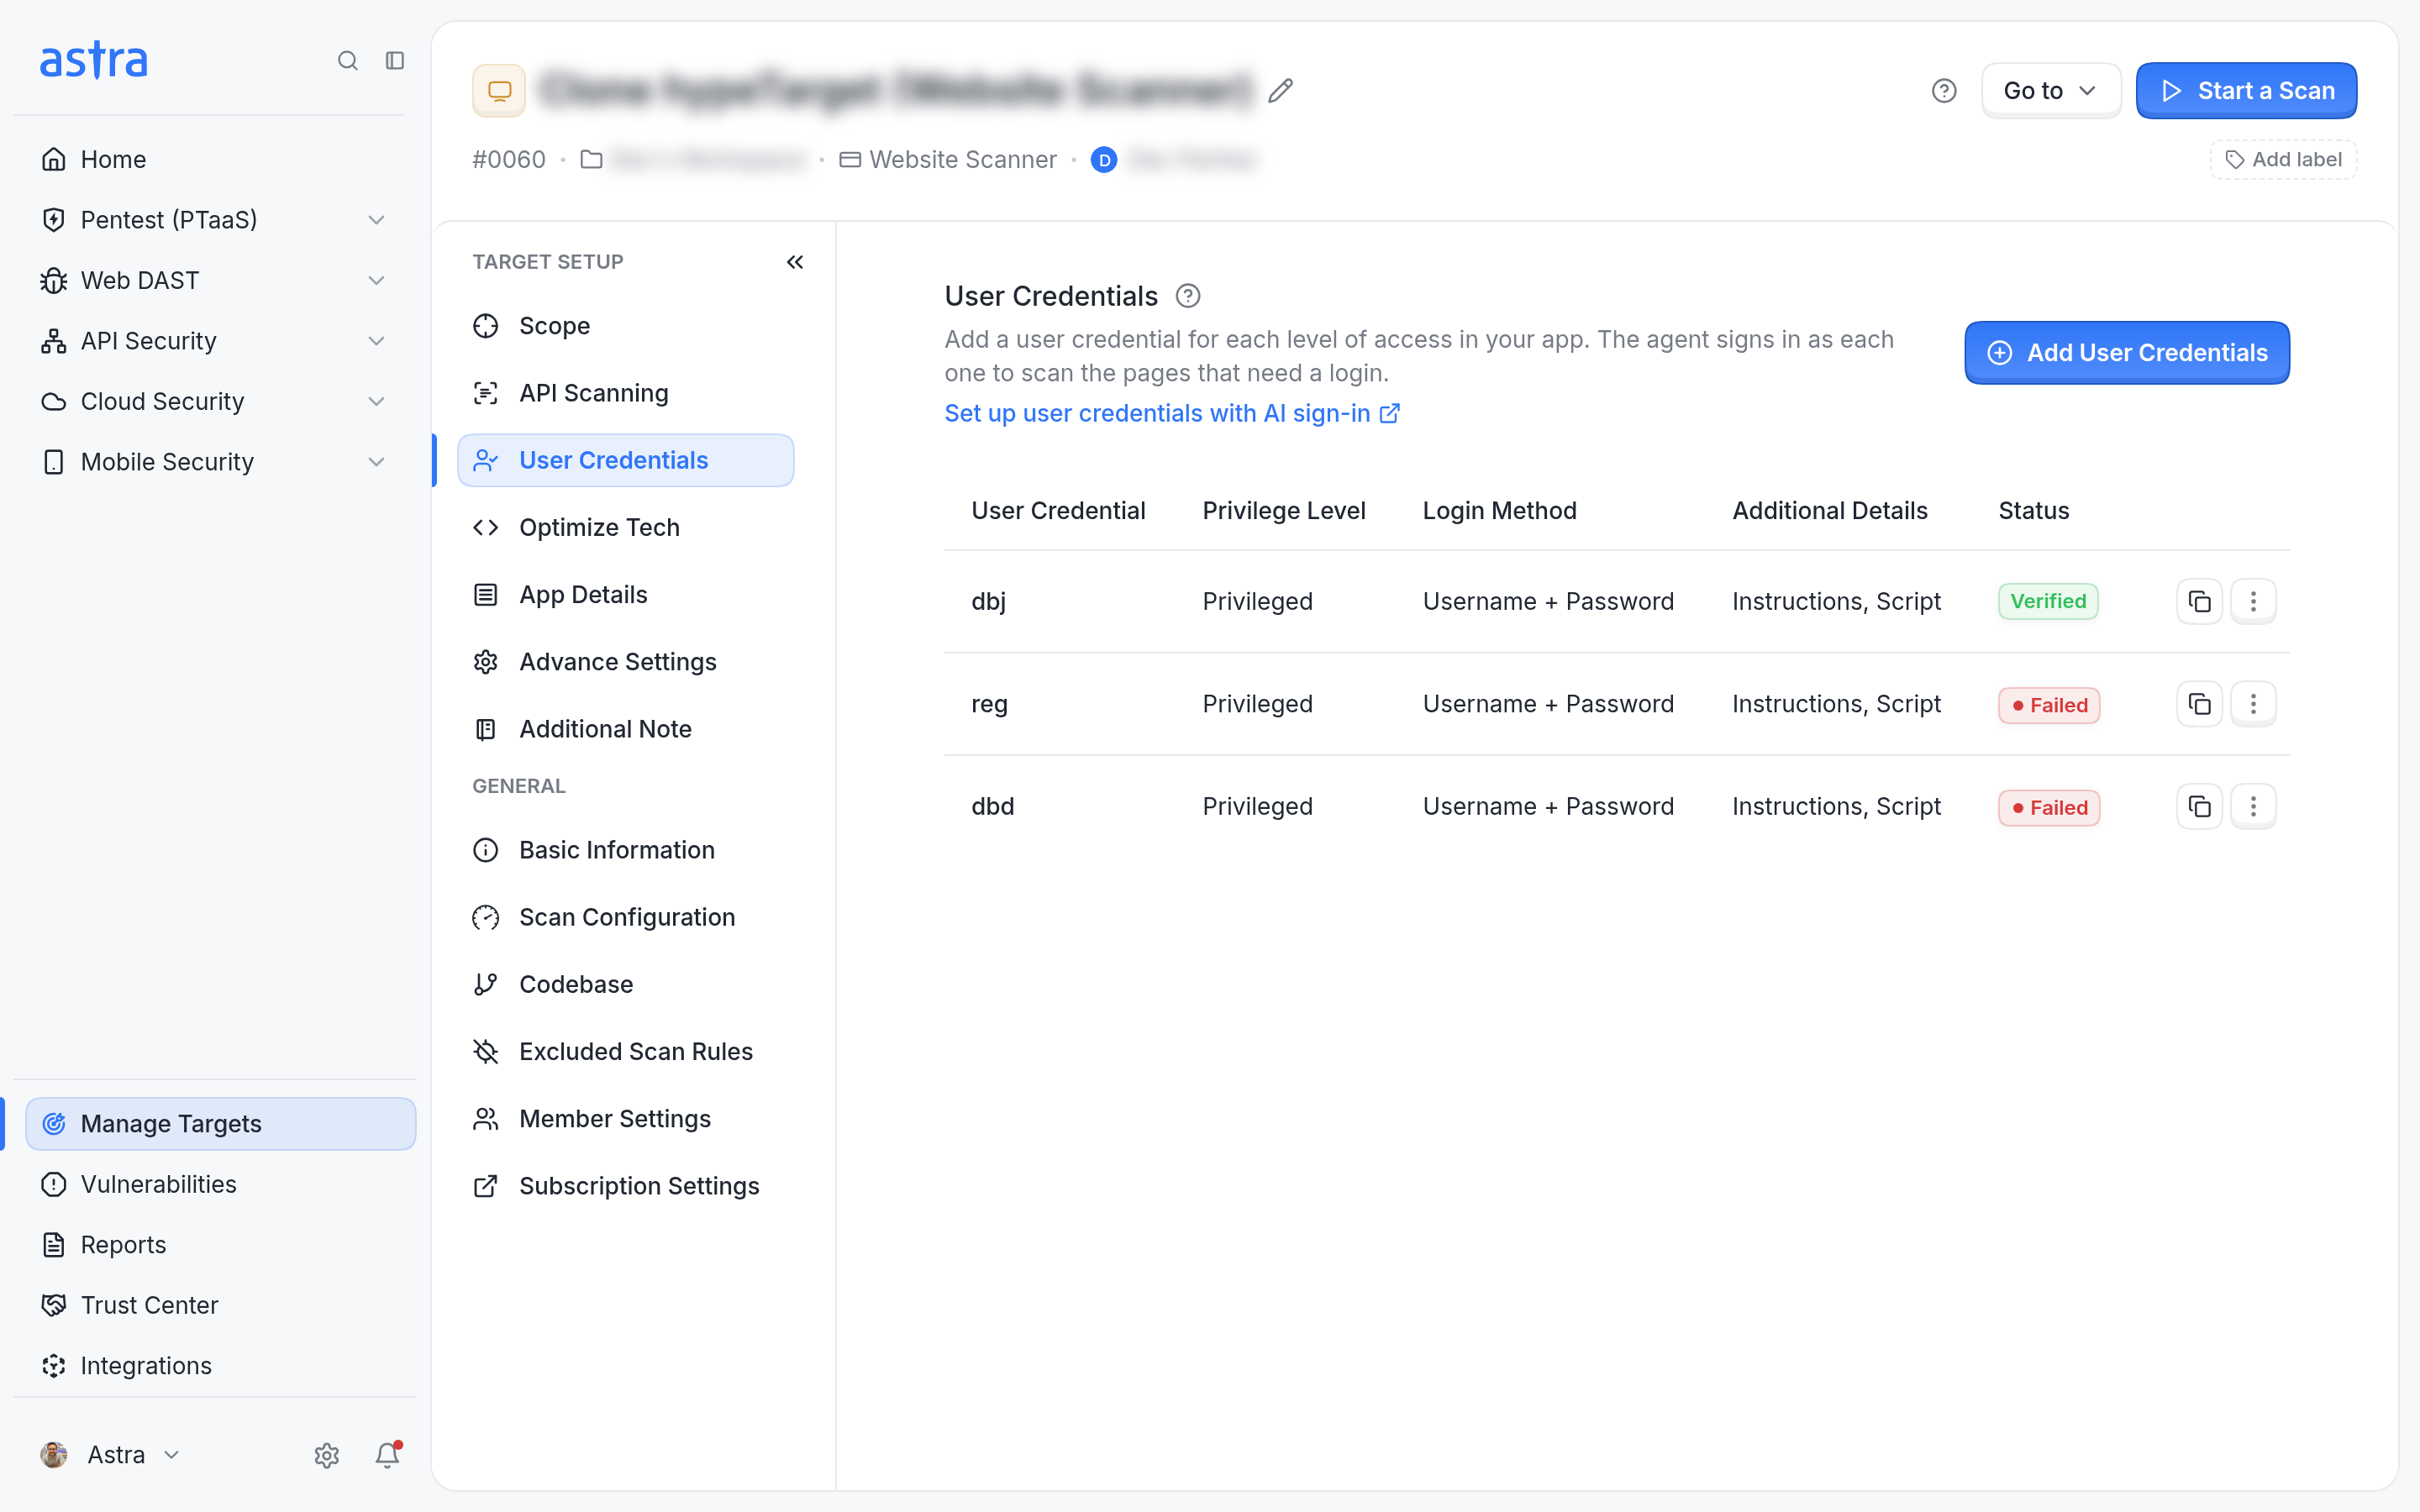
The User Credentials page lists each user credential and its status.
Add a user credential
Add one user credential for each level of access in the application, for example an administrator and a regular user. Use an account that exists in the application and can sign in today.
Click Add User Credentials.
Under Login Method, choose how this user credential signs in, the same way it does on the application's login page.
Under Account Details, enter the User Credential Name, choose the Privilege Level, fill in the sign-in fields for the chosen method and write the Sign-In Instructions.
Optionally, open Additional Details and upload a Login Recording or a Custom Script.
Click Save and verify. Astra saves the user credential and starts a sign-in check.
Fields marked with an asterisk (*) are required. To add more user credentials, click Add User Credentials again.
Login methods: each method asks for different sign-in fields.
Login method | How the account signs in | Fields |
|---|---|---|
Username + Password | A username and password, with no extra step. | Username, Password |
Password + Authenticator | A password, then a code from an authenticator app. | Username, Password, Authenticator Setup Key |
SSO Only | Sign-in through another service, with no extra step. | Sign-In Provider, Username Or Email, Password |
SSO + Authenticator | Sign-in through another service, then a code from an authenticator app. | Sign-In Provider, Username Or Email, Password, Authenticator Setup Key |
Authenticated Header | Access with a header and token sent on each request. | Header Name, Token |
For the SSO methods, Microsoft is available as the Sign-In Provider. Google is marked Coming soon.
The Authenticator Setup Key is the key shown when the authenticator app was first set up, usually next to the QR code. Astra uses it to generate the same codes as the app.
Password + Email Code, Email Code and Magic Link are marked Coming soon and can't be selected yet.
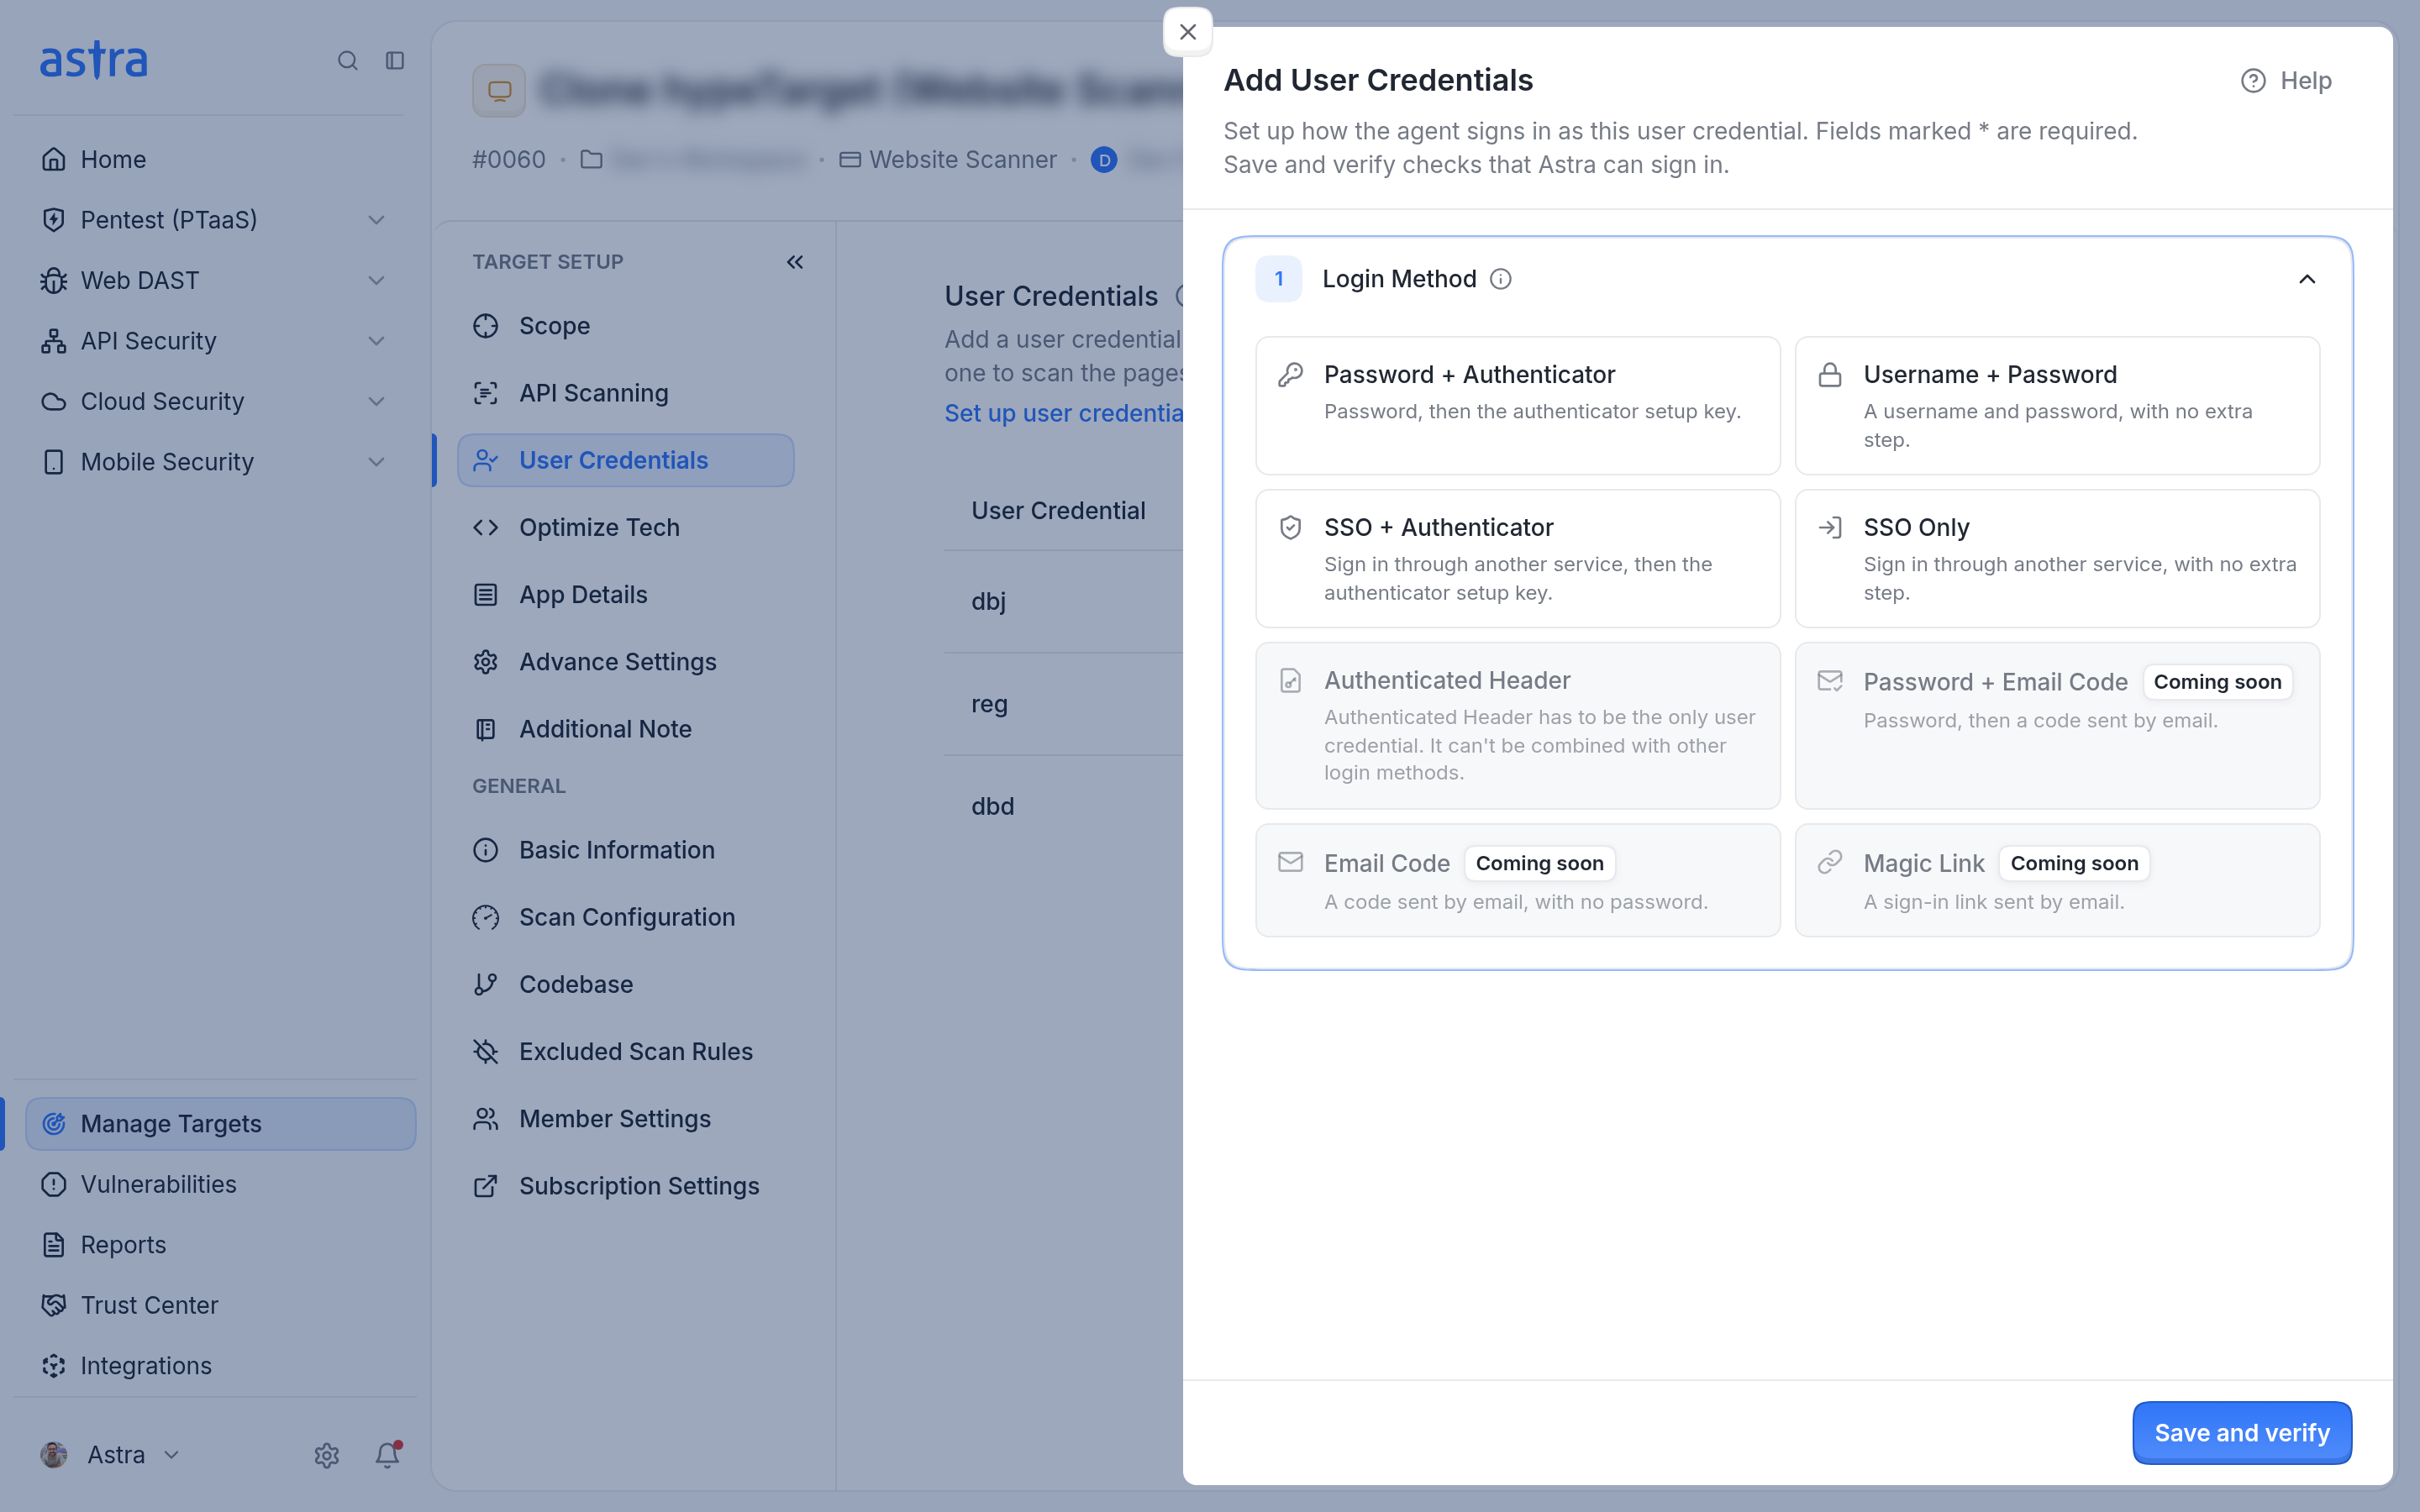
Choose the login method first. Methods marked Coming soon can't be selected yet.
Important
Authenticated Header has to be the only user credential on the target. It can't be combined with other login methods.
Account details: the fields that identify the account and explain how it signs in.
User Credential Name: a name for this level of access, for example Admin. Each name must be unique on the target and 60 characters or fewer.
Privilege Level: Privileged for an account that manages the app for others, such as adding users or changing settings, or Non-Privileged for an account that does everyday work in the app with its own access.
The sign-in fields for the chosen login method, as listed in the table above.
Sign-In Instructions: every step of the sign-in, one per line, in order. Include the prompts and choices that come up on the way, and end on the step where the signed-in page is showing. The instructions can be up to 2,500 characters.
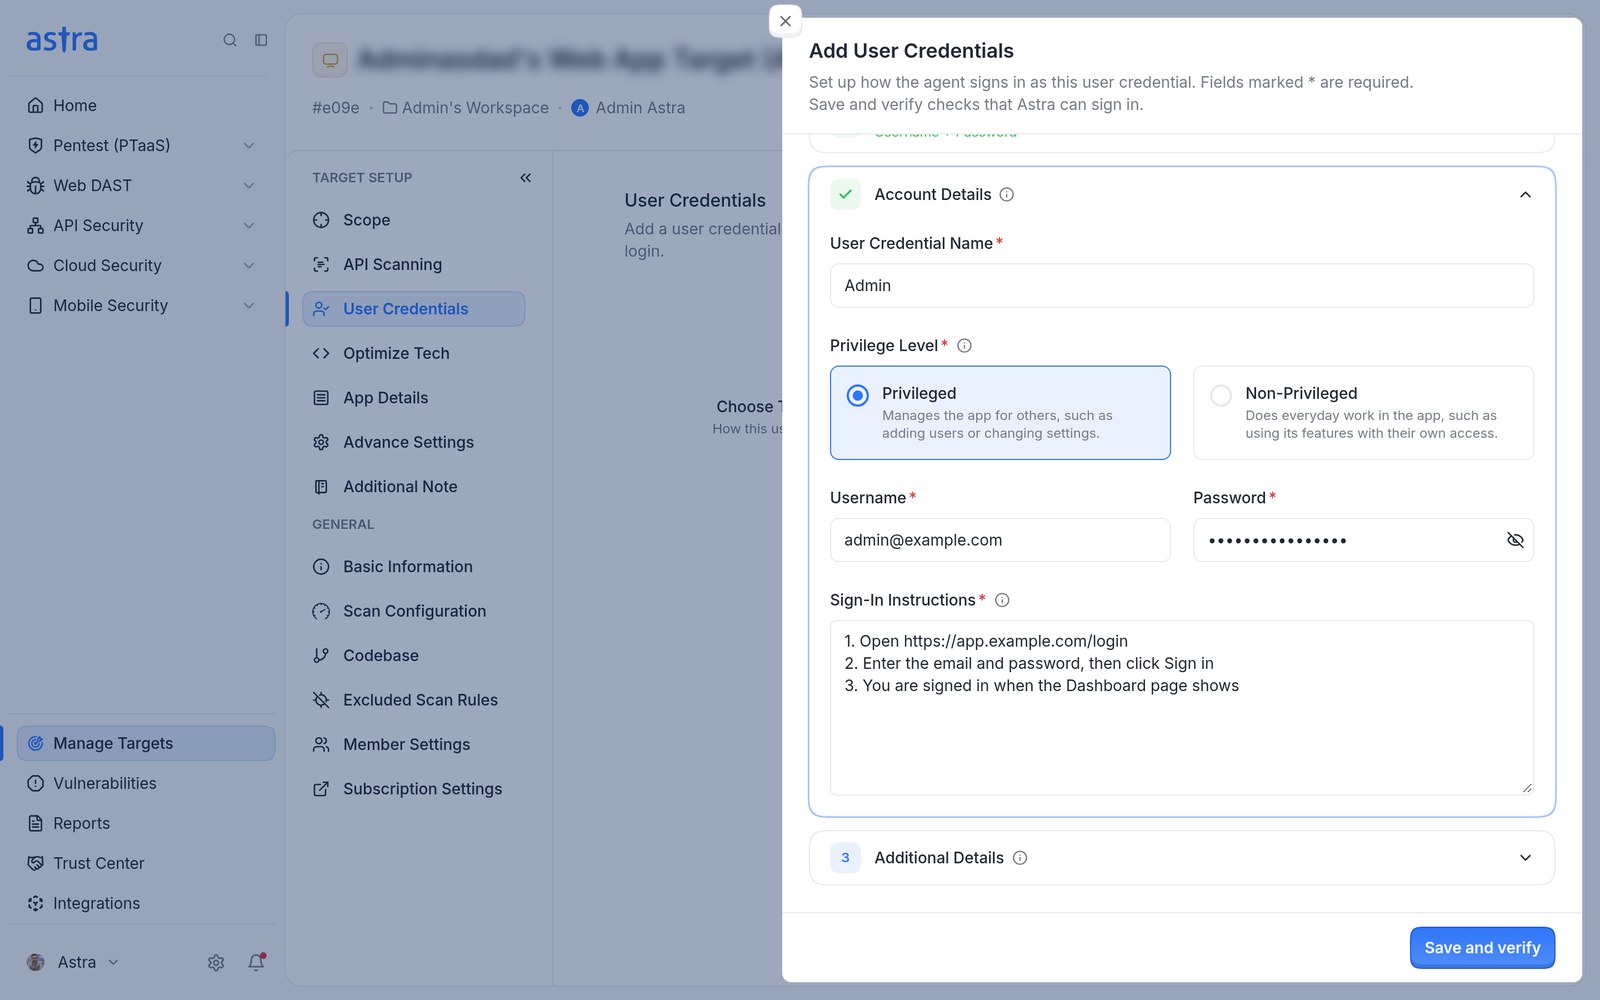
Account Details holds the name, privilege level, sign-in details and Sign-In Instructions.
Note
Sign-In Instructions are required unless a login recording or custom script is added under Additional Details. They aren't needed for Authenticated Header.
If the sheet is closed before saving: a Leave Without Finishing? dialog appears when there are unsaved changes. Discard changes closes the sheet without adding anything, and Keep editing returns to the form. A user credential appears in the list only after Save and verify is clicked.
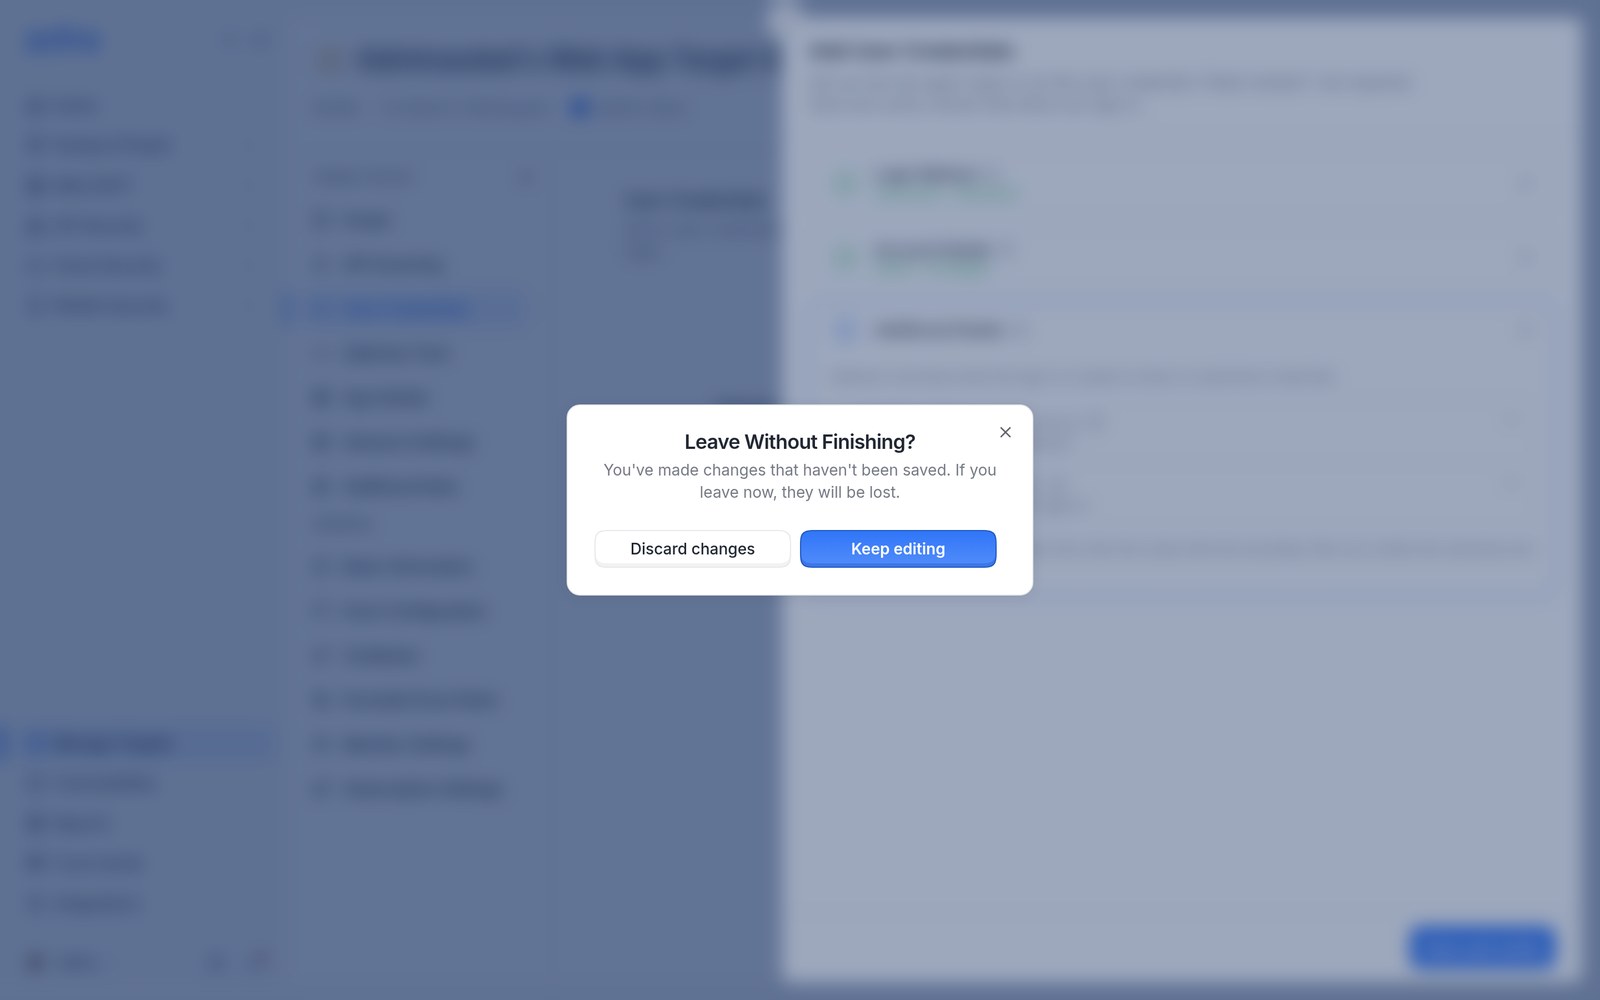
The Leave Without Finishing? dialog appears when the sheet is closed with unsaved changes.
Add a login recording or a custom script
Use Additional Details when the sign-in is easier to show or script than to describe. Both are optional.
Login Recording (Easiest to set up): record signing in as this user credential, from the login page to the first page after sign-in, export the recording as a JSON file and upload it. Click Read the recording guide for help.
Custom Script (Most flexible): upload a .js Puppeteer script that signs in as this user credential. Click Read the script guide for help.
The agent follows the instructions first, then the script, then the recording. The files can contain the username and password. Each uploaded file shows who uploaded it and when, and can be downloaded or removed.
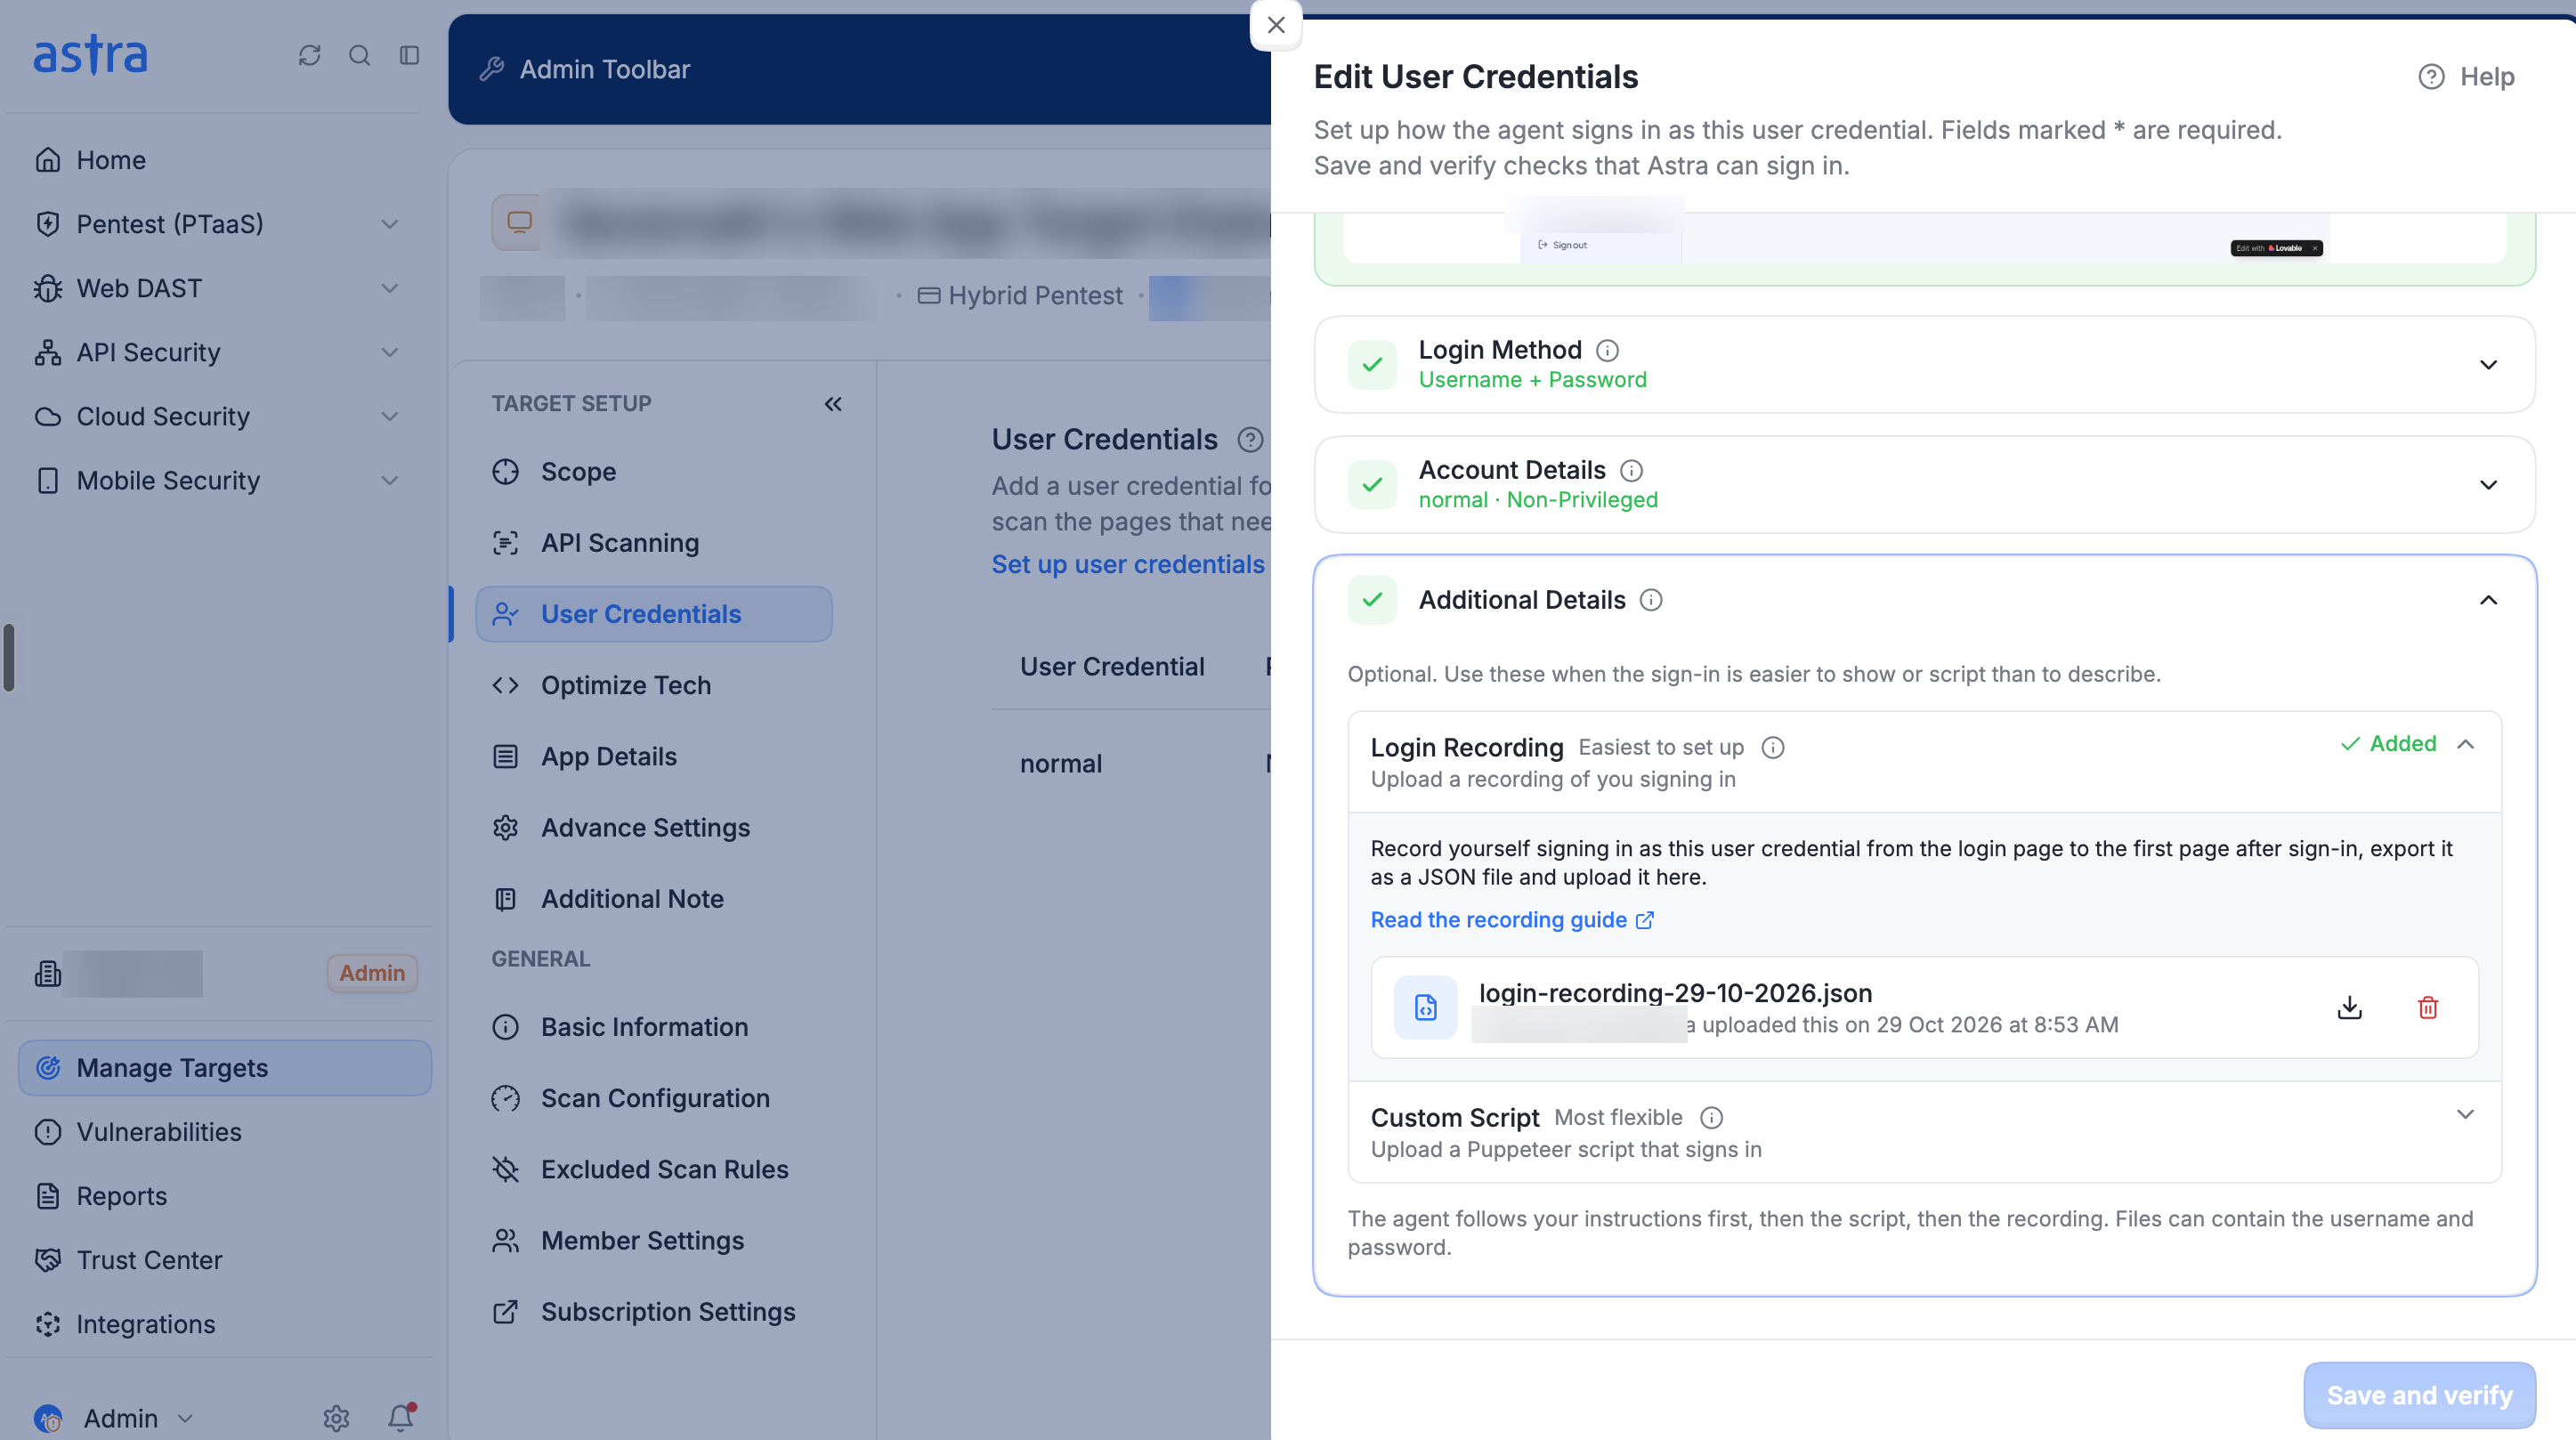
Additional Details with a login recording added. The Custom Script section is below it.
After a sign-in check, Astra can add a script it wrote, labelled Written by Astra. Login script is a script Astra wrote from the sign-in, and Correct script is a corrected version of an uploaded script. Each can be opened, downloaded or removed.
Check the sign-in result
The Status column on the User Credentials page shows where each sign-in check stands, and pointing to a status shows more detail. A scan uses a user credential only after it is Verified. For what each status means, read Set up user credentials with AI Sign-in.
Click a user credential to open it and see the result of its latest check:
A verified user credential shows "Astra signed in as" followed by its name, with a screenshot of the signed-in page.
A failed user credential shows "Astra could not sign in as" followed by its name, the reason, and screenshots from the attempt.
While a check is In progress, the user credential opens as View User Credentials and can't be edited until the check finishes.
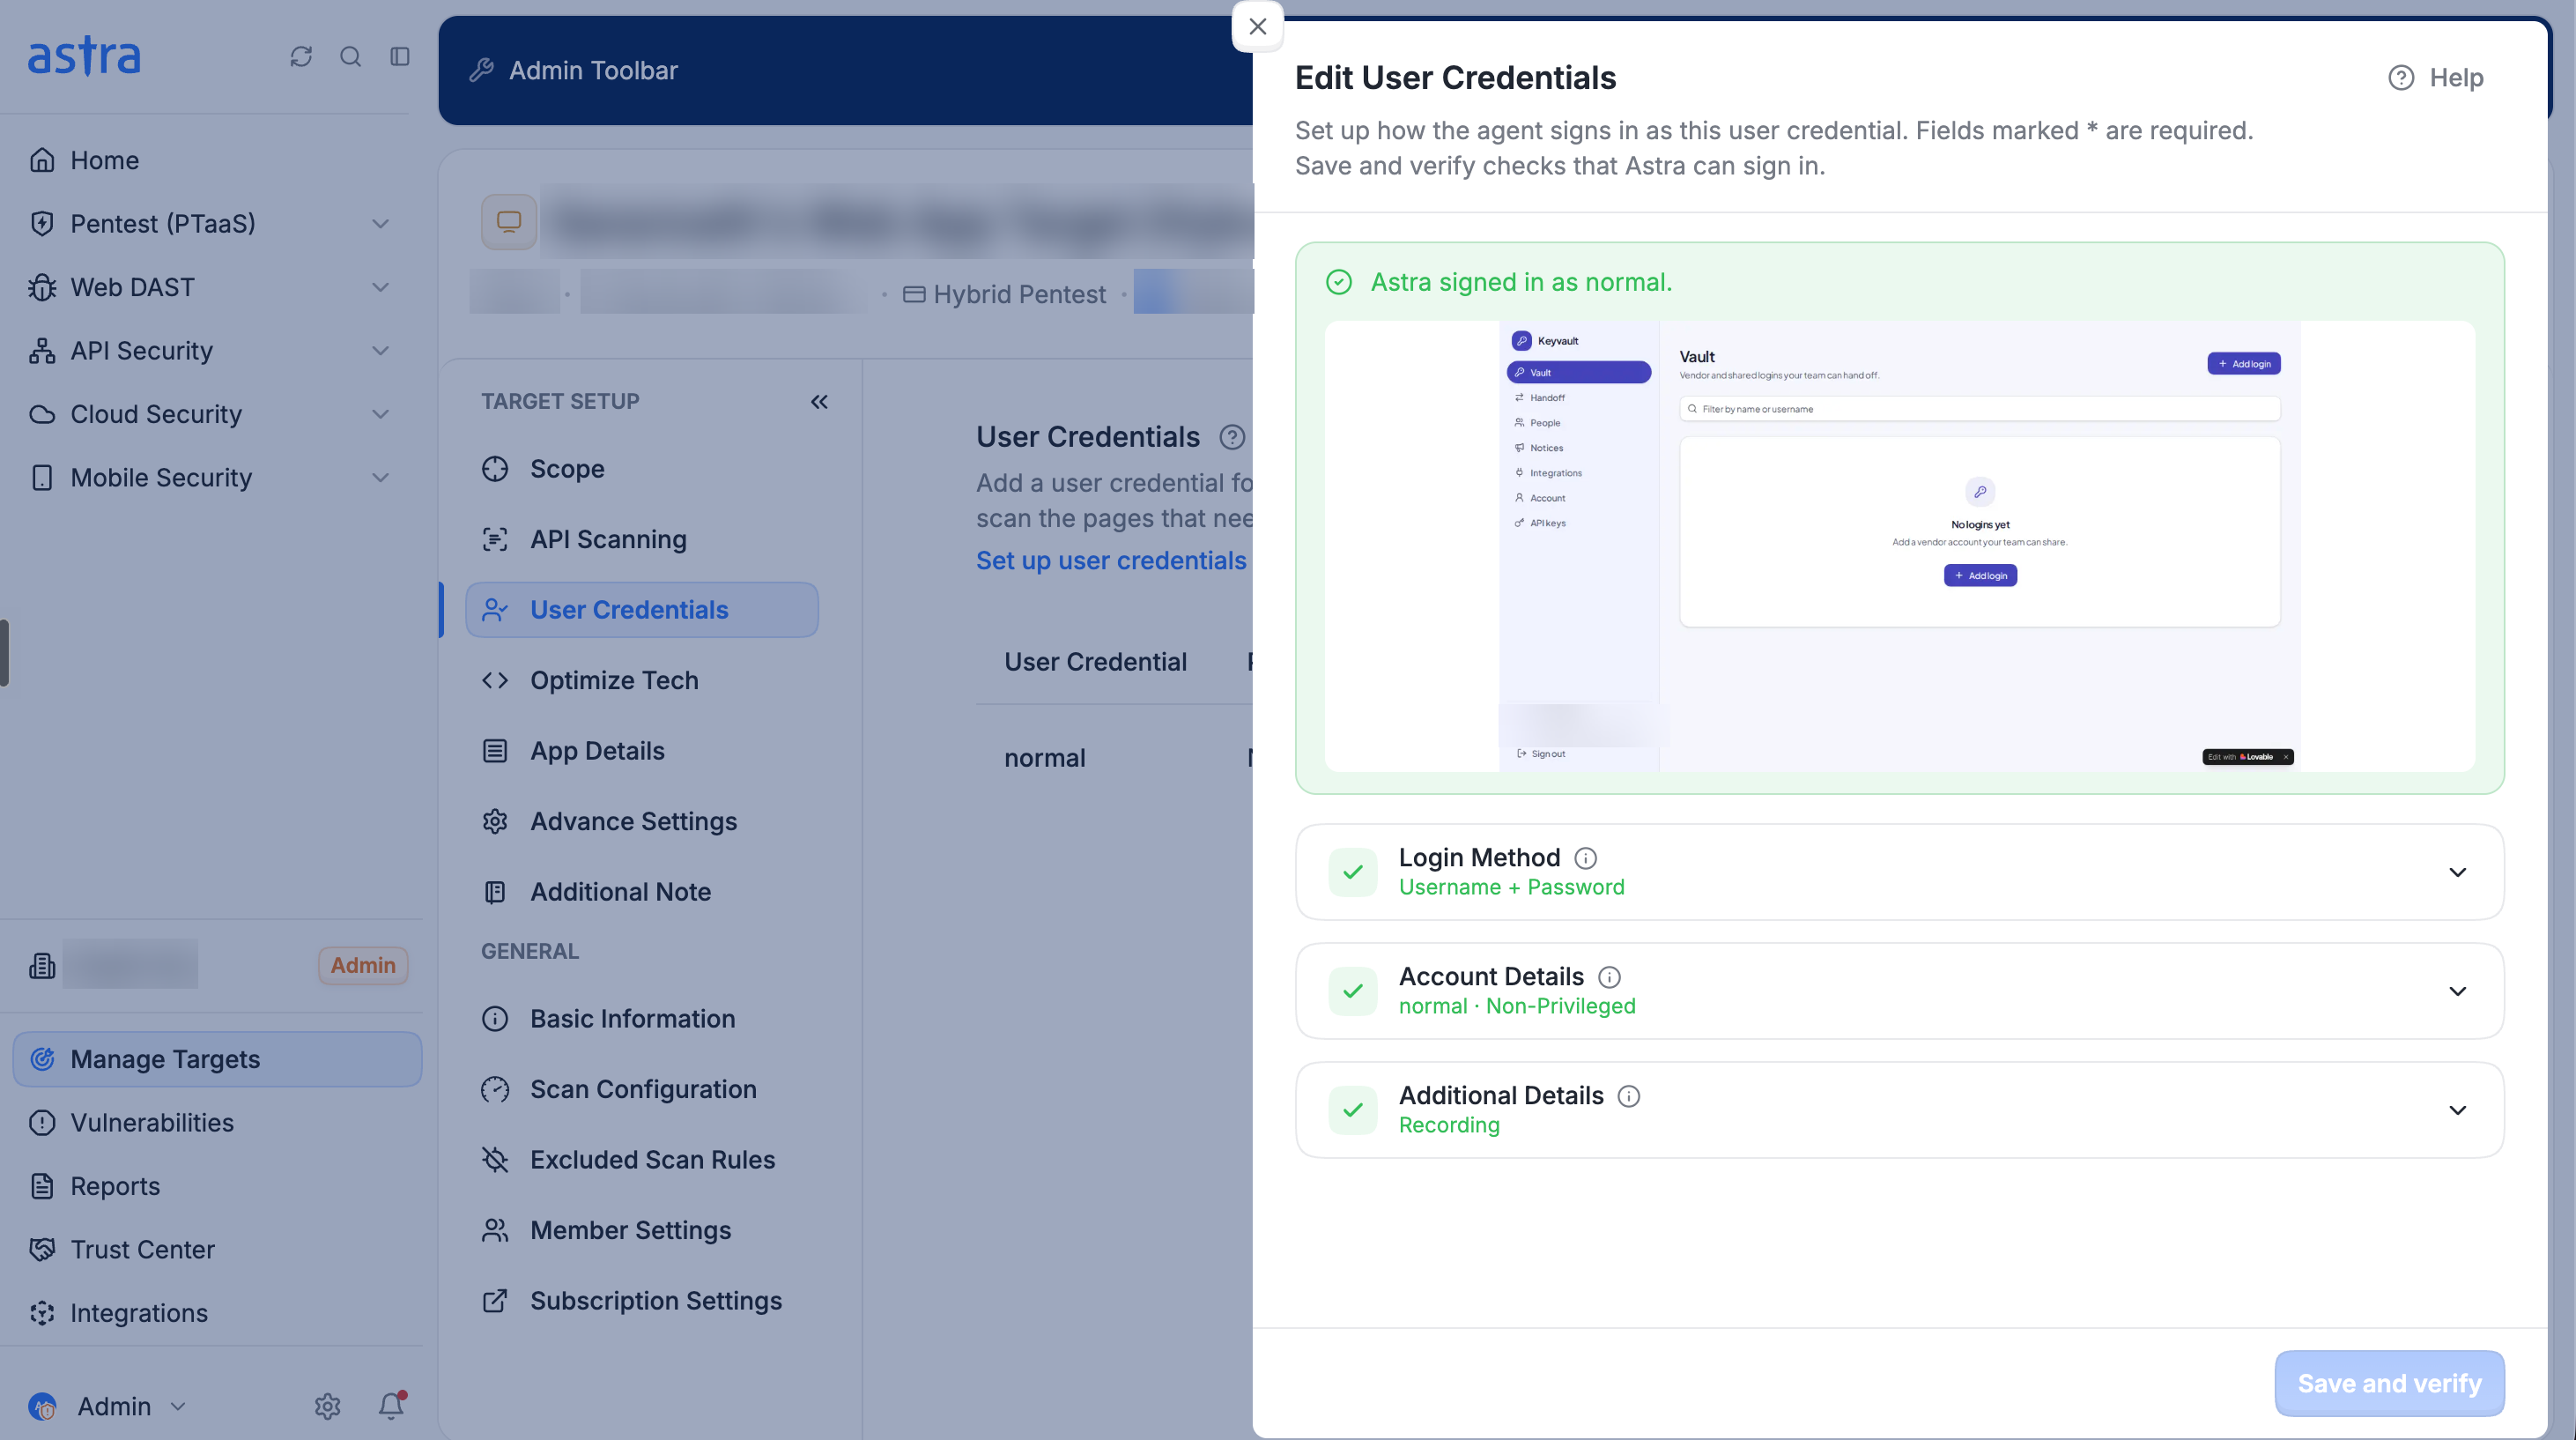
A verified user credential shows Astra signed in, with a screenshot of the signed-in page.
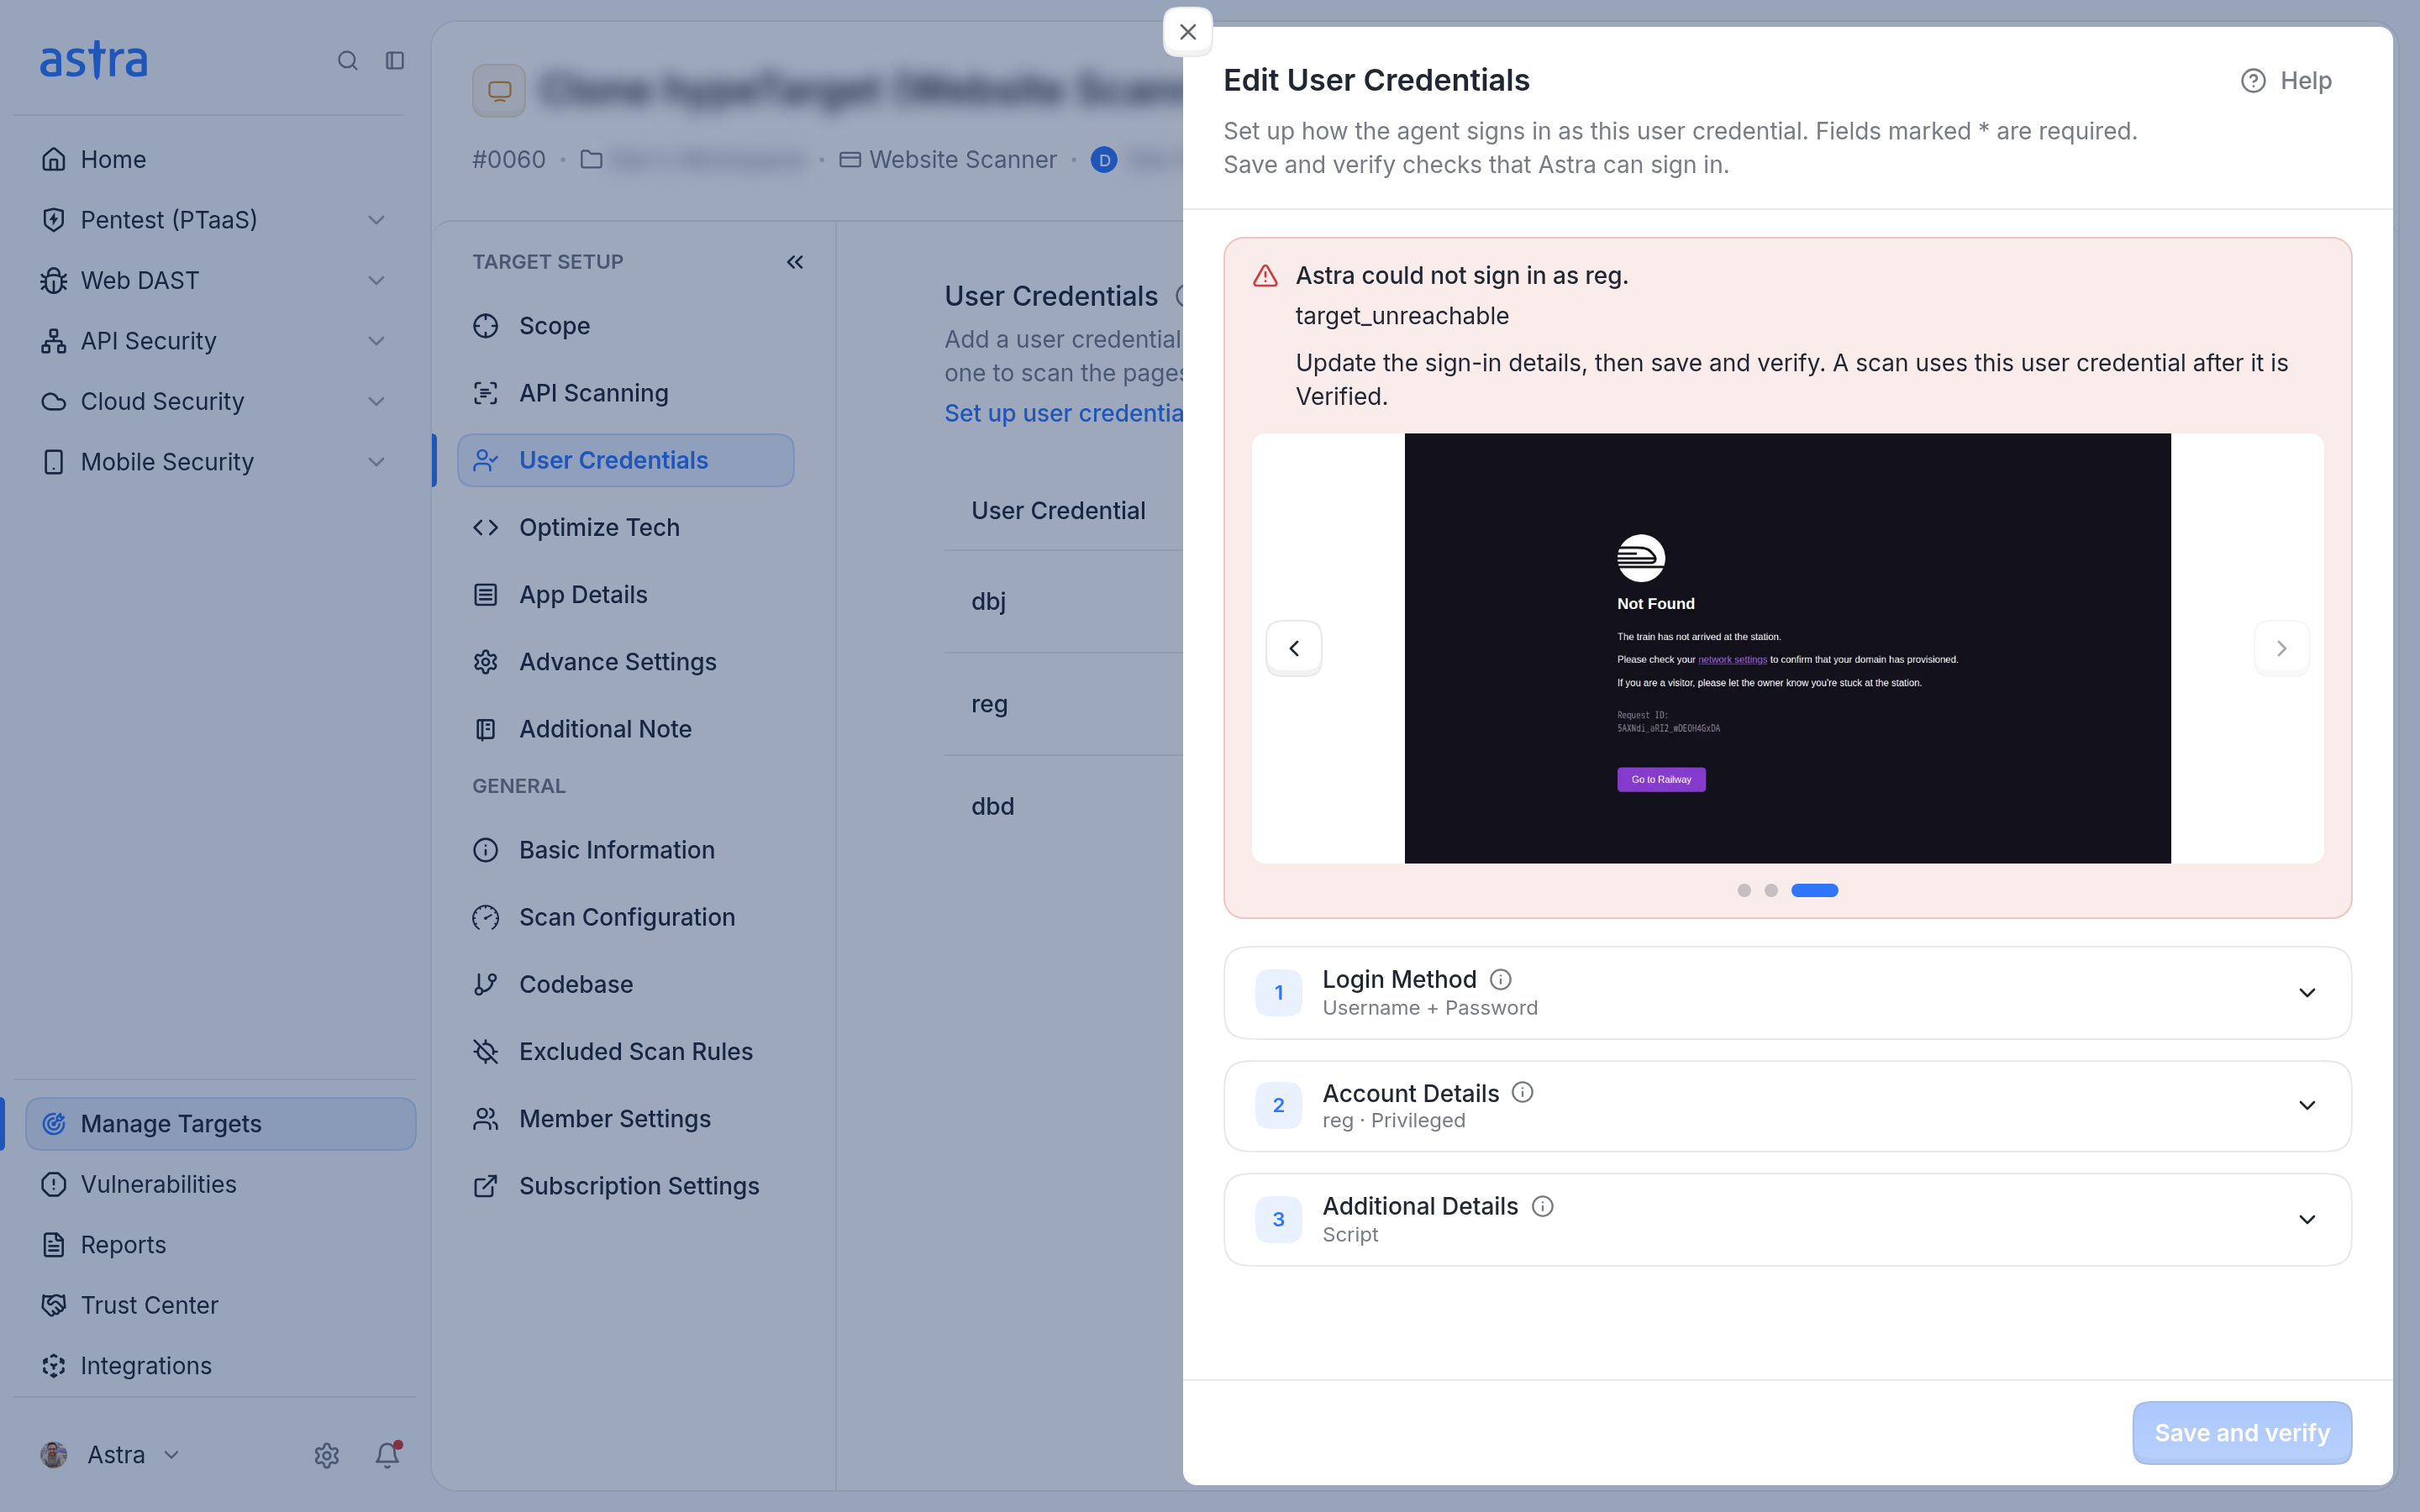
A failed user credential shows why Astra couldn't sign in.
Fix a failed check: update the sign-in details in the same sheet, and then click Save and verify to run the check again.
Manage user credentials
Each row on the User Credentials page has a Duplicate button and a menu with these actions:
View: opens the user credential while a check is In progress.
Verify Again: runs the sign-in check again without changing any details. It isn't available while the user credential is Incomplete, In progress or Can't be checked.
Edit: opens the user credential to change its details. It isn't shown while a check is In progress.
Duplicate: starts a new user credential with the same login method and account details. Additional Details starts empty. It isn't available while a check is Pending or In progress, or when the target uses Authenticated Header.
Delete: removes the user credential and its sign-in details from the target after confirmation. This can't be undone.