Overview of the DAST Scans Page
Last updated: October 11, 2026
Introduction
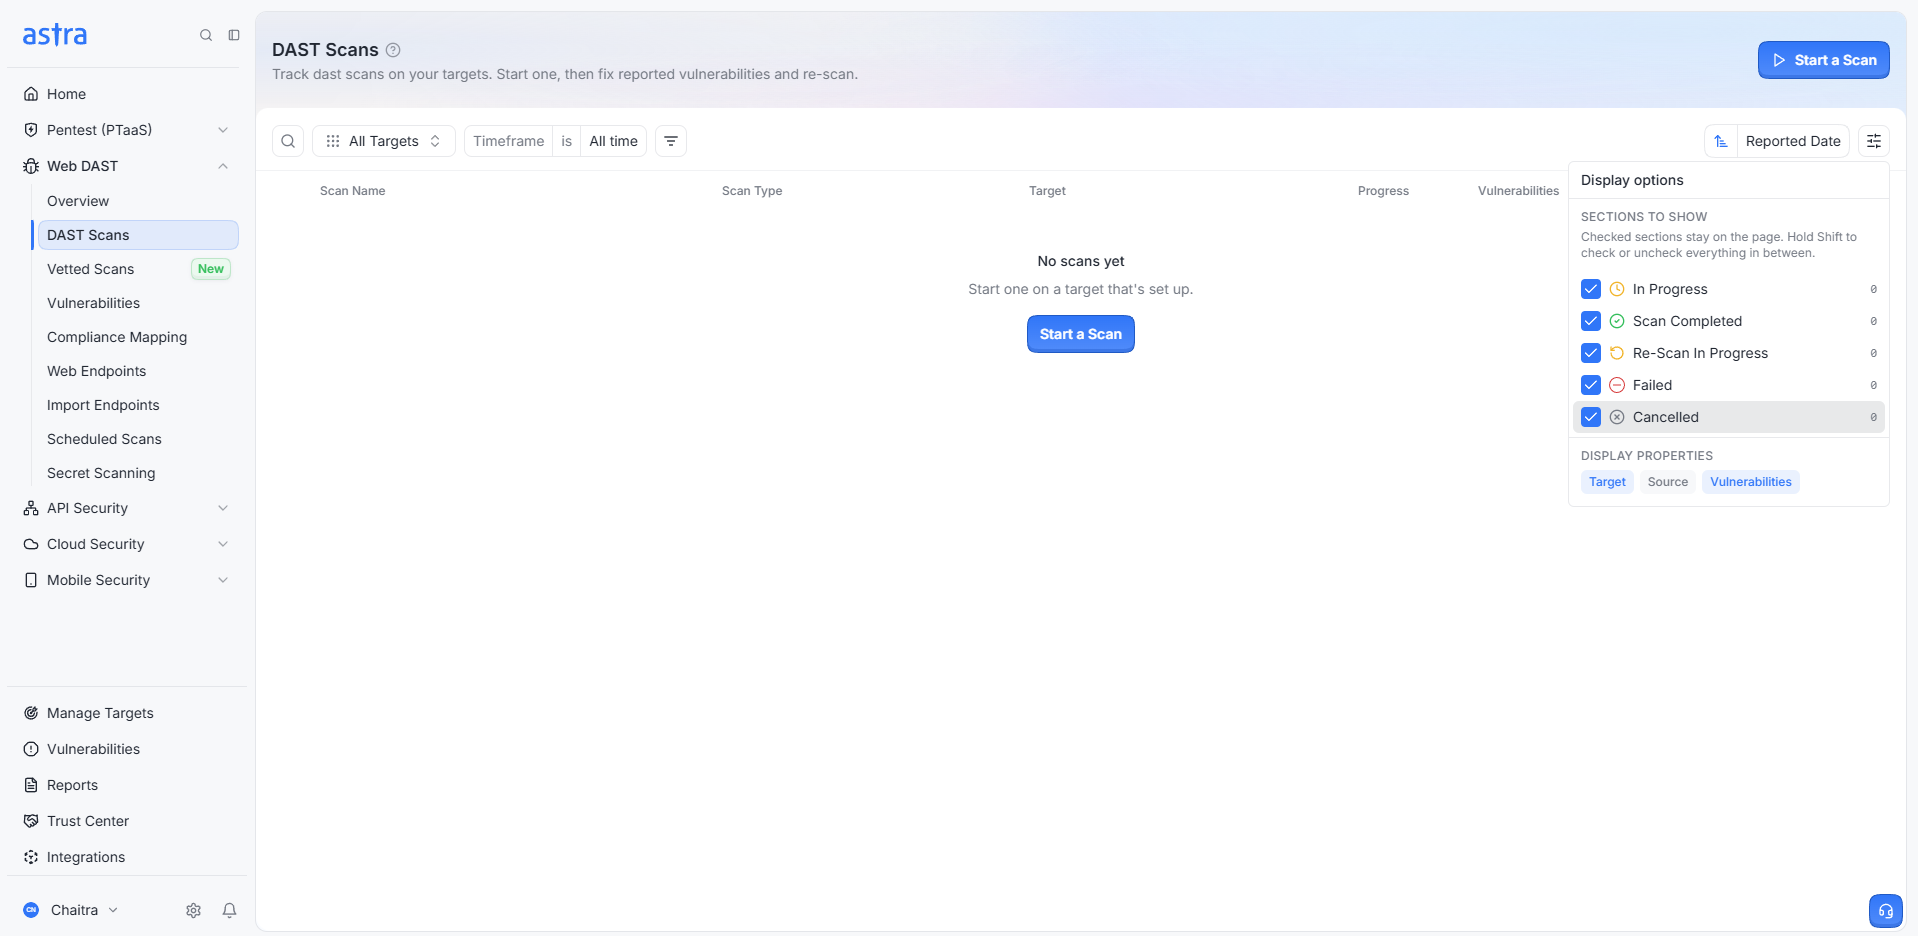
The DAST Scans page, under Web DAST in the left sidebar, is where you track the DAST (vulnerability) scans on your web application targets. From one place you can see which scans are running, finished, failed or cancelled, start a new scan, and move on to fixing the reported vulnerabilities and re-scanning. You don’t have to open each target separately.
Key Functions
Scan list: Each scan shows its Scan Name, Scan Type, Target, Progress and Vulnerabilities. Scans are grouped by status: In Progress, Scan Completed, Re-Scan In Progress, Failed and Cancelled.
Search and filters: Search by keyword, filter by Target or Timeframe (default: All time), apply additional filters, and sort by Reported Date.
Display options: Use the settings icon to show or hide status sections and to choose which columns appear (Target, Source, Vulnerabilities).
Available Actions
Start a scan: Click Start a Scan, choose a scan type (Manual, Automated Emerging or Automated Lightning), select one or more targets, then click Start Scans. The scan appears under In Progress. If a target already has a scan running, you’ll see a View Scan option instead.
View scan details: Open a scan to see its progress and findings.
Cancel a scan: Open a running scan’s details and click Cancel.
Re-scan: After fixing a vulnerability, re-run the scan to confirm the fix.
Schedule scans: Use Scheduled Scans in the Web DAST menu to run daily, weekly or monthly scans.
Best Practices
Check your scan quota before starting a scan.
Finish target setup, including login details, so the scanner can cover authenticated areas.
Use Lightning for quick checks and Emerging for new threats.
Re-scan after fixes to confirm they worked.
Mark confirmed false positives so they’re skipped in future scans.
Schedule recurring scans to match your release cycle.