How to scan applications with restricted access
Last updated: June 8, 2026
Introduction
If your application is behind a firewall, requires specific IP access, or uses HTTP Basic Authentication, Astra's scanner may be blocked from reaching it. This guide covers the available methods to grant Astra's scanner access to restricted environments so scans can complete successfully.
Method 1: IP Address Whitelisting
The recommended approach for most restricted environments. All requests from Astra's scanner originate from a fixed set of static IP addresses.
Retrieve the full list of Astra's scanner IPs from Astra IP Ranges
Add each IP address to your firewall or security system's allowlist
Ensure the allowlist applies to your login system, CAPTCHA, and MFA if applicable
Return to your Astra dashboard and re-run the scan
This method also works for VPN-restricted staging environments — whitelist Astra's IPs instead of setting up VPN access.
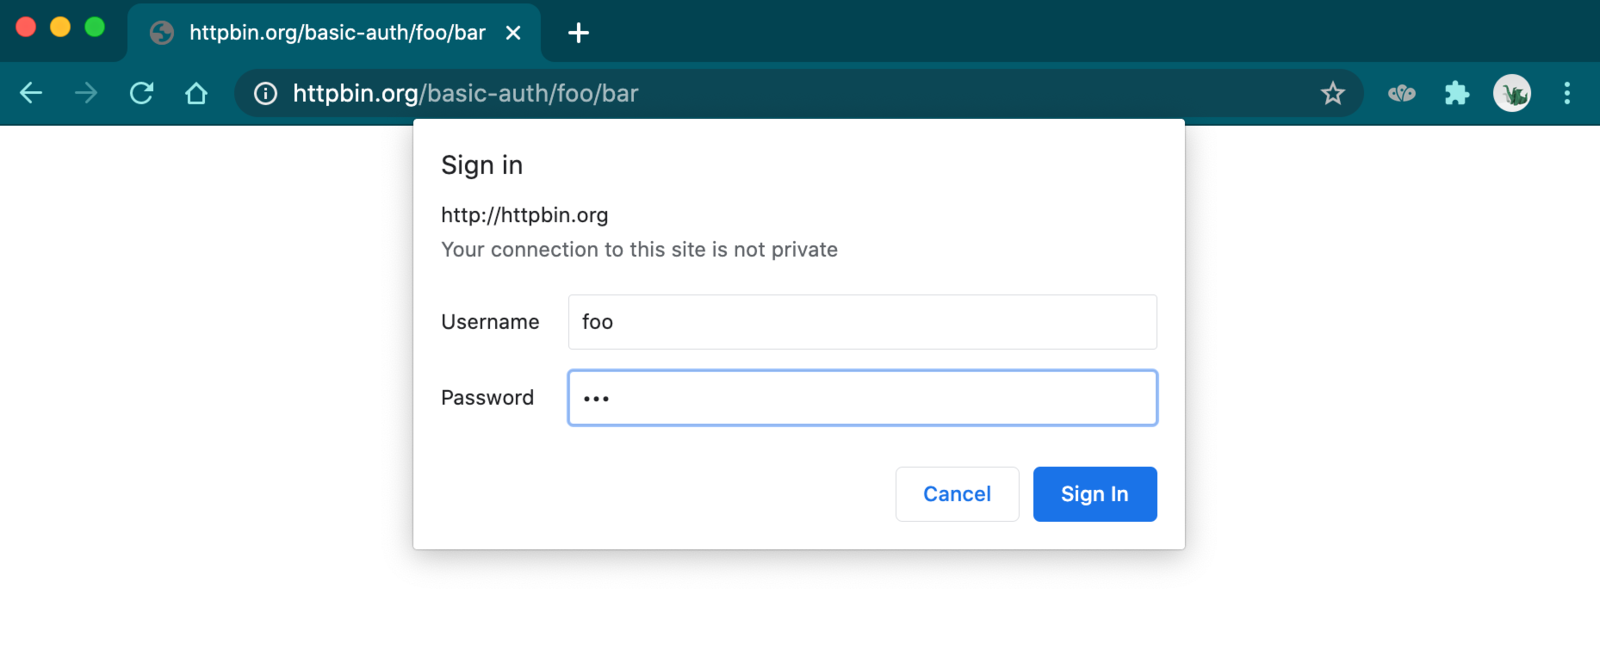
Method 2: HTTP Basic Authentication
If your target is secured with HTTP Basic Authentication, pass credentials directly in the target URL.
Format:
https://username:password@example.com/
Example: If your username is john and password is test1234:
https://john:test1234@example.com/
If you cannot update the target URL directly, raise a support ticket with the formatted URL and our team will update it for you.
Method 3: Custom HTTP Header
Use this method when IP whitelisting is not feasible. Add a secret HTTP header that your security rules can use to identify and allow Astra's scanner traffic.
Go to Target Settings → Advanced Settings
Click Add HTTP Headers
Click + Add HTTP header
Enter astra as the Header Name
Enter a secure token such as a UUID as the Header Value — generate one at https://guidgenerator.com
Click Save Changes
Update your server or firewall to allow requests containing this header
All scanner requests to your target will now include this custom header, making them identifiable and allowable by your security rules.
Example of NGINX configuration
http {


  # installed for getastra.com # DAST checking

  map $http_astra $authentication {

    default "Restricted Access";

    "" "off";

  }


  server {

    # ...


    satisfy any;

    auth_basic           $authentication;

    auth_basic_user_file /etc/nginx/.htpasswd;


    allow nnn.nnn.nnn.nnn;


    # ...

  }

}
You can verify the same by making a cURL request with the said header:
curl -H "Accept: text/html" -H "astra: " -X GET https://HOSTNAME
Expected Outcome
After applying any of the above methods, Astra's scanner should be able to reach your target without being blocked. Re-run the connectivity check from your target's scan settings page to confirm access is working before starting a full scan.
Troubleshooting
Connectivity check still failing after IP whitelisting
Confirm all IPs from Astra IP Ranges have been added — missing a single IP can cause failures
Check whether your WAF or CDN provider such as Cloudflare has additional bot protection layers that need separate configuration. See How to scan web applications protected with CAPTCHA
Verify the allowlist rules are applied at every layer — application firewall, server firewall, and login system
HTTP Basic Authentication credentials not working in target URL
Ensure special characters in your username or password are URL-encoded. For example, @ becomes %40
Confirm the credentials are valid by testing the formatted URL directly in your browser
Custom header not being recognized by the server
Verify the header name and value in Target Settings match exactly what is configured in your server rules — these are case-sensitive
Test using the curl command provided above to confirm the header is being sent and recognized correctly
Ensure the server configuration change has been saved and the server restarted if required
Application behind VPN with no static IP option
Contact our support team to discuss alternative access arrangements. In some cases Astra's security engineers can work with you to establish a secure connection for manual pentest engagements