Starting a Scan
Last updated: January 26, 2026
Starting or bulk starting a scan in Astra is a straightforward process that can be done directly from the dashboard. Below is a step-by-step guide on how to perform this task:
Start a Scan
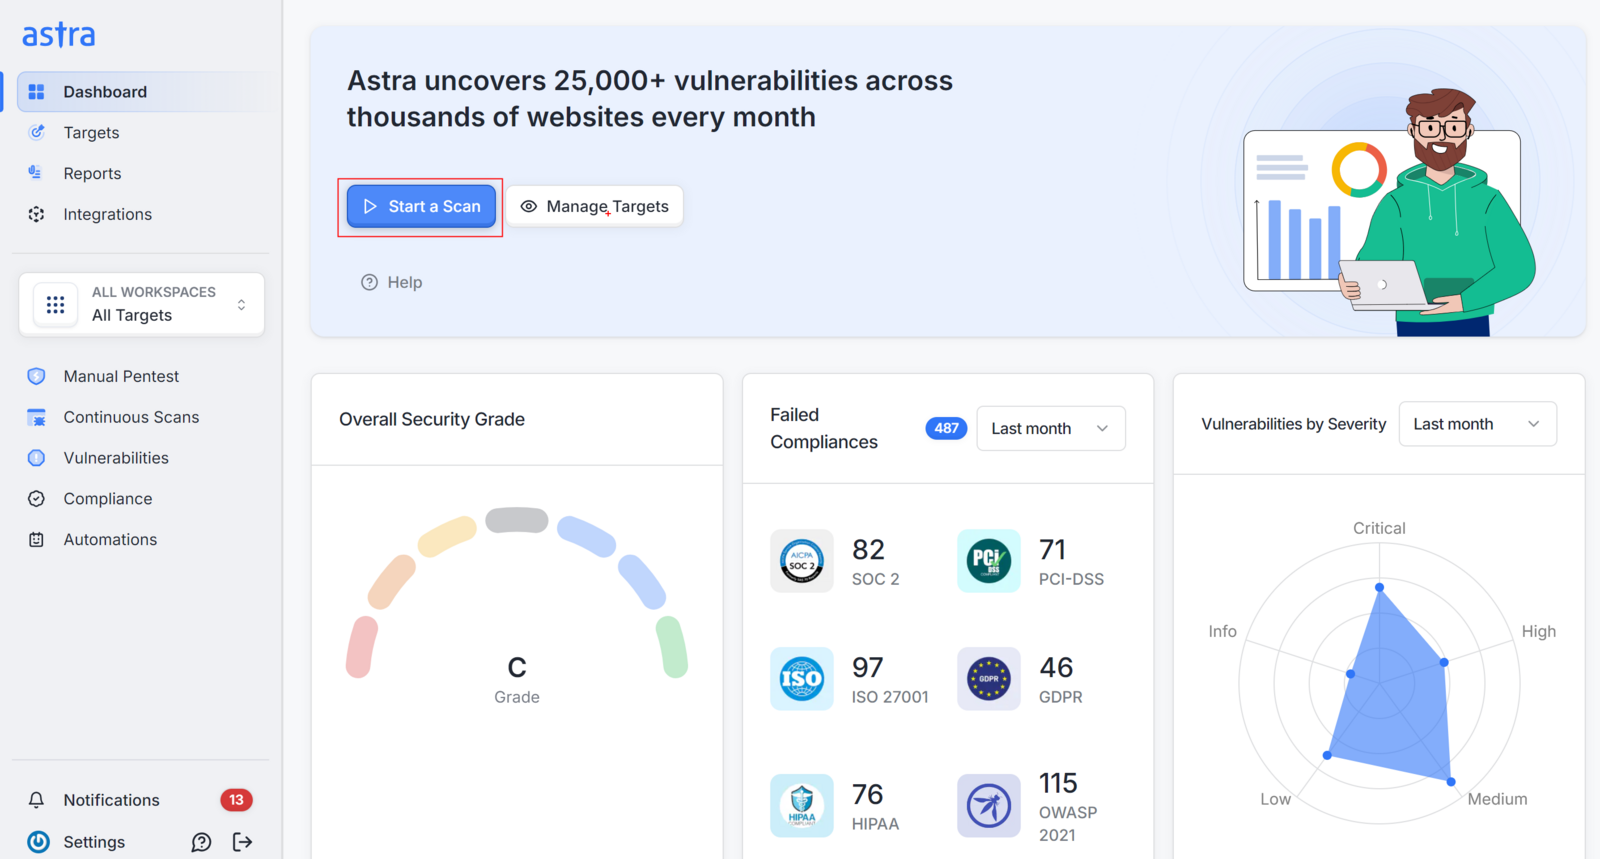
Locate the "Start a Scan" Button The Start a Scan button is prominently located on the dashboard. Astra has strategically placed this button across the dashboard, allowing you to start a scan from any part of the interface.
Select the Scan Type Once you click on Start a Scan, a side sheet will open up, presenting you with several scan type options.
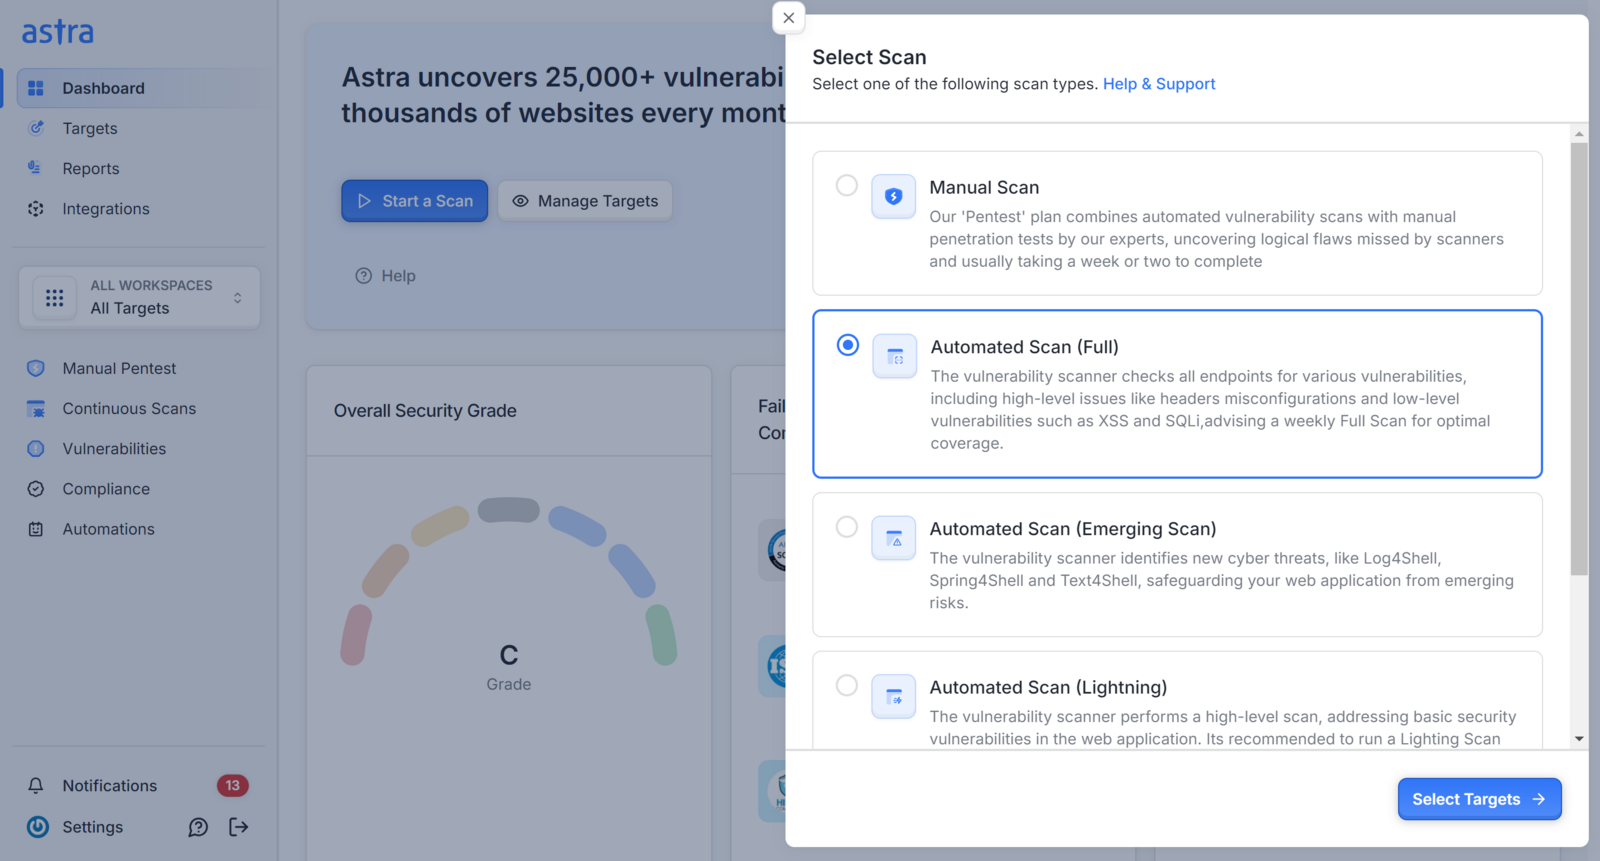
Breakdown of scan types:
Manual Scan: Combines automated vulnerability scans with manual penetration tests.
Automated Scan (Full): Checks all endpoints for various vulnerabilities including high-level issues.
Automated Scan (Emerging Scan): Identifies new cyber threats safeguarding your web application from emerging risks.
Automated Scan (Lightning): Performs a high-level scan addressing basic security vulnerabilities in the web application.
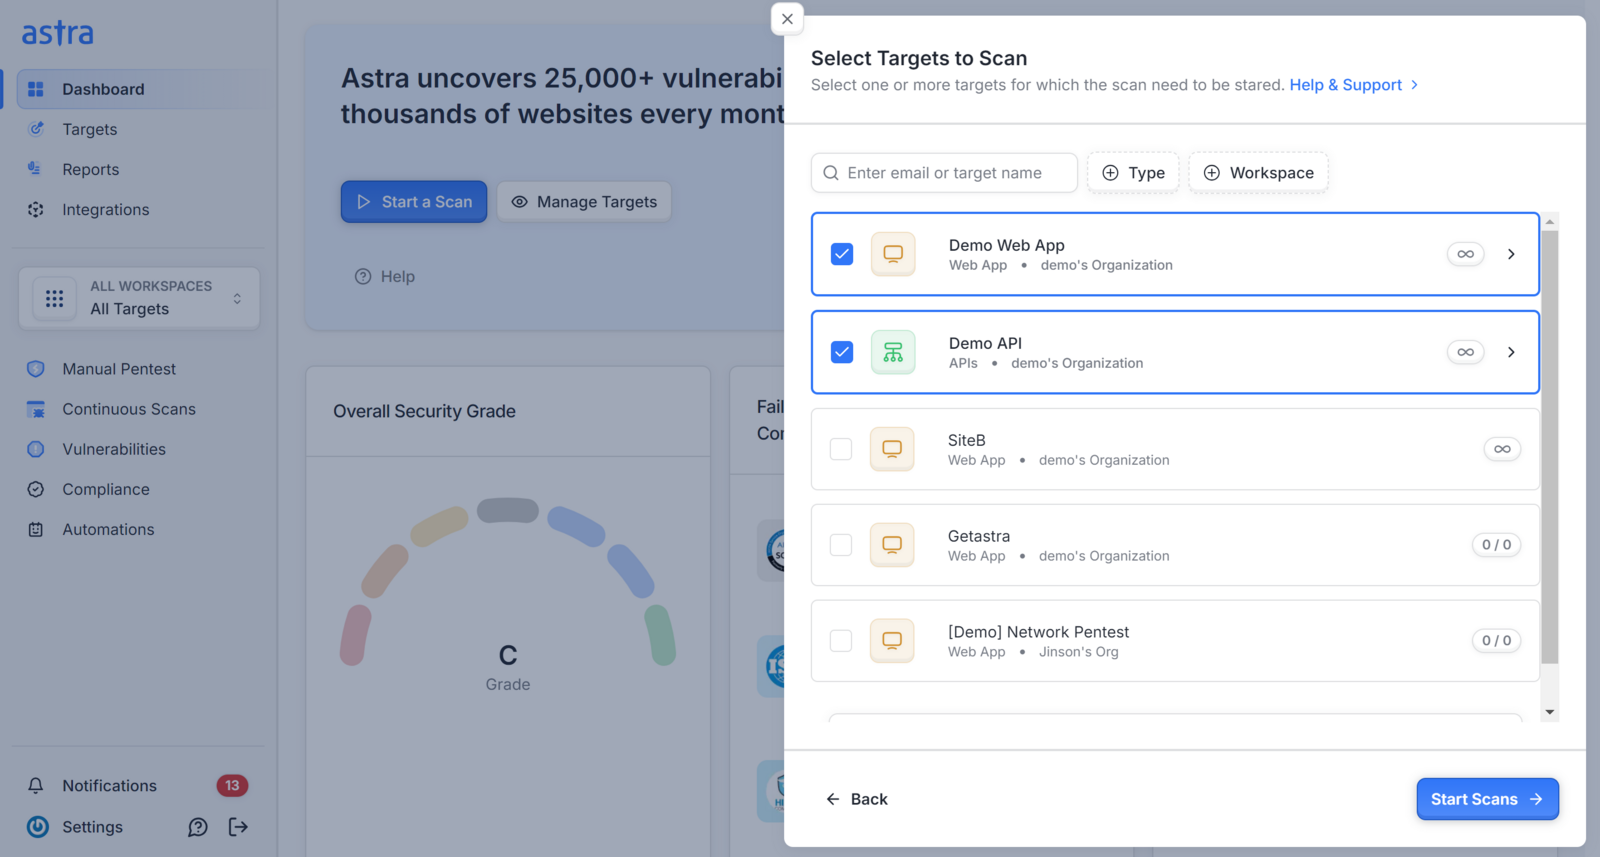
Select Targets After selecting the scan type, you will be prompted to select targets for which you want to run a scan. You can either select a single target or multiple targets if you want to perform bulk scans.
Start the Scan Once you’ve selected your scan type and targets, click on the Start Scans button. A success message will appear confirming that the scan has been initiated.
You may encounter a failure message if the selected targets are having any ongoing scans. You have the option to view the scan progress by clicking on the "View Scan" button.
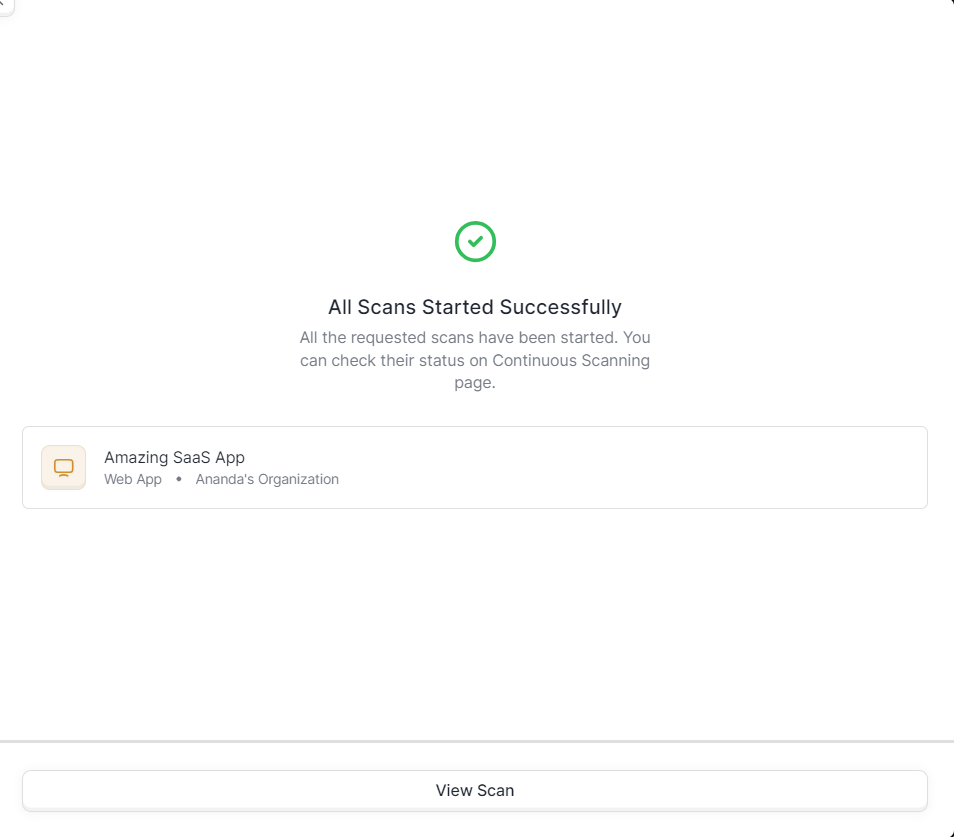
Clicking on View Scan button will take you to the scan detail page
If you're facing any issues, feel free to create a support ticket or write to help@getastra.com